Creative Woodworks & crafts 2003-01, страница 24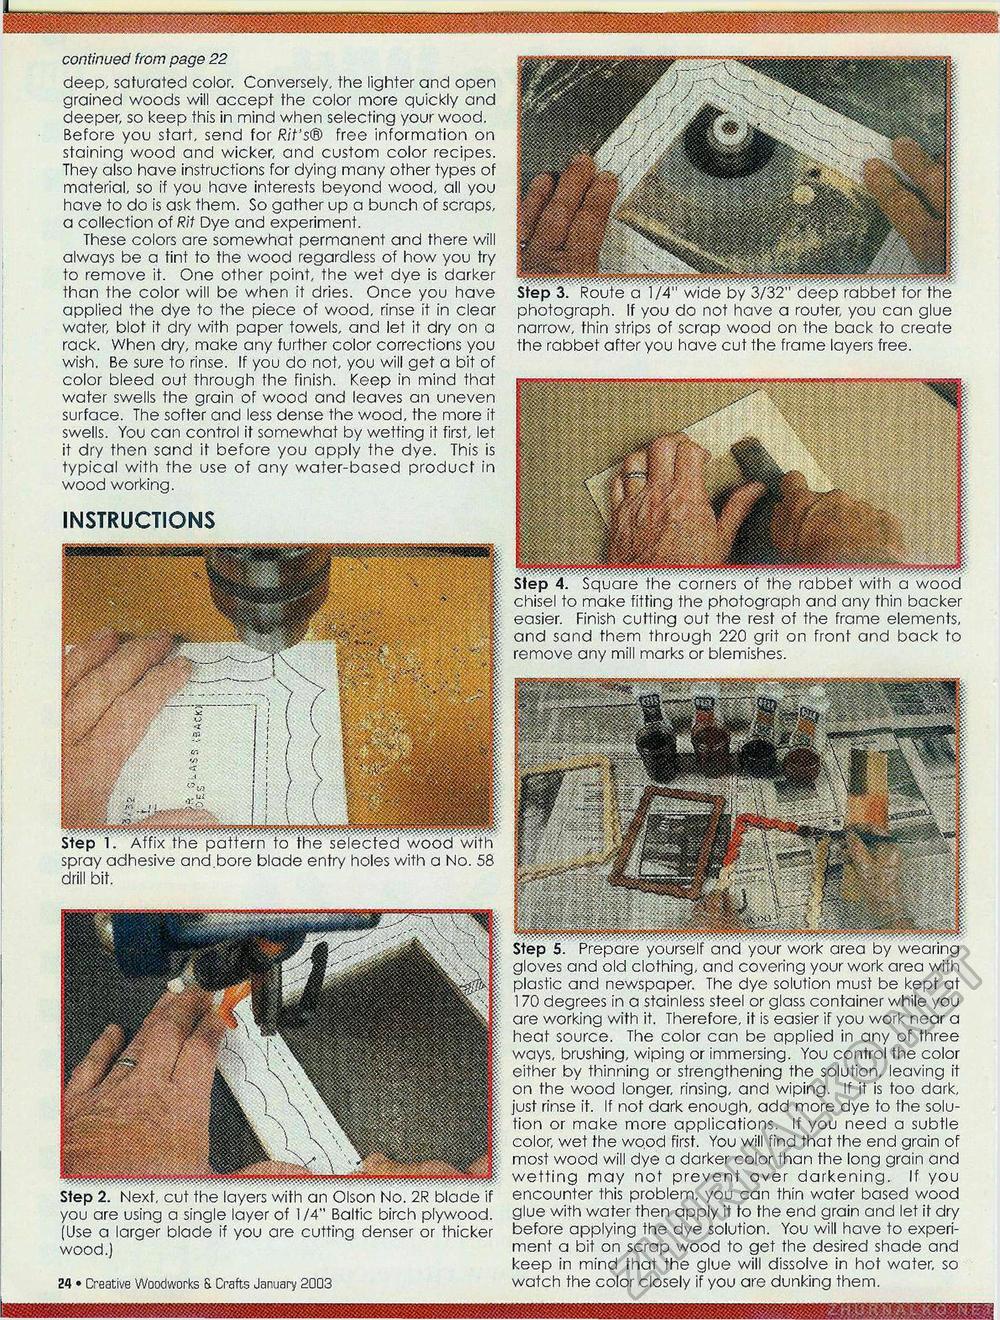
-PI " 'J: KSSSg chisel to make fitting the photograph and any thin backer easier. Finish cutting out the rest of the frame elements, and sand them through 220 grit on front and back to remove any mill marks or blemishes. spray adhesive and bore blade entry holes with a No. 58 drill bit. INSTRUCTIONS you are using a single layer of 1/4" Baltic birch plywood. (Use a larger blade if you are cutting denser or thicker wood.) Creative Woodworks S. Crafts January 2003 • 25 gloves and old clothing, and covering your work area with plastic and newspaper. The dye solution must be kept at 170 degrees in a stainless steel or glass container while you are working with it. Therefore, it is easier if you work near a heat source. The color can be applied in any of three ways, brushing, wiping or immersing. You control the color either by thinning or strengthening the solution, leaving it on the wood longer, rinsing, and wiping. If it is too dark, just rinse it. If not dark enough, add more dye to the solution or make more applications. If you need a subtle color, wet the wood first. You will find that the end grain of most wood will dye a darker color than the long grain and wetting may not prevent over darkening. If you encounter this problem, you can thin water based wood glue with water then apply it to the end grain and let it dry before applying the dye solution. You will have to experiment a bit on scrap wood to get the desired shade and keep in mind that the glue will dissolve in hot water, so watch the color closely if you are dunking them. continued from page 22 deep, saturated color. Conversely, the lighter and open grained woods will accept the color more quickly and deeper, so keep this in mind when selecting your wood. Before you start, send for R/f's® free information on staining wood and wicker, and custom color recipes. They also have instructions for dying many other types of material, so if you have interests beyond wood, all you have to do is ask them. So gather up a bunch of scraps, a collection of Rit Dye and experiment. These colors are somewhat permanent and there will always be a tint to the wood regardless of how you try to remove it. One other point, the wet dye is darker than the color will be when it dries. Once you have applied the dye to the piece of wood, rinse it in clear water, blot it dry with paper towels, and let it dry on a rack. When dry, make any further color corrections you wish. Be sure to rinse. If you do not, you will get a bit of color bleed out through the finish. Keep in mind that water swells the grain of wood and leaves an uneven surface. The softer and less dense the wood, the more it swells. You can control it somewhat by wetting it first, let it dry then sand it before you apply the dye. This is typical with the use of any water-based product in wood working. photograph. If you do not have a router, you can glue narrow, thin strips of scrap wood on the back to create the rabbet after you have cut the frame layers free. |


