Creative Woodworks & crafts 2003-01, страница 25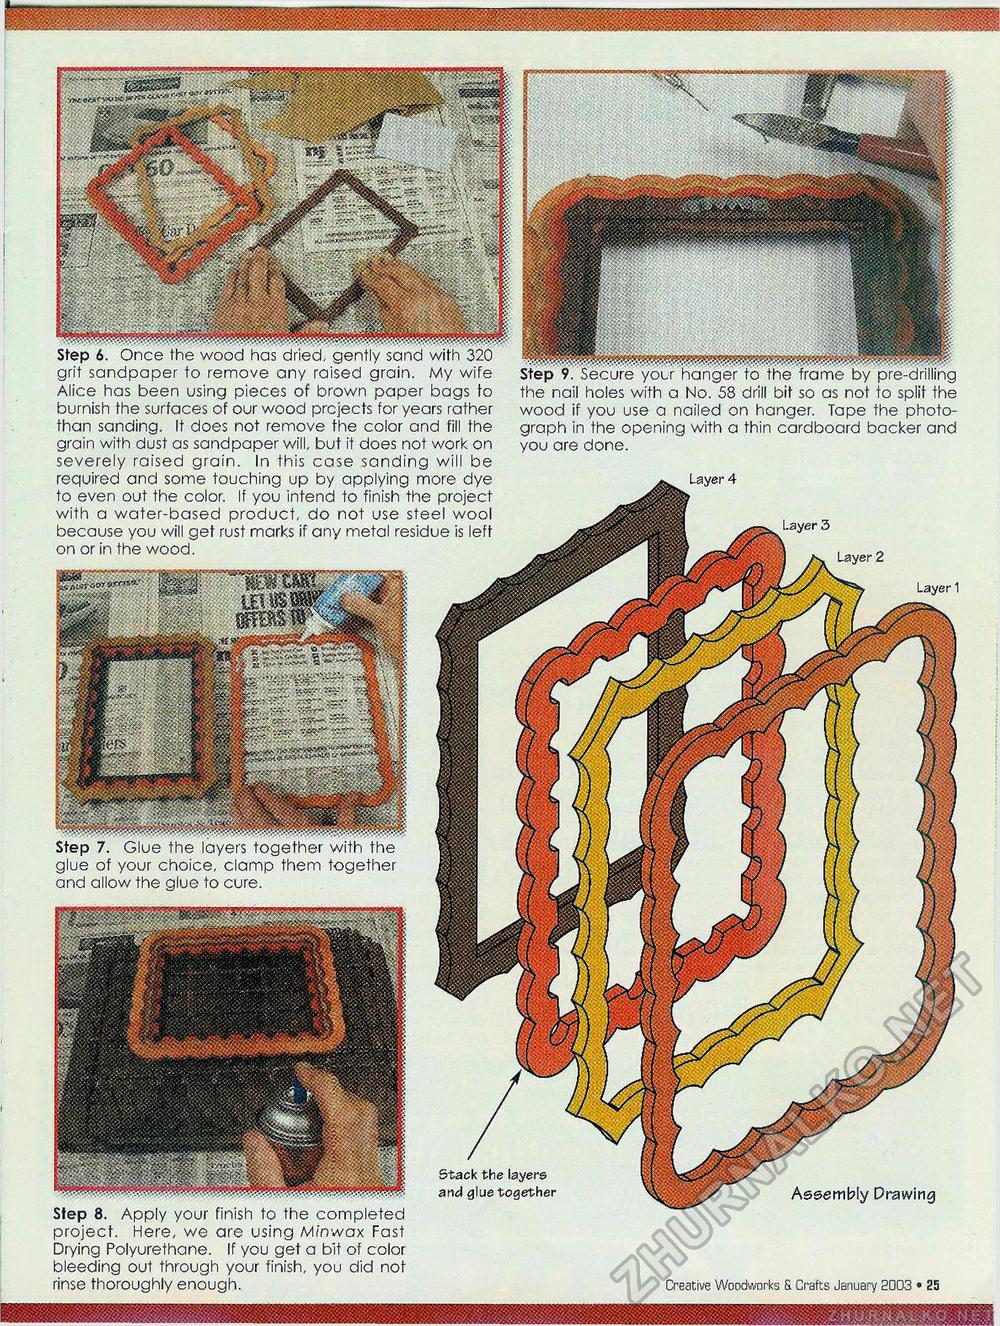
mmm glue of your choice, clamp them together and allow the glue to cure. Step 8. Apply your finish to the completed project. Here, we are using Minwax Fast Drying Polyurethane. If you get a bit of color bleeding out through your finish, you did not rinse thoroughly enough. Stack the layers and glue together Assembly Drawing Creative Woodworks S. Crafts January 2003 • 25 Step 6. Once the wood has dried, gently sand with 320 grit sandpaper to remove any raised grain. My wife Alice has been using pieces of brown paper bags to burnish the surfaces of our wood projects for years rather than sanding. It does not remove the color and fill the grain with dust as sandpaper will, but it does not work on severely raised grain. In this case sanding will be required and some touching up by applying more dye to even out the color. If you intend to finish the project with a water-based product, do not use steel wool because you will get rust marks if any metal residue is left on or in the wood. the nail holes with a No. 58 drill bit so as not to split the wood if you use a nailed on hanger. Tape the photograph in the opening with a thin cardboard backer and you are done. Layer 4 Layer 3 Layer 2 Layer 1 |


