Creative Woodworks & crafts 2003-01, страница 59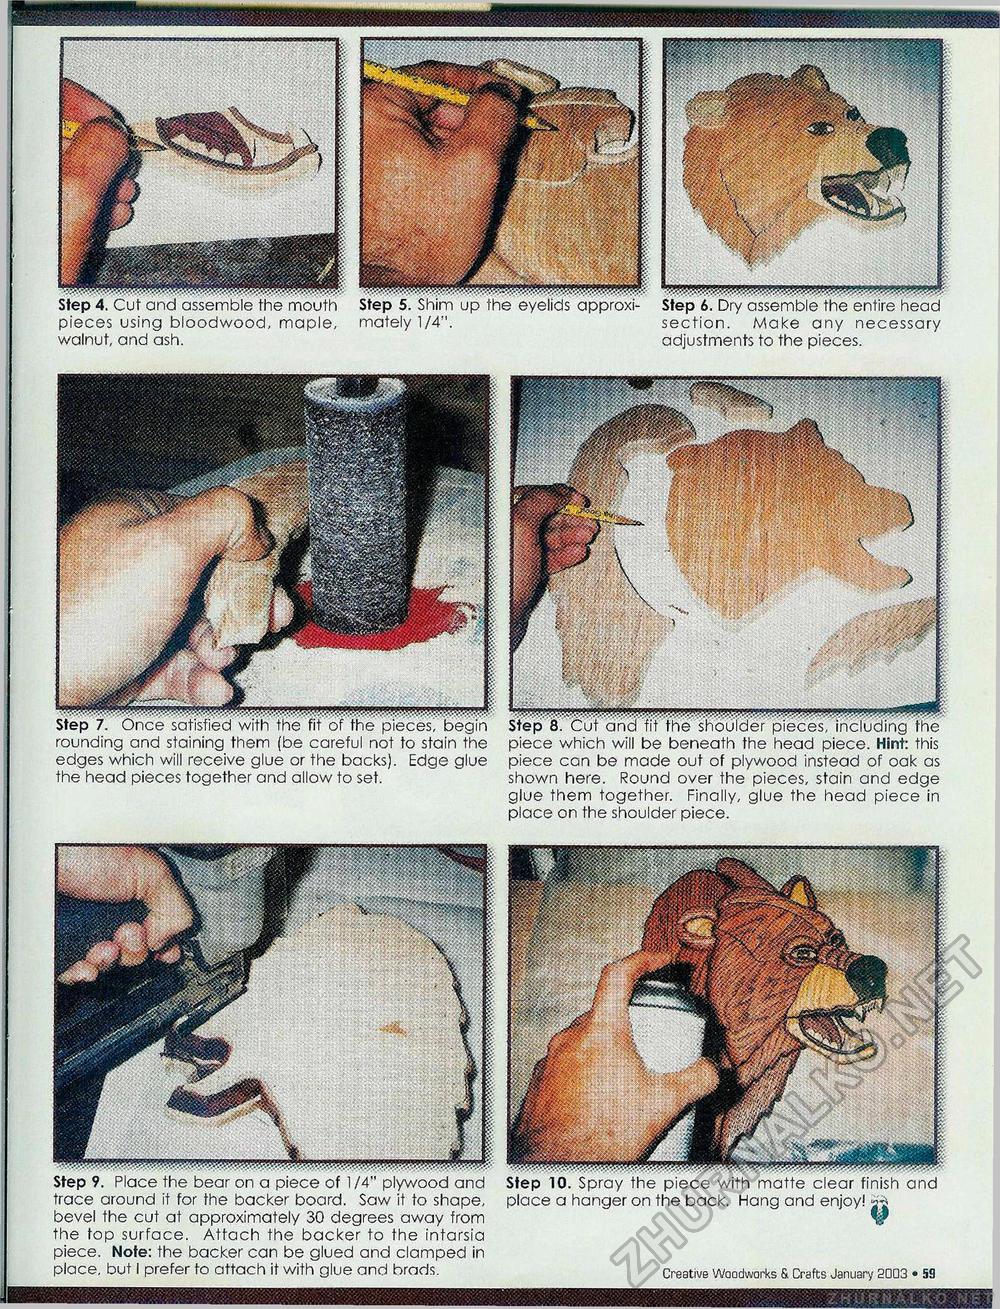
pieces using bloodwood, maple, matelyl/4". walnut, and ash. Step 6. Dry assemble the entire head section. Make any necessary adjustments to the pieces. Step 7. Once satisfied with the fit of the pieces, begin rounding and staining them (be careful not to stain the edges which will receive glue or the backs). Edge glue the head pieces together and allow to set. 'j!;.j!:;.;.i;j............. "■^'E'^.llji'M.^M.^ Step S. Cut and fit the shoulder pieces, including the piece which will be beneath the head piece. Hint: this piece can be made out of plywood instead of oak as shown here. Round over the pieces, stain and edge glue them together. Finally, glue the head piece in place on the shoulder piece. place a hanger on the back. Hang and enjoy! Creative Woodworks & Crafts January 20D3 • 59 Step 9. Place the bear on a piece of 1/4" plywood and trace around it for the backer board. Saw it to shape, bevel the cut at approximately 30 degrees away from the top surface. Attach the backer to the intarsia piece. Note: the backer can be glued and clamped in place, but I prefer to attach it with glue and brads. |


