Creative Woodworks & crafts 2003-01, страница 58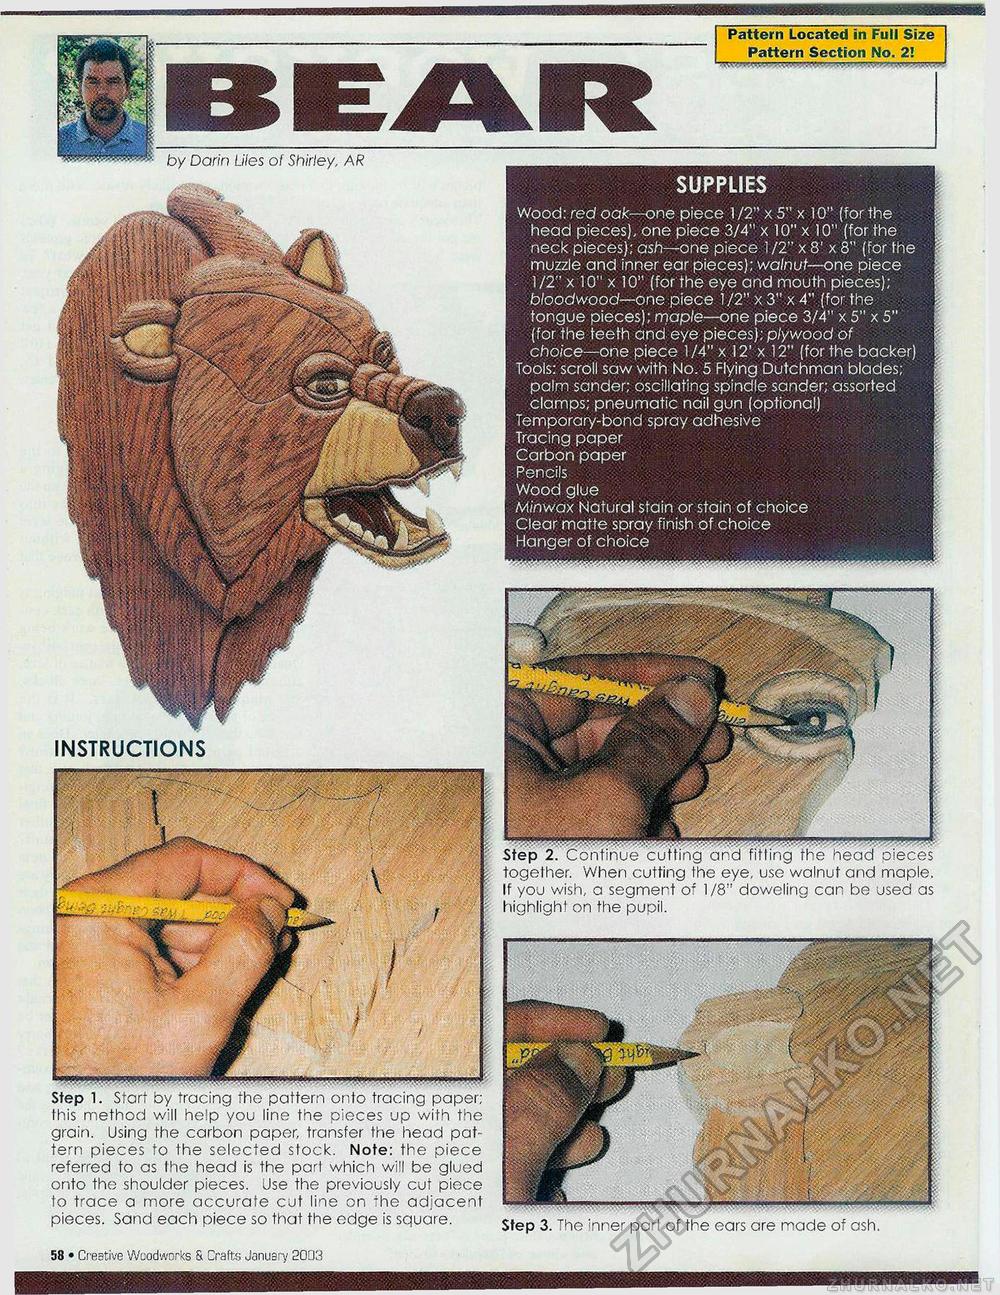
SUPPLIES Wood: red oak—one piece 1 /2" x 5" x 10" (for the head pieces), one piece 3/4" x 10" x 10" (for the neck pieces); ash—one piece 1 /2" x 8' x 8" (for the muzzle and inner ear pieces); walnut—one piece 1/2" x 10" x 10" (for the eye and mouth pieces); bloodwood—one piece 1 /2" x 3" x 4" (for the tongue pieces); maple—one piece 3/4" x 5" x 5" (for the teeth ana eye pieces); plywood of choice—one piece 1/4" x 12' x 12" (for the backer) Tools: scroll saw with No. 5 Flying Dutchman blaaes; palm sander; oscillating spindle sander; assorted clamps; pneumatic nail gun (optional) Temporary-bona spray adhesive Tracing paper Carbon paper Pencils Wood glue Minwax Natural stain or stain of choice Clear matte spray finish of choice Hanger of choice Pattern Located in Full Size Pattern Section No. 2! ■.'.v.1.'»■.»>• ■.■AW" ' .'.<v.J ■ /■"Aiv.-.-i, by Darin Liles of Shirley, AR Step 1. Start by tracing the pattern onto tracing paper; this method will help you line the pieces up with the grain. Using the carbon papor, transfer the head pattern pieces to the selected stock. Note: the piece referred to as the head is the part which will be glued onto the shoulder pieces. Use the previously cut piece to trace a more accurate cut line on "he adjacent pieces. Sand each piece so that the edge is sguare. Step 3. The inner part of the ears are made of ash. together. When cutting the eye, use walnut and maple. If you wish, a segmert o-" 1/8" doweling can be used as highlight on the pupil. INSTRUCTIONS Creative Woodworks S. Crafts January 2003 • 25 |


