Creative Woodworks & crafts 2003-01, страница 56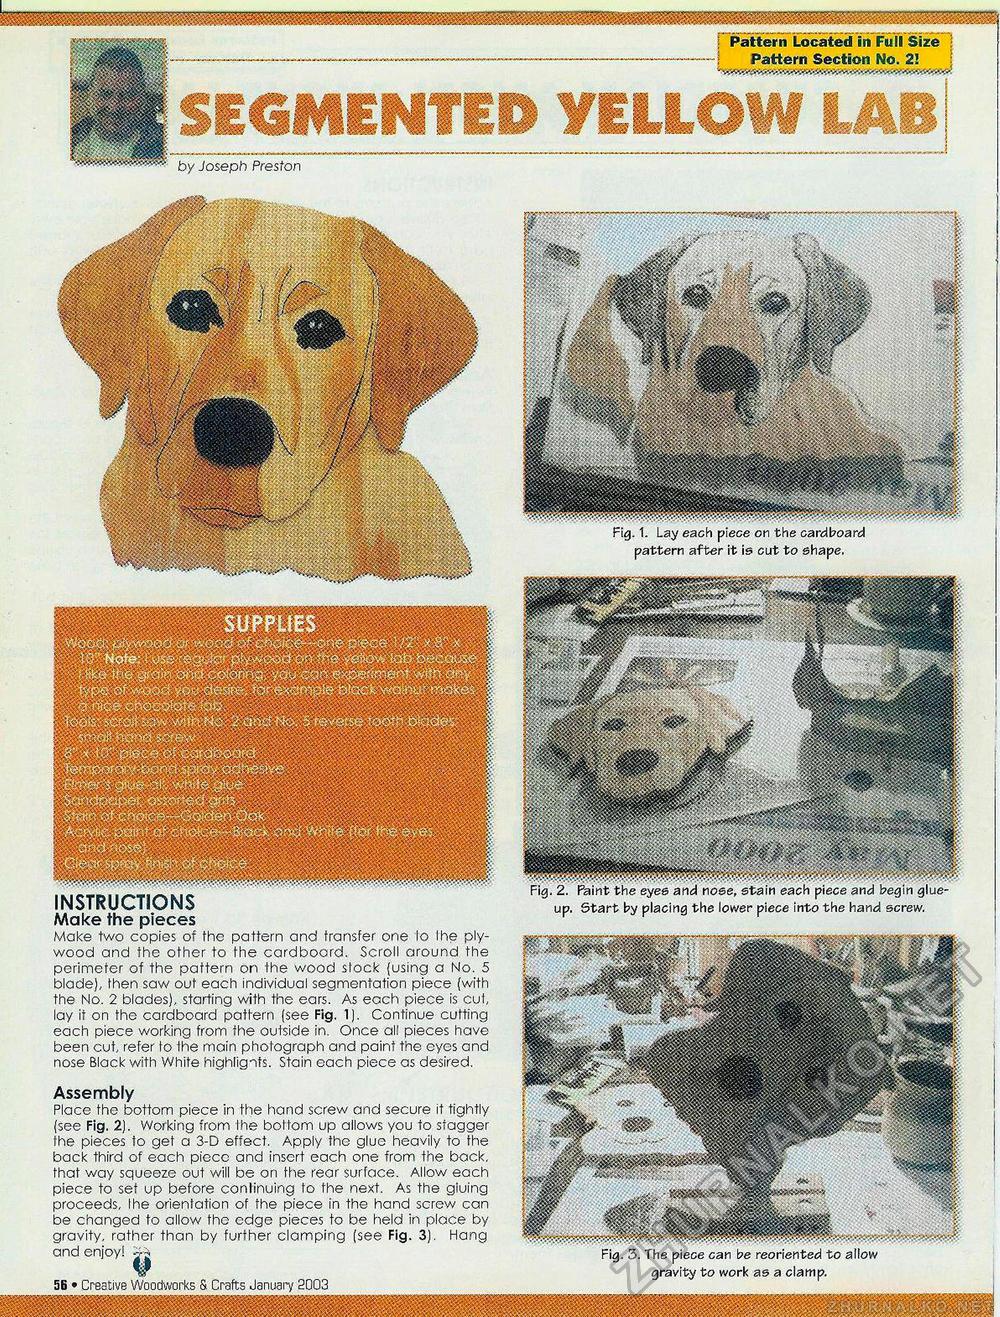
mmmmmmmmmmmmmmm j Pattern Located in Full Size Pattern Section No. 2! m m (mwm 1 j Ww m w mmmmmm | by Joseph Preston !m ? ^ f : ' t INSTRUCTIONS Make the pieces Moke two copies of the pattern and transfer one to Ihe plywood and the other to the cardbocrd. Scroll around the perimeter of the pattern on the wood slock {using a No. 5 blade), then saw out each individual segmentation piece (with the No. 2 blades), starting with the ears. As each piece is cul, lay it on the cardboard pattern (see Fig. 1). Continue cutting each piece working from the outside in. Once all pieces have been cut, refer to Ihe main photograph and paint the eyes and nose Black with White highlignfs. Stain cach piece as desired. Assembly Place the bottom piece in the hand screw and secure it tightly (see Fig. 2). Working from the bottom up allows you to stagger the pieces to get a 3-D effect. Apply the glue heavily to the back third of each piecc and insert each one from the bock, that way squeeze out will be on the rear surface. Allow each piece to set up before continuing to the next. As the gluing proceeds, Ihe orientation of the piece in the hand screw can be changed to allow the edge pieces to be held in ploce by gravity, rather than by further clamping (see Fig. 3). Hang and enjoy! Creative Woodworks S. Crafts January 2003 • 25 . fi: Jj wm- 0.W&VZv- Fig. 1. Lay each piece on the cardboard pattern after it is cut to shape. r^Sgft? Fig. 2. Paint the eyes and nose, stain each piece and begin glue-up. Start by placing the lower piece into the hand screw. Fig. 3. The piece can be reoriented to allow gravity to work as a c\amp. |


