Creative Woodworks & crafts 2003-01, страница 53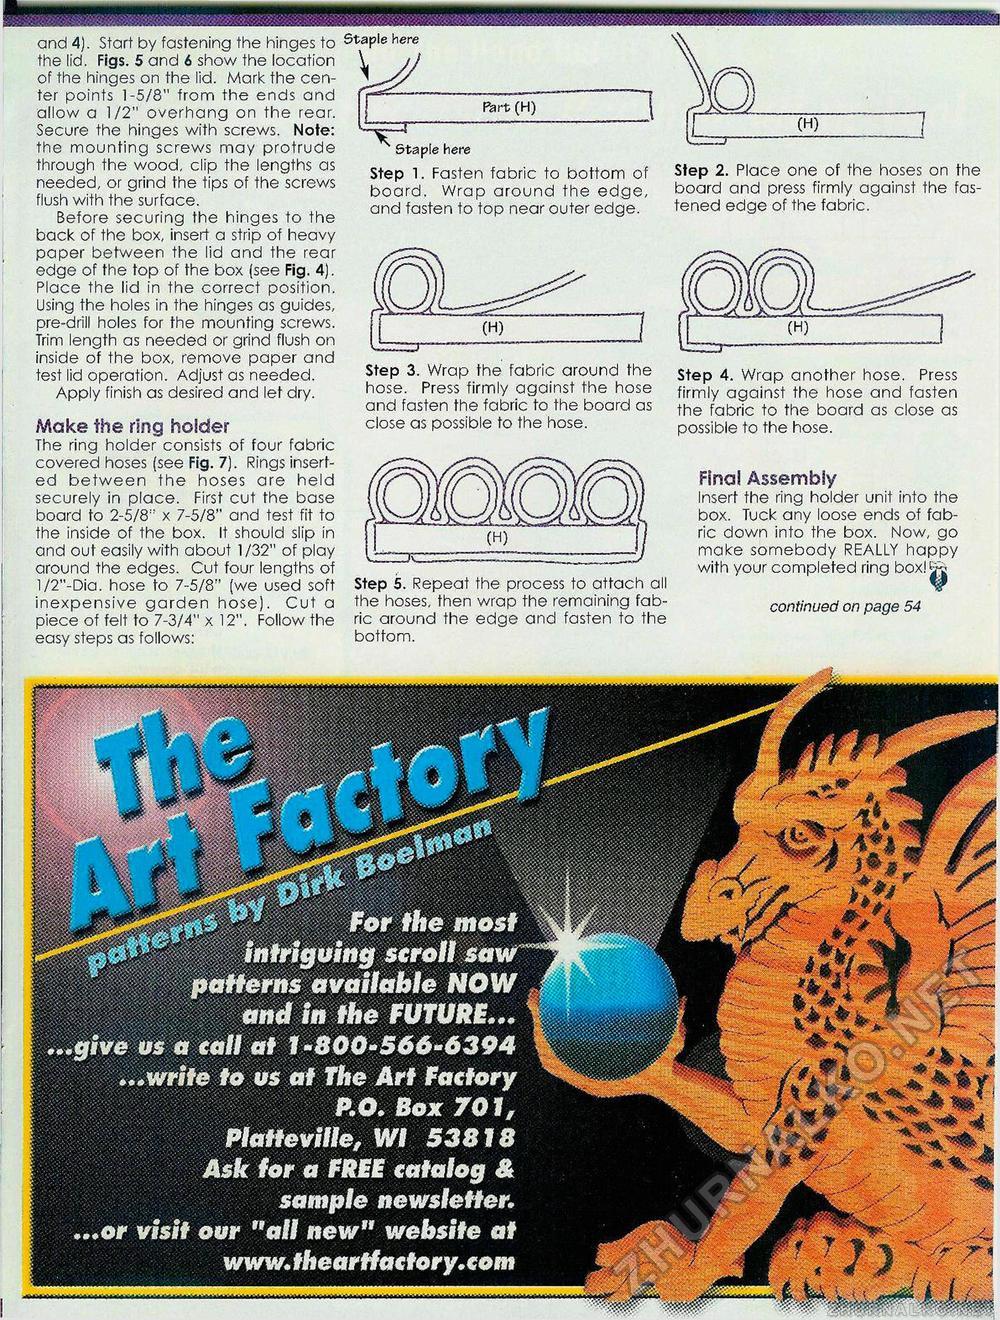
and 4). Start by fastening the hinges to the lid. Figs. 5 and 6 show the location of the hinges on the lid. Mark the center points 1-5/8" from the ends and allow a 1/2" overhang on the rear. Secure the hinges with screws. Note: the mounting screws may protrude through the wood, clip the lengths as needed, or grind the tips of the screws flush with the surface. Before securing the hinges to the back of the box, insert a strip of heavy paper between the lid and the rear edge of the top of the box (see Fig. 4). Place the lid in the correct position. Using the holes in the hinges as guides, pre-drill holes for the mounting screws. Trim length as needed or grind flush on inside of the box, remove paper and test lid operation. Adjust as needed. Apply finish as desired and let dry. Make the ring holder The ring holder consists of four fabric covered hoses (see Fig. 7). Rings inserted between the hoses are held securely in place. First cut the base board to 2-5/8" x 7-5/8" and test fit to the inside of the box. It should slip in and out easily with about 1/32" of play around the edges. Cut four lengths of l/2"-Dia. hose to 7-5/8" (we used soft inexpensive garden hose). Cut a piece of felt to 7-3/4" x 12". Follow the easy steps as follows: here Step 1. Fasten fabric to bottom of board. Wrap around the edge, and fasten to top near outer edge. Step 3. Wrap the fabric around the hose. Press firmly against the hose and fasten the fabric to the board as close as possible to the hose. Step 5. Repeat the process to attach all the hoses, then wrap the remaining fabric around the edge and fasten to the bottom. Step 2. Place one of the hoses on the board and press firmly against the fastened edge of the fabric. Step 4. Wrap another hose. Press firmly against the hose and fasten the fabric to the board as close as possible to the hose. Final Assembly Insert the ring holder unit into the box. Tuck any loose ends of fabric down into the box. Now, go make somebody REALLY happy with your completed ring box!^ continued on page 54 |


