Creative Woodworks & crafts 2003-03, страница 12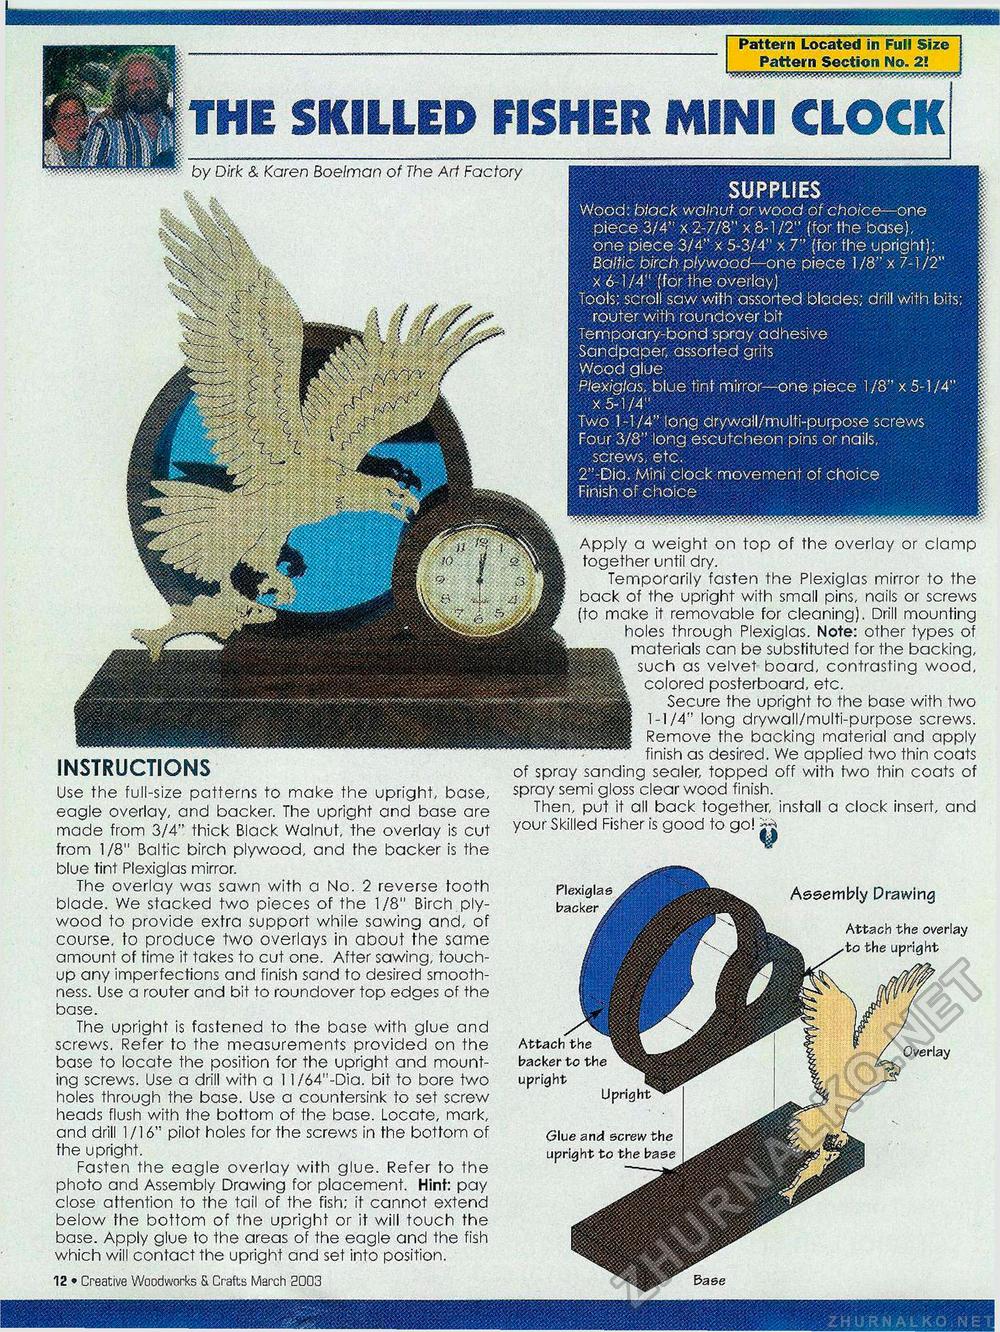
SUPPLIES Wood: black walnut or wood of choice—one piece 3/4" x 2-7/8" x 8-1/2" (for the base), one piece 3/4" x 5-3/4" x 7" (for the upright); Baltic birch plywood—one piece 1/8" x 7-1/2" x 6-1/4" (for the overlay) Toots: scroll saw with assorted blades; drill with bits; router with round over bit Temporary-bond spray adhesive Sandpaper, assorted grits Wood glue Plexiglas, blue tint mirror—one piece 1 /8" x 5-1/4" x 5-1/4" Two 1-1/4" long drywall/multi-purpose screws Four 3/8" long escutcheon pins or nails, screws, etc. 2" Die. Mini clock movement of choice Finish of choice __________________Pattern Located in Full Size Pattern Section No. 2! SKILLED FISHER MINI CLOCK by Dirk & Karen Boelman of The Art Factory INSTRUCTIONS Use the full-size patterns to make the upright, base, eagle overlay, and backer. The upright and base are made from 3/4" thick Black Walnut, the overlay is cut from 1/8" Baltic birch plywood, and the backer is the blue tint Plexiglas mirror. The overlay was sawn with a No. 2 reverse tooth blade. We stacked two pieces of the 1/8" Birch plywood to provide extra support while sawing and, of course, to produce two overlays in about the same amount of time it takes to cut one. After sawing, touch-up any imperfections and finish sand to desired smoothness. Use a router and bit to roundover top edges of the base. The upright is fastened to the base with glue and screws. Refer to the measurements provided on the base to locate the position for the upright and mounting screws. Use a drill with a 1 l/64,!-Dia. bit to bore two holes through the base. Use a countersink to set screw heads flush with the bottom of the base. Locate, mark, and drill 1/16" pilot holes for the screws in the bottom of the upright. Fasten the eagle overlay with glue. Refer to the photo and Assembly Drawing for placement. Hint: pay close attention to the tail of the fish; it cannot extend below the bottom of the upright or it will touch the base. Apply glue to the areas of the eagle and the fish which will contact the upright and set into position. 12 • Creative Woodworks & Crafts March 2003 Base Apply a weight on top of the overlay or clamp together until dry. Temporarily fasten the Plexiglas mirror to the back of the upright with small pins, nails or screws (to make it removable for cleaning). Drill mounting holes through Plexiglas. Note: other types of materials can be substituted for the backing, such as velvet board, contrasting wood, colored posterboard, etc. Secure the upright to the base with two 1-I/4" long drywall/multi-purpose screws. Remove the backing material and apply finish as desired. We applied two thin coats of spray sanding sealer, topped off with two thin coats of spray semi gloss clear wood finish. Then, put it all back together, install a clock insert, and your Skilled Fisher is good to go! Attach the overlay the upright backer to the upright Glue and screw the upright to the base Overlay Plexiglas backer Assembly Drawing |


