Creative Woodworks & crafts 2003-03, страница 44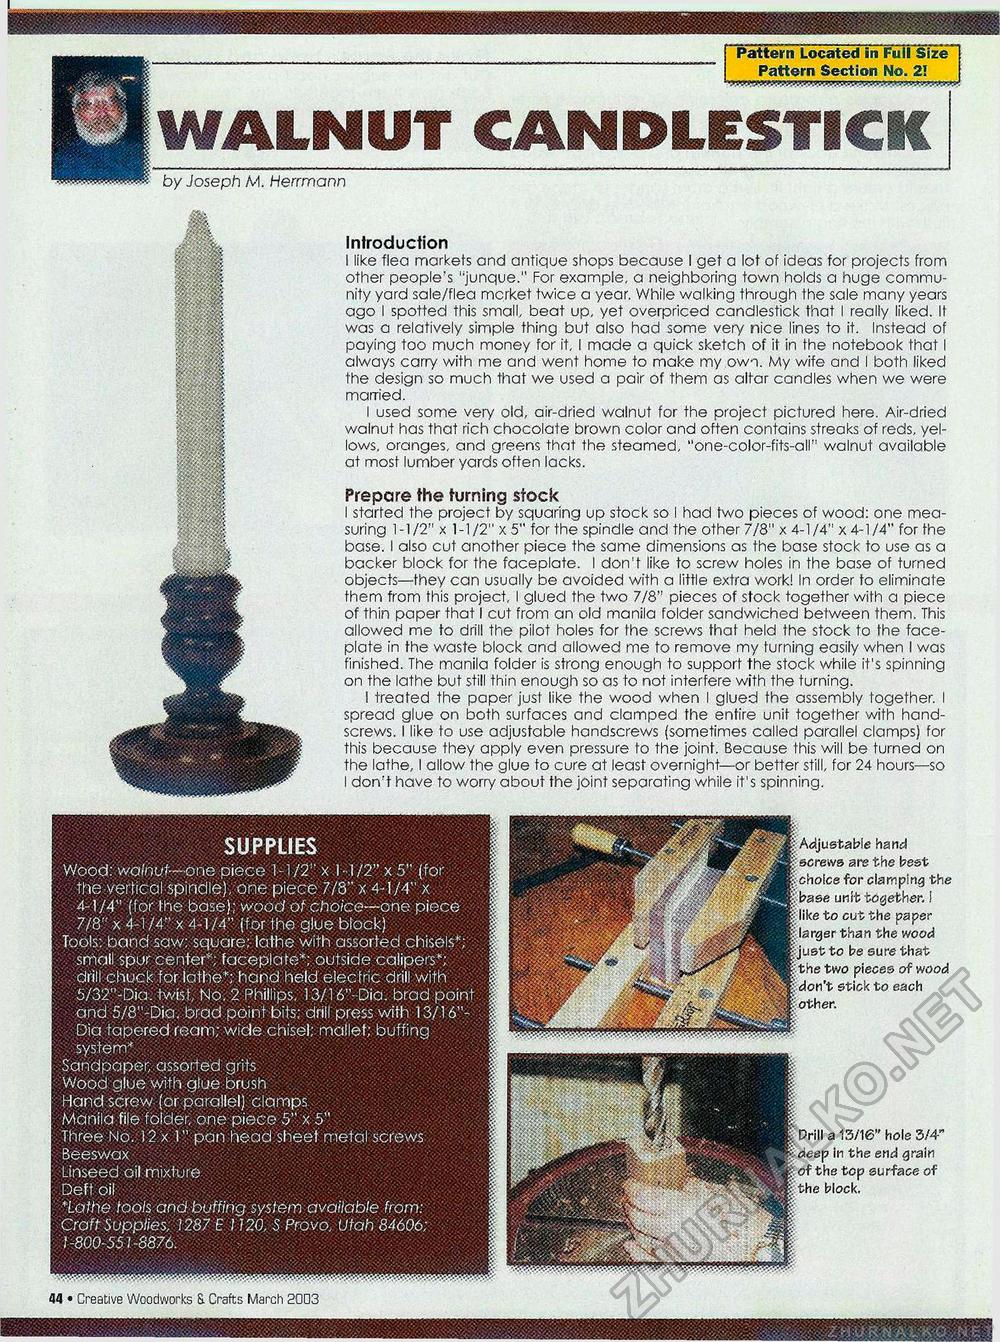
Pattern Located in Full Pattern Section No 1 'Aw.r^ffffw. II Size"] ■21...... WALNUT CANDLESTICK by Joseph M. Herrmann I m I I §lt§§ a a a pa il Introduction I like flea markets and antique shops because I get a lot of ideas for projects from other people's "junque." For example, a neighboring town holds a huge community yard sale/flea mcrket twice a year. While walking through the sale many years ago I spotted this small, beat up, yet overpriced candlestick that I really liked. It was a relatively simple thing but also had some very nice lines to it. Instead of paying too much money for it, I made a quick sketch of it in the notebook that I always carry with me and went home to make my own. My wife and I both liked the design so much that we used a pair of them as altar candles when we were married. I used some very old, air-dried walnut for the project pictured here. Air-dried walnut has that rich chocolate brown color and often contains streaks of reds, yellows, oranges, and greens that the steamed, "one-color-fits-air walnut available at most lumber yards often lacks. Prepare the turning stock I started the project by squaring up stock so I had two pieces of wood: one measuring 1-1/2" x 1-1/2" x 5" for the spindle and the other 7/8" x 4-1/4" x 4-1/4" for the base. I also cut another piece the same dimensions as the base stock to use as a backer block for the faceplate. I don't like to screw holes in the base of turned objects—they can usually be avoided with a little extra work! In order to eliminate them from this project, I glued the two 7/8" pieces of stock together with a piece of thin paper that I cut from an old manila folder sandwiched between them. This allowed me to drill the pilot holes for the screws that held the stock to the faceplate in the waste block and allowed me to remove my turning easily when I was finished. The manila folder is strong enough to support the stock while it's spinning on the lathe but still thin enough so as to not interfere with the turning. I treated the paper just like the wood when I glued the assembly together. I spread glue on both surfaces and clamped the entire unit together with hand-screws. I like to use adjustable handscrews (sometimes called parallel clamps) for this because they apply even pressure to the joint. Because this will be turned on the lathe, I allow the glue to cure at least overnight—or better still, for 24 hours—so I don't have to worry about the joint separating while it's spinning. hand are the best clamping the unit together. I to cut the paper the wood be sure that two pieces of wood Stick to each a 13/16" hole 3/4" in the end grain top surface of block. SUPPLIES Wood: walnut—one piece 1-1/2" x 1-1/2" x 5" (for the vertical spindle), one piece 7/8" x 4-1/4" x 4-1/4" (for the base); wood of choice—one piece 7/8" x 4-1 /4" x 4-1/4" (for the glue block) Tools: band saw: square: lathe with assorted chisels*; small spur center*; faceplate*: outside calipers"; drill chuck for lathe*; hand held electric drill with 5/32"-Dia. twist, No. 2 Phillips, 13/16"-Dia. brad point and 5/8"-Dia. brad point bits: drill press with 13/16"-Dia tapered ream; wide chisel; mallet; buffing system* . Sandpaper, assorted grits Wood glue with glue brush Hand screw (or parallel) clamps Manila file folder, one piece 5" x 5" Three No. 12x1" pan head sheet metal screws 3eeswax Linseed oil mixture Deft oil *lathe tools and buffing system available from: Croft Supplies, 1287 E 1120, S Provo, Utah 84606; }-800-551-8876. 12 • Creative Woodworks & Crafts March 2003 Base |


