Creative Woodworks & crafts 2003-04, страница 42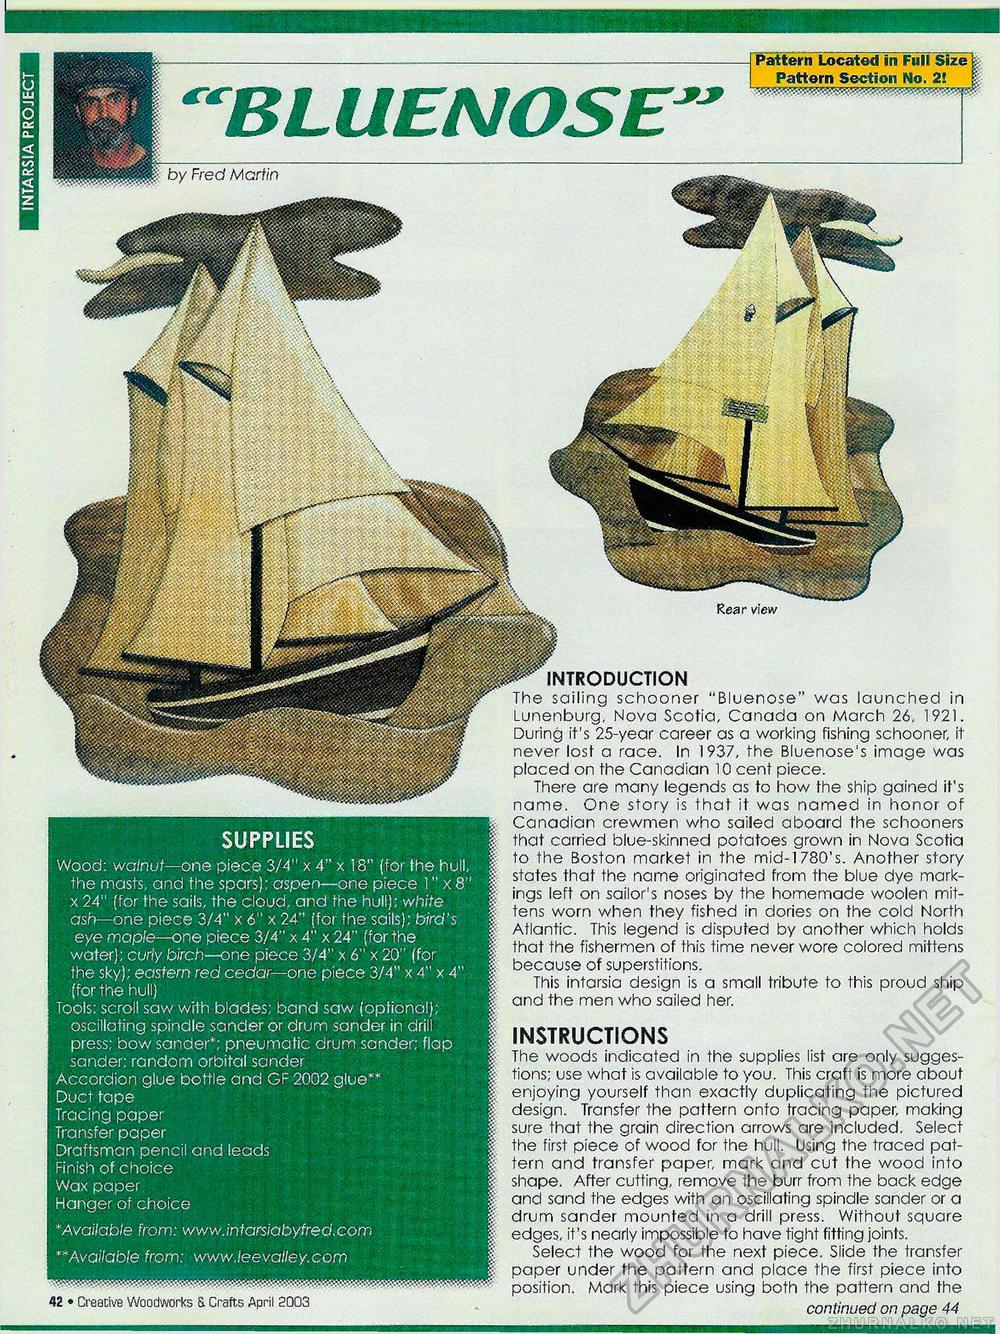
SUPPLIES Wood: walnut—one piece 3/4" x 4" x 18" (for the hull, the masts, and the spars); aspen—one piece 1" x 8" x 24" (for the sails, the cloua, and the hull); white ash—one piece 3/4" x 6" x 24" (for the sails); bird's, eye maple—one piece 3/4" x 4" x 24" (for the water); curly birch—one piece 3/4" x 6" x 20" (for the sky); eastern red cedar— one piece 3/4" x 4" x 4" (for the hull) Tools: scroll saw with blades; band saw (optional); oscillating spindle sander or drum sander in drill press; bow sander*; pneumatic drum sander; flap sander; random orbital sander Accordion glue bottle and GF 2002 glue** Duct tape Tracing paper Transfer paper Draftsman pencil and leads Finish of choice Wax paper Hanger of choice * Available from: www.intarsiabyfred.com **Available from: www.leevalley.com "BLUENOSE" Pattern Located in Full Size Pattern Section No. 2! 42 • Creative Woodworks a Crafts April 2003 Rear view by Fred Martin INTRODUCTION The sailing schooner "Bluenose" was launched in Lunenburg, Nova Scotia, Canada on March 26, 1921. During it's 25-year career as a working fishing schooner, it never lost a race. In 1937, the Bluenose's image was placed on the Canadian 10 cent piece. There are many legends as to how the ship gained it's name. One story is that it was named in honor of Canadian crewmen who sailed aboard the schooners that carried blue-skinned potatoes grown in Nova Scotia to the Boston market in the mid-1780's. Another story states that the name originated from the blue dye markings left on sailor's noses by the homemade woolen mittens worn when they fished in dories on the cold North Atlantic. This legend is disputed by another which holds that the fishermen of this time never wore colored mittens because of superstitions. This intarsia design is a small tribute to this proud ship and the men who sailed her. INSTRUCTIONS The woods indicated in the supplies list are only suggestions; use what is available to you. This craft is more about enjoying yourself than exactly duplicating the pictured design. Transfer the pattern onto tracing paper, making sure that the grain direction arrows are included. Select the first piece of wood for the hull. Using the tracea pattern and transfer paper, mark and cut the wood into shape. After cutting, remove the burr from the back eage and sand the edges with an oscillating spindle sander or a drum sander mountea in a drill press. Without sguare edges, it's nearly impossible to have tight fitting joints. Select the wood for the next piece. Slide the transfer paper under the pattern and place the first piece into position. Mark this piece using both the pattern and the continued on page 44 |


