Creative Woodworks & crafts 2003-04, страница 44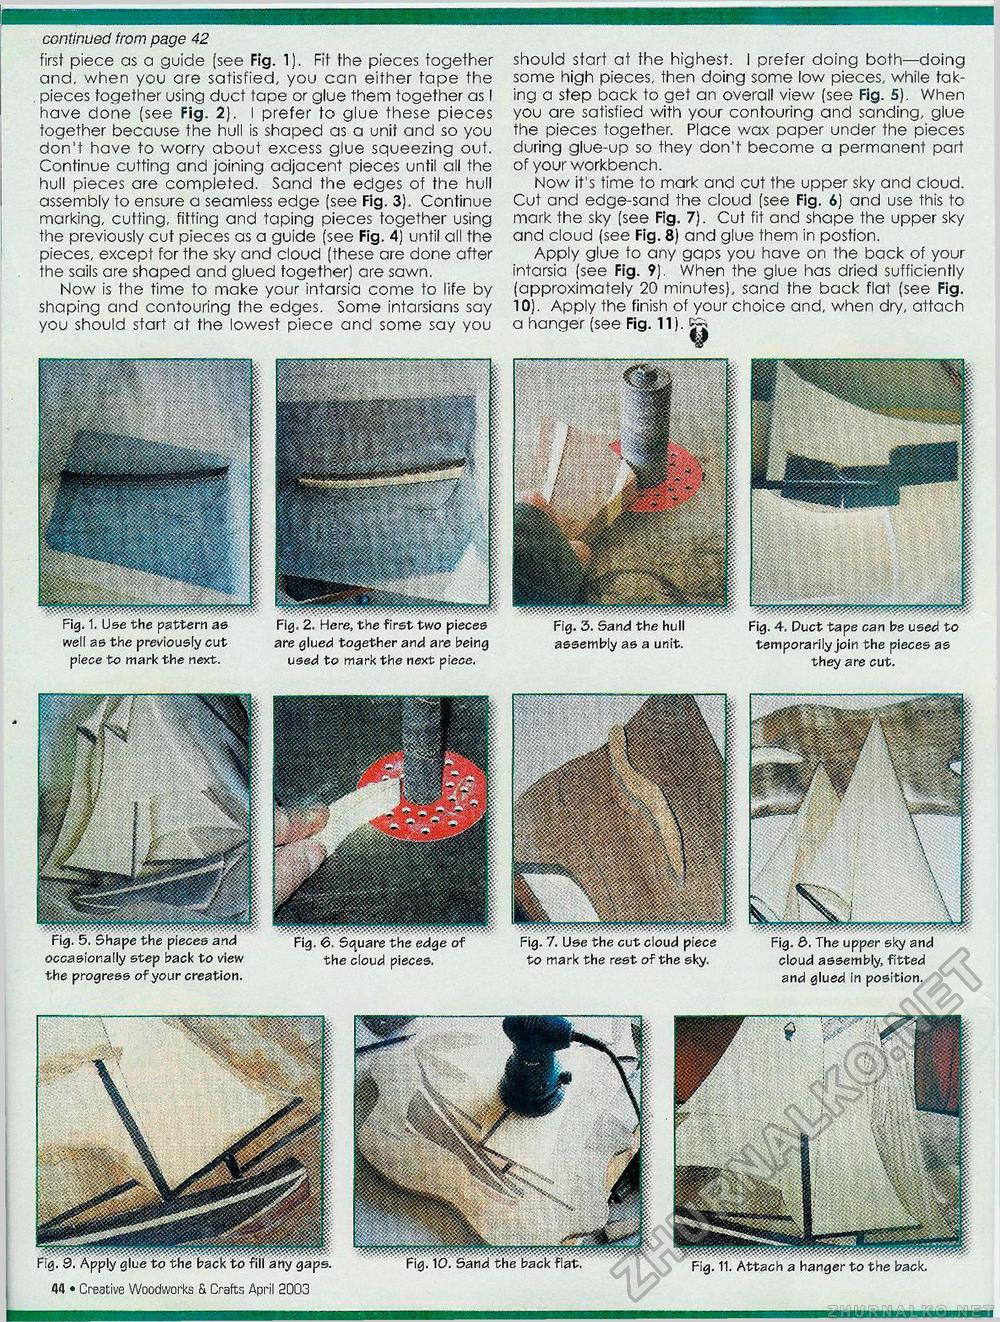
continued from page 44 first piece as a guide (see Fig. 1). Fit the pieces together and, when you are satisfied, you can either tape the . pieces together using duct tape or glue them together as I have done (see Fig. 2). I prefer to glue these pieces together because the hull is shaped as a unit and so you don't have to worry about excess glue squeezing out. Continue cutting and joining adjacent pieces until all the hull pieces are completed. Sand the edges of the hull assembly to ensure a seamless edge (see Fig. 3). Continue marking, cutting, fitting and taping pieces together using the previously cut pieces as a guide (see Fig. 4) until all the pieces, except for the sky and cloud (these are done after the sails are shaped and glued together) are sawn. Now is the time to make your intarsia come to life by shaping and contouring the edges. Some intarsians say you should start at the lowest piece and some say you Fig. 1. Use the pattern as well as the previously cut piece to mark the next. should start at the highest. I prefer doing both—doing some high pieces, then doing some low pieces, while taking a step back to get an overall view (see Fig. 5). When you are satisfied with your contouring and sanding, glue the pieces together. Place wax paper under the pieces during glue-up so they don't become a permanent part of your workbench. Now it's time to mark and cut the upper sky and cloud. Cut and edge-sand the cloud (see Fig. 6) and use this to mark the sky (see Fig. 7). Cut fit and shape the upper sky and cloud (see Fig. 8) and glue them in postion. Apply glue to any gaps you have on the back of your intarsia (see Fig. 9). When the glue has dried sufficiently (approximately 20 minutes), sand the back flat (see Fig. 10). Apply the finish of your choice and, when dry, attach a hanger (see Fig. 11). ^rj Fig. 3. Sand the hull assembly as a unit. Fig. 2. Here, the first two pieces are glued together and are being used to mark the next piece. to mark the rest of the sky. cloud assembly, fitted and glued in position. fl4 • Creative Woodworks & Crafts April 2003 Fig. 6. Square the edge of the cloud pieces. 4. Puct tape can be used to temporarilyjoin the pieces as they are cut. Fig. 5. Shape the pieces and occasionally step back to view the progress of your creation. Fig. 10. Sand the back flat. Fig. 11. Attach a hanger to the back. |


