Creative Woodworks & crafts 2003-11, страница 43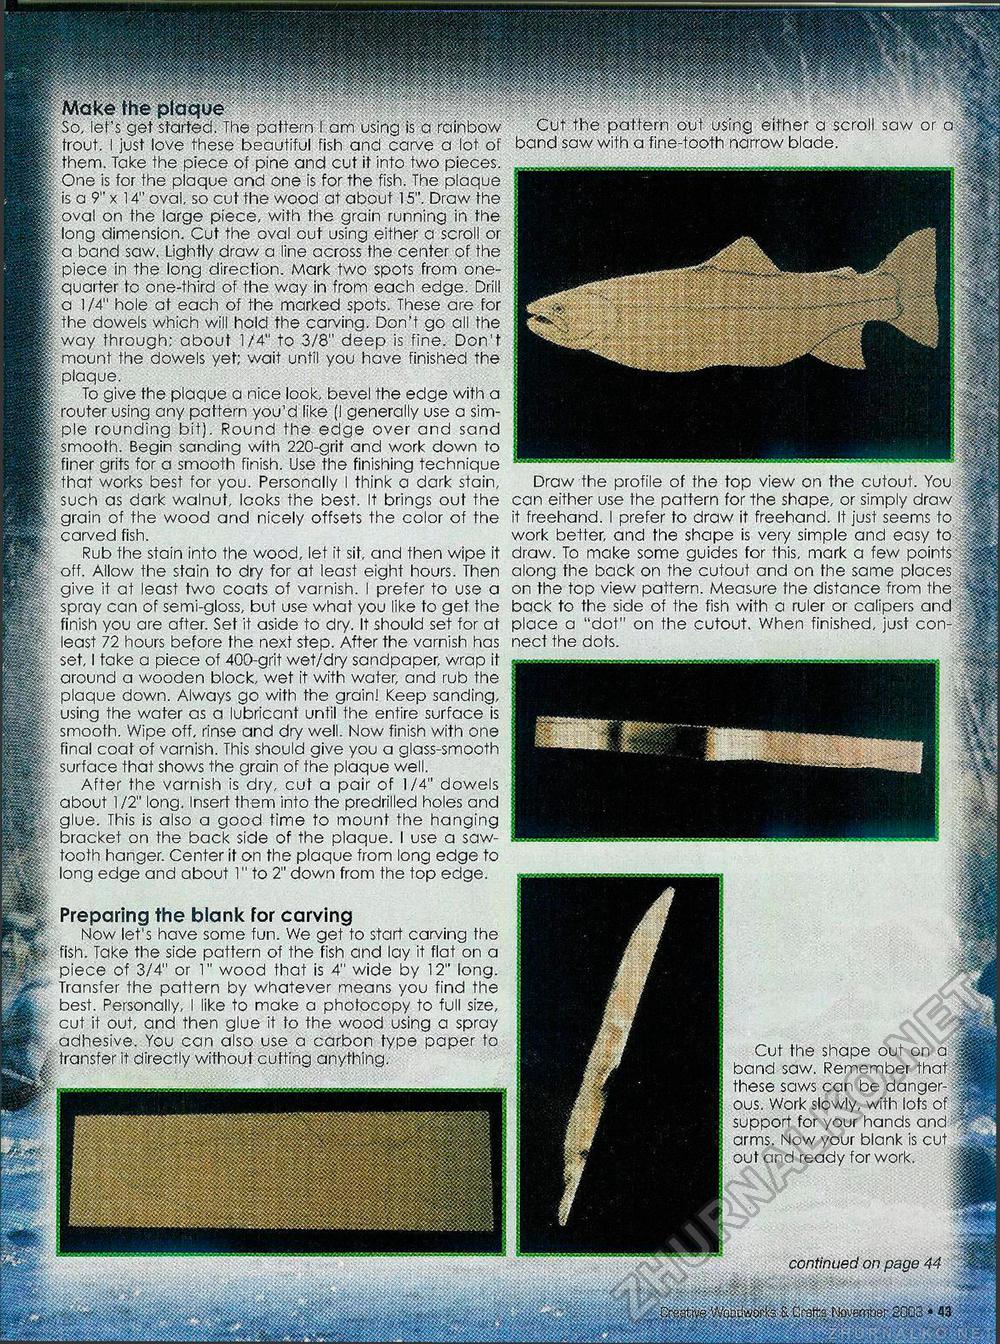
Make the plaque So, let's get started. The pattern I am using is a rainbow Cut the pattern out using either a scroll saw or a; trout. I just love these beautiful fish and carve a lot of band saw with a fine-tooth narrow blade, them. Take the piece of pine and cut it into two pieces. One is for the plaque and one is for the fish. The plaque H^rM/^ ::.'-' is a 9" x 14" oval, so cut the wood at about 15". Draw the | " _ , ^ ^ 1 oval on the large piece, with the grain running in the . long dimension. Cut the oval out using either a scroll or 1 a band saw. Lightly draw a line across the center of the ^ piece in the long direction. Mark two spots from one- | rapppP; ..........g quarter to one-third of the way in from each edge. Drill HP^^^^ K-'SB. a 1/4" hole at each of the marked spots. These are for jP^, pi the dowels which will hold the carving. Don't go all the . 9 way through; about 1/4" to 3/8" deep is fine. Don't ,<" 'M mount the dowels yet; wait until you have finished the " ; plaque. To give the plaque a nice look, bevel the edge with a .. i/ router using any pattern you'd like (I generally use a sim- ple rounding bit). Round the edge over and sand ■■ smooth. Begin sanding with 220-grit and work down to 9j ' ' ':''•''.'" finer grits for a smooth finish. Use the finishing technique that works best for you. Personally I think a dark stain, Draw the profile of the top view on the cutout. You such as dark walnut, looks the best. It brings out the can either use the pattern for the shape, or simply draw grain of the wood and nicely offsets the color of the it freehand. I prefer to draw it freehand. It just seems to carved fish. work better, and the shape is very simple and easy to Rub the stain into the wood, let it sit, and then wipe it draw. To make some guides for this, mark a few points off. Allow the stain to dry for at least eight hours. Then along the back on the cutout ana on the same places give it at least two coats of varnish. I prefer to use a on the top view pattern. Measure the distance from the spray can of semi-gloss, but use what you like to get the back to the side of the fish with a ruler or calipers and finish you are after. Set it aside to dry. It should set for at place a "dot" on the cutout. When finished, just con-least 72 hours before the next step. After the varnish has nect the dots, set, I take a piece of 400-grit wet/dry sandpaper, wrap it around a wooden block, wet it with water; and rub the B; > : plaque down. Always go with the grain! Keep sanding, fl■ v M^f... using the water as a lubricant until the entire surface is jBRPMH| " 1 , ^ smooth. Wipe off, rinse and dry well. Now finish with one . final coat of varnish. This should give you a glass-smooth . surface that shows the grain of the plaque well. After the varnish is dry, cut a pair of 1/4" dowels I about 1 /2" long. Insert thsm into the predrilled holes and ^^H^f^t1*^^? ■ glue. This is also a good time to mount the hanging 9 /- f bracket on the back side of the plaque. I use a saw- wiHMHMWWiMl^BHWMWMMMBMWIIMMMi tooth hanger. Center it on the plaque from long edge to long edge and about 1" to 2" down from the top edge. ^^^^^^^^^^^^^^ Preparing the blank for carving Now let's have some fun. We get to start carving the fish. Take the side pattern of the fish and lay it flat on a piece of 3/4" or 1" wood that is 4" wide by 12" long. Transfer the pattern by whatever means you find the best. Personally, I like to make a photocopy to full size, cut it out, and then glue it to the wood using a spray adhesive. You can also use a carbon type paper to transfer it directly without cutting anything. Cut the shape out on a band saw. Remember that these saws can be dangerous. Work slowly, with lots of support for your hands and arms. Now your blank is cut out and ready for work. continued on page 44 |


