Creative Woodworks & crafts 2003-11, страница 40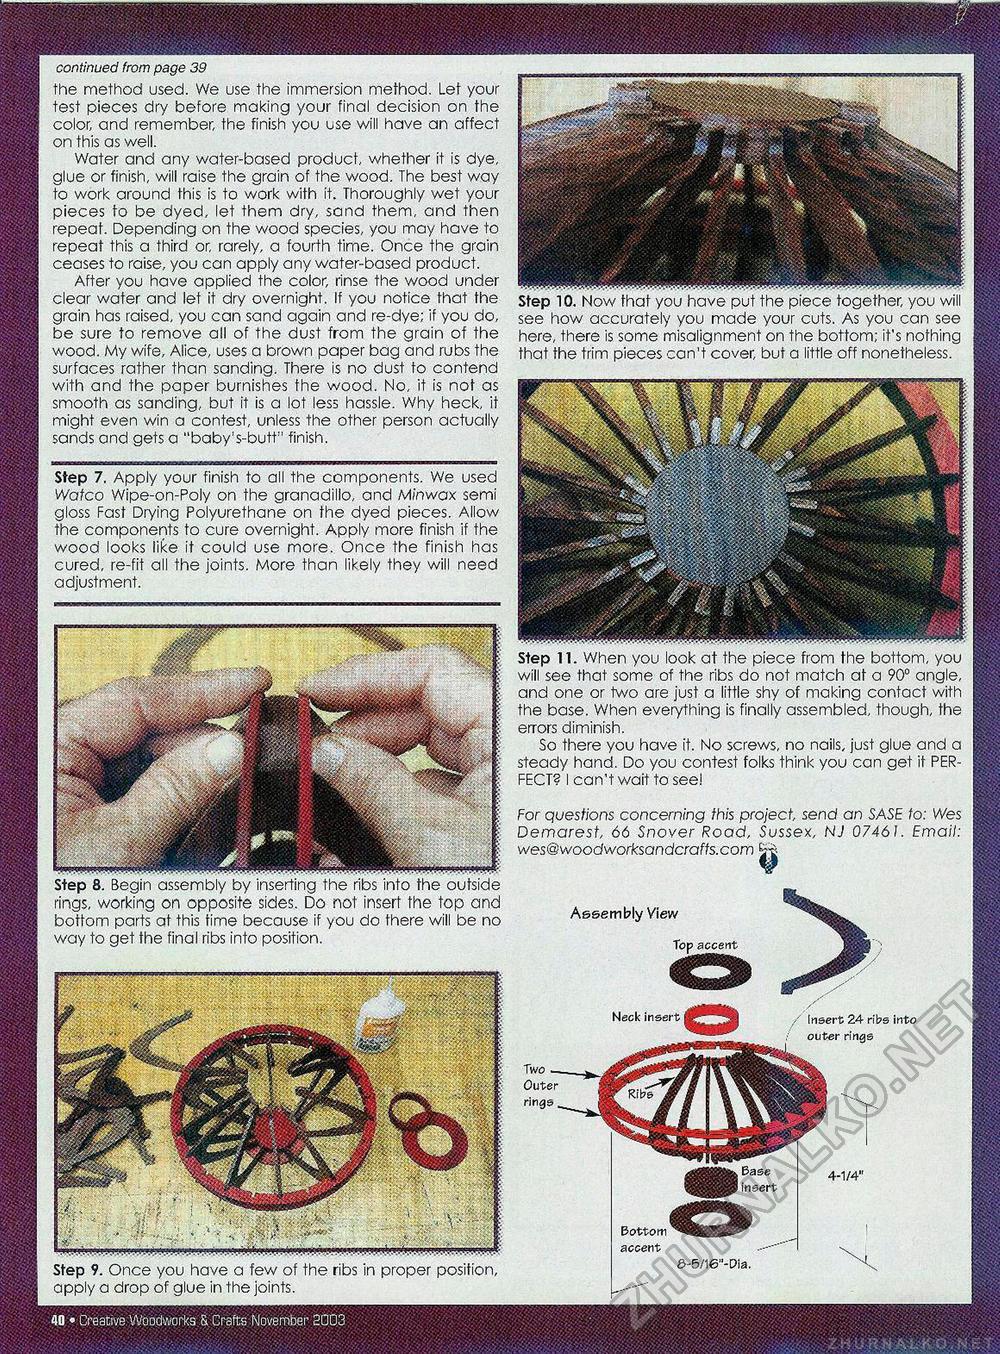
40 • Creative Woodworks S Grafts November 2003 continued from page 39 the method used. We use the immersion method. Let your test pieces dry before making your final decision on the color, and remember, the finish you use will have an affect on this as well. Water and any water-based product, whether it is dye, glue or finish, will raise the grain of the wood. The best way to work around this is to work with it. Thoroughly wet your pieces to be dyed, let them dry, sand them, and then repeat. Depending on the wood species, you may hove to repeat this a third or, rarely, a fourth time. Once the grain ceases to raise, you can apply any water-based product. After you have applied the color, rinse the wood under clear water and let it dry overnight. If you notice that the grain has raised, you can sand again and re-dye; if you do, be sure to remove all of the dust from the grain of the wood. My wife, Alice, uses a brown paper bag and rubs the surfaces rather than sanding. There is no dust to contend with and the paper burnishes the wood. No, it is not as smooth as sanding, but it is a lot less hassle. Why heck, it might even win a contest, unless the other person actually sands and gets a "baby's-butt" finish. Step 10. Now that you have put the piece together, you will see how accurately you made your cuts. As you can see here, there is some misalignment on the bottom; it's nothing that the trim pieces can't cover, but a little off nonetheless. Step 7. Apply your finish to all the components. We used Watco Wipe-on-Poly on the granadillo, and Minwax semi gloss Fast Drying Polyurethane on the dyed pieces. Allow the components to cure overnight. Apply more finish if the wood looks like it could use more. Once the finish has cured, re-fit all the joints. More than likely they will need adjustment. Step 11. When you look at the piece from the bottom, you will see that some of the ribs do not match at a 90° angle, and one or two are just a little shy of making contact with the base. When everything is finally assembled, though, the errors diminish. So there you have it. No screws, no nails, just glue and a steady hand. Do you contest folks think you can get it PERFECT? I can't wait to see! For questions concerning this project send an SASE to: Wes Demarest 66 Snover Road, Sussex, NJ 07461. Email: wes@woodworksandcraffs.com Step 8. Begin assembly by inserting the ribs into the outside rings, working on opposite sides. Do not insert the top and bottom parts at this time because if you do there will be no way to get the final ribs into position. Assembly View Top accent Neck insert / insert 24 ribs into outer rings Two — Outer rings. Base insert Bottom accent Step 9. Once you have a few of the ribs in proper position, apply a drop of glue in the joints. |


