Creative Woodworks & crafts 2003-11, страница 57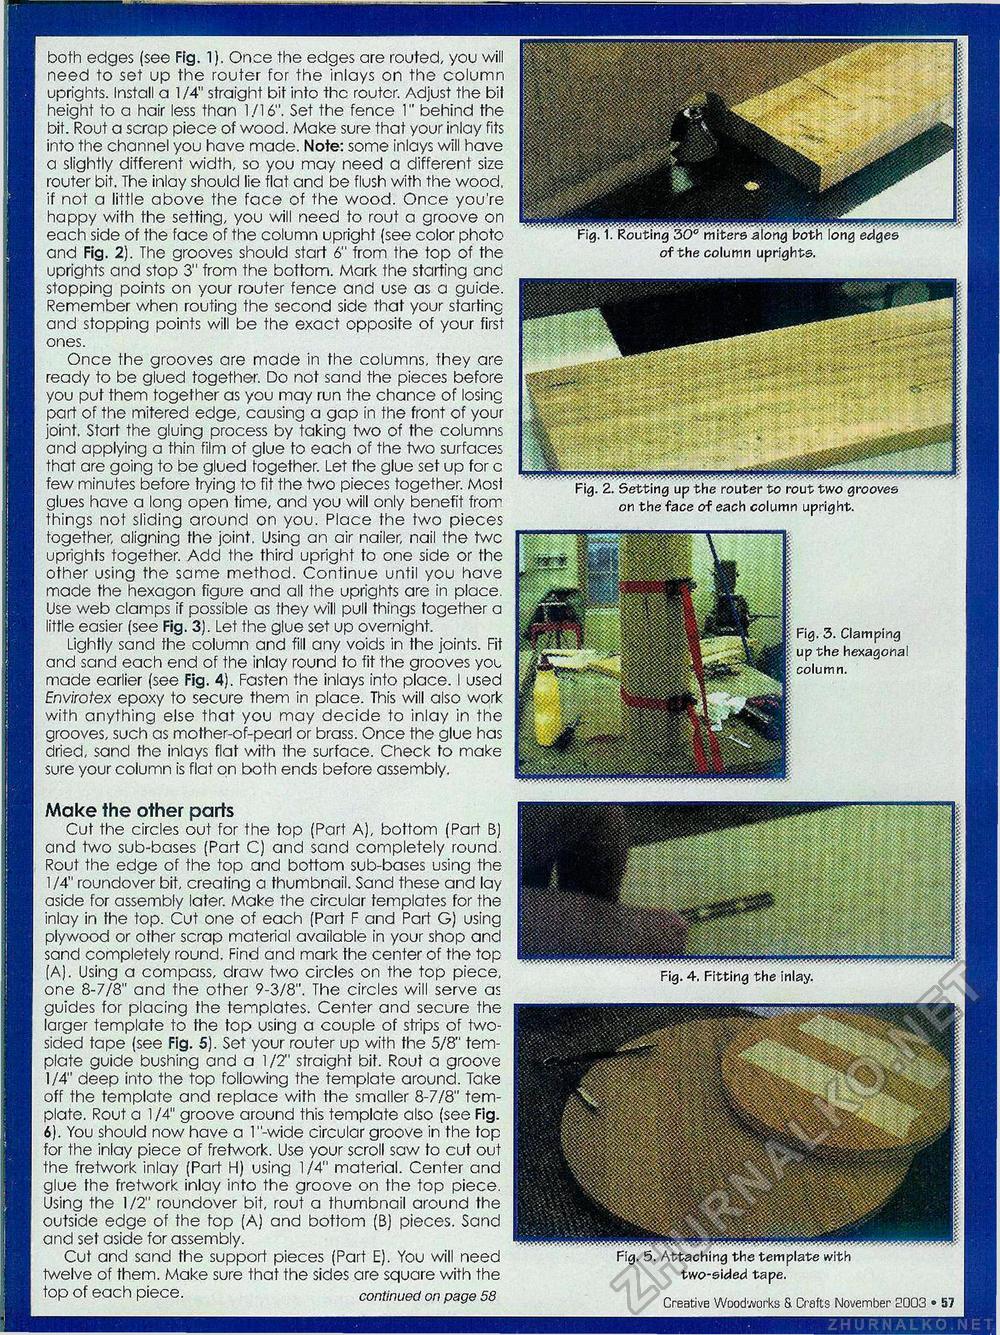
Fig. 2. Setting up the router to rout two grooves on the face of each column upright. WMMMMI Fig. 1. Routing 30° miters along both long edges of the column uprights. both edges (see Fig. 1). Once the edges are routed, you will need to set up the router for the inlays on the column uprights. Install a 1/4" straight bit into the router. Adjust the bit height to a hair less than 1/16". Set the fence 1" behina the bit. Rout a scrap piece of wood. Make sure that your inlay fits into the channel you have made. Note: some inlays will have a slightly different width, so you may need a different size router bit. The inlay should lie flat and be flush with the wood, if not a little above the face of the wood. Once you're happy with fhe setting, you will need to rout a groove on each side of the face of the column upright (see color photo and Fig. 2). The grooves should start 6" from the top of the uprights and stop 3" from the bottom. Mark the starting anc stopping points on your router fence and use as a guiae. Remember when routing the second side that your starting and stopping points will be the exact opposite of your first ones. Once the grooves are made in the columns, they are ready to be glued together. Do not sand the pieces before you put them together as you may run the chance of losing part of the mitered edge, causing a gap in the front of your joint. Start the gluing process by taking two of the columns and applying a thin film of glue to each of the two surfaces that are going to be glued together. Let fhe glue set up for c few minutes before trying to fit the two pieces together. Most glues have a long open time, and you will only benefit from things not sliding around on you. Place the two pieces together, aligning the joint. Using an air nailer, nail the two uprights together. Add the third upright to one side or the other using the same method. Continue until you have made the hexagon figure and all the uprights are in place. Use web clamps if possible as they will pull things together a little easier (see Fig. 3). Let the glue set up overnight. Lightly sand the column and fill any voids in the joints. Fit and sand each end of the inlay round to fit the grooves you made earlier (see Fig. 4). Fasten the inlays into place. I used Envirotex epoxy to secure them in place. This will also work with anything else that you may decide to inlay in the grooves, such as mother-of-pearl or brass. Once the glue has dried, sand the inlays flat with the surface. Check to make sure your column is flat on both ends before assembly. Make the other parts Cut the circles out for the top (Part A), bottom (Part B) and two sub-bases (Part C) and sand completely round. Rout the edge of the top and bottom sub-bases using the 1/4" roundover bit, creating a thumbnail. Sand these and lay aside for assembly later. Make the circular templates for the inlay in the top. Cut one of each (Part F and Part G) using plywood or other scrap material available in your shop and sand completely round. Find and mark the center of the top (A). Using a compass, draw two circles on the top piece, one 8-7/8" and the other 9-3/8". The circles will serve as guides for placing the templates. Center and secure the larger template to the top using a couple of strips of two-sided tape (see Fig. 5). Set your router up with the 5/8" template guide bushing and a 1/2" straight bit. Rout a groove 1/4" deep into the top following the template around. Take off the template and replace with the smaller 8-7/8" template. Rout a 1/4" groove around this template also (see Fig. 6). You should now have a l"-wide circular groove in the top for the inlay piece of fretwork. Use your scroll saw to cut out the fretwork inlay (Part H) using 1/4" material. Center and glue the fretwork inlay into the groove on the top piece. Using the 1/2" roundover bit, rout a thumbnail around the outside edge of the top (A) and bottom (B) pieces. Sand and set aside for assembly. Cut and sand the support pieces (Part E). You will need Iwelve of them. Make sure that the sides are square with the top of eac h piece. continued on page 58 Fig. 5. Attaching the template with two-sided tape. 56 • Creative Woodworks 8. Crafts November 2003 Fig. 4. Fitting the inlay. Fig. 3. Clamping I up the hexagonal column. |


