Creative Woodworks & crafts 2003-11, страница 54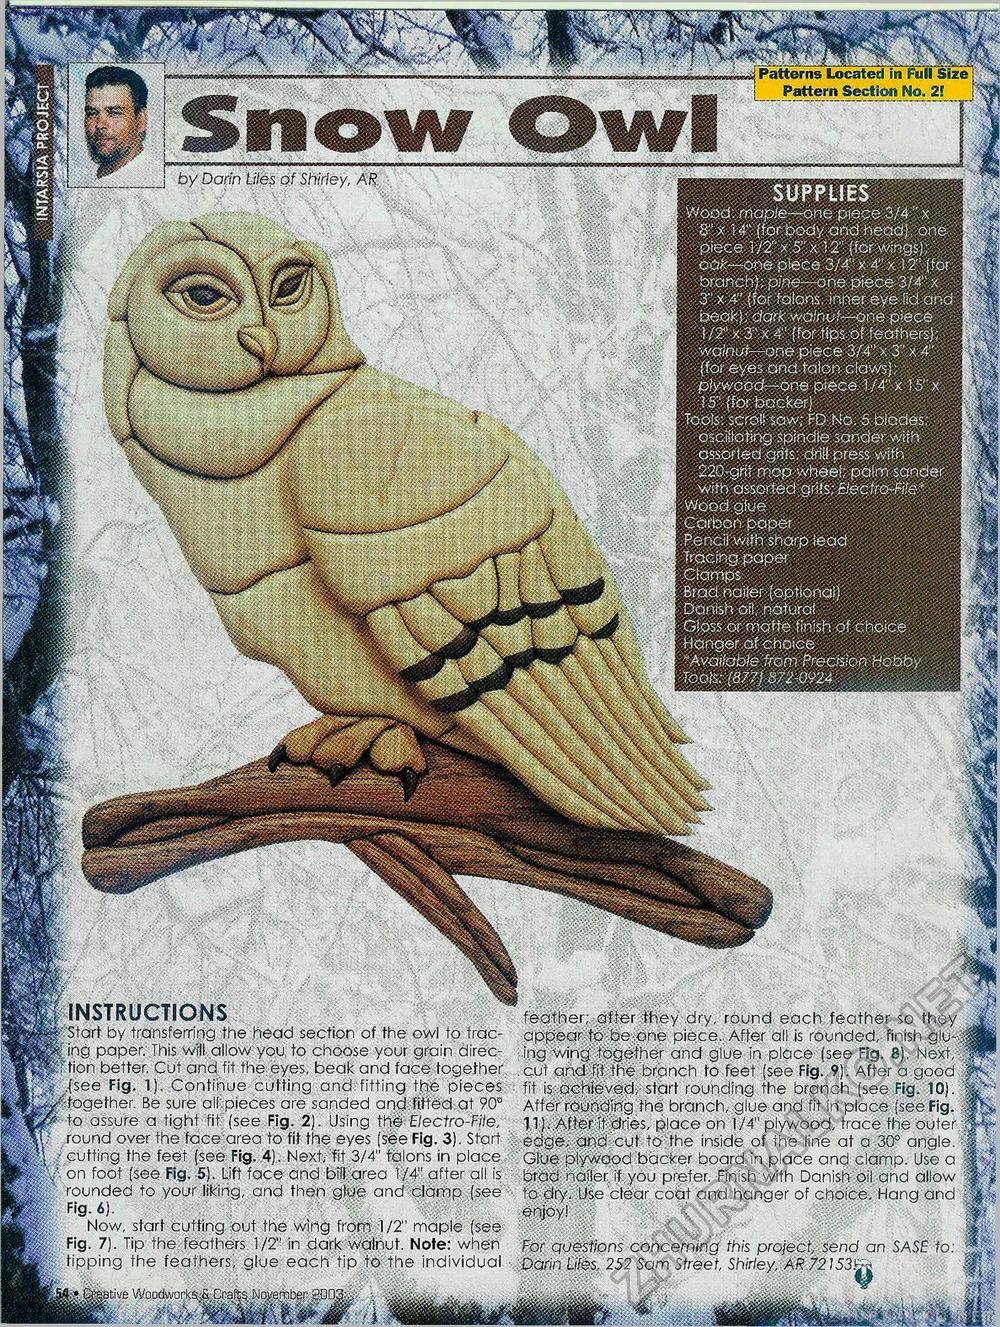
SUPPLIES Wood: f«c\D;e:---one> piece 3/4 ' x : .'• x U" {for body end need) one pieced 172" x 5" x 12; (for wings); : oOA'~one p'tece:3/4"x 4"x ! 2': (for ■ ' branch); pine—one piece 3/4" k 3" x 4" (for talons, inner eye lid and ; beak); dark wainvt—one piece 1/2" x 3" :< 4" [for tips of feathers); v '/yglnui-^-one :piece 3/4" x 3" x 4" (for eyes ahd fdlonvC!aws); i-i^M p'ywbdd—one piece V4" x >5"x -15" {for backer} ToP's: sCrpi! sew; FD No: 5 Diodes; •■?>.'•' :;'• osciStcting spindle sender with assorted grfts: anil press with , ;; 220:gnfmo?> wheel; paim sender ; with assorted grthtkledtro-Fik* ■ Wood glue ;€ai'b:anpoper.- £ . Pencil With'sharp lead i ftbeNg paper > Brad baiter (optional) . Danish oil, nature? Gloss Or nipfte finish of Choice Hanger ,of choice Tools: (877) 872-0924 ij Patterns Located in Full Size Pattern Section No. 21 by Darin Liles of Shirley, AR. INSTRUCTIONS feather;..after Mey dry. round each feather so they ^.f""Start by transferring the head section of the owl to trac- appear, tope,one piece. After all is rounded, finish glu- §£|k; ing paper. This will allow you to choose your grain direc- ing wing .together and glue in place (see Fig. 8). Next, PF'tion better. Cut and fit the eyes, beak and face together , cut and fit the branch to feet (see Fig. 9). After a good pee Fig. 1). Continue cutting and fitting the pieces fit is achieved, start rounding the branch (see Fig. 10). IWv together. Be sure all.pieces are sanded and fitted at 90° After rounding the branch, glue and fit In place (see Fig. If* to assure a tight fit (see Fig. 2). Using the Electro-File, 11). Afterlt:dries, place on 1/4" plywood, trace the outer IT? round over the face;area to fit the eyes (see Fig. 3). Start edge, and cut to the inside of the line at a 30° angle. M i cutting the feet (see Fig. 4). Next, fit 3/4" talons in place Glue plywood backer board in place and clamp. Use a 7 on foot (see Fig. 5). Lift face and blarea 1/4" after all is pr;ad nailer if you prefer. Finish with Danish oil and allow if rounded to your liking, and then glue and clamp (see to dry. Use clear coat and hanger of choice. Hang and m- F'9- *>)■ enjoy! §p Now, start cutting out the wing from 1/2" maple (see •fl Fig. 7). Tip the feathers 1/2" in dark walnut. Note: when For questions concerning this project, send an SASE to: I tipping the feathers, glue each tip to the individual Darin Liles, 252 Sam Street, Shirley, AR 72153 festive VVD0dworte&Ccafe.«bep,gOq3&>. . .fe;^..; . .,■ |


