Creative Woodworks & crafts 2003-11, страница 53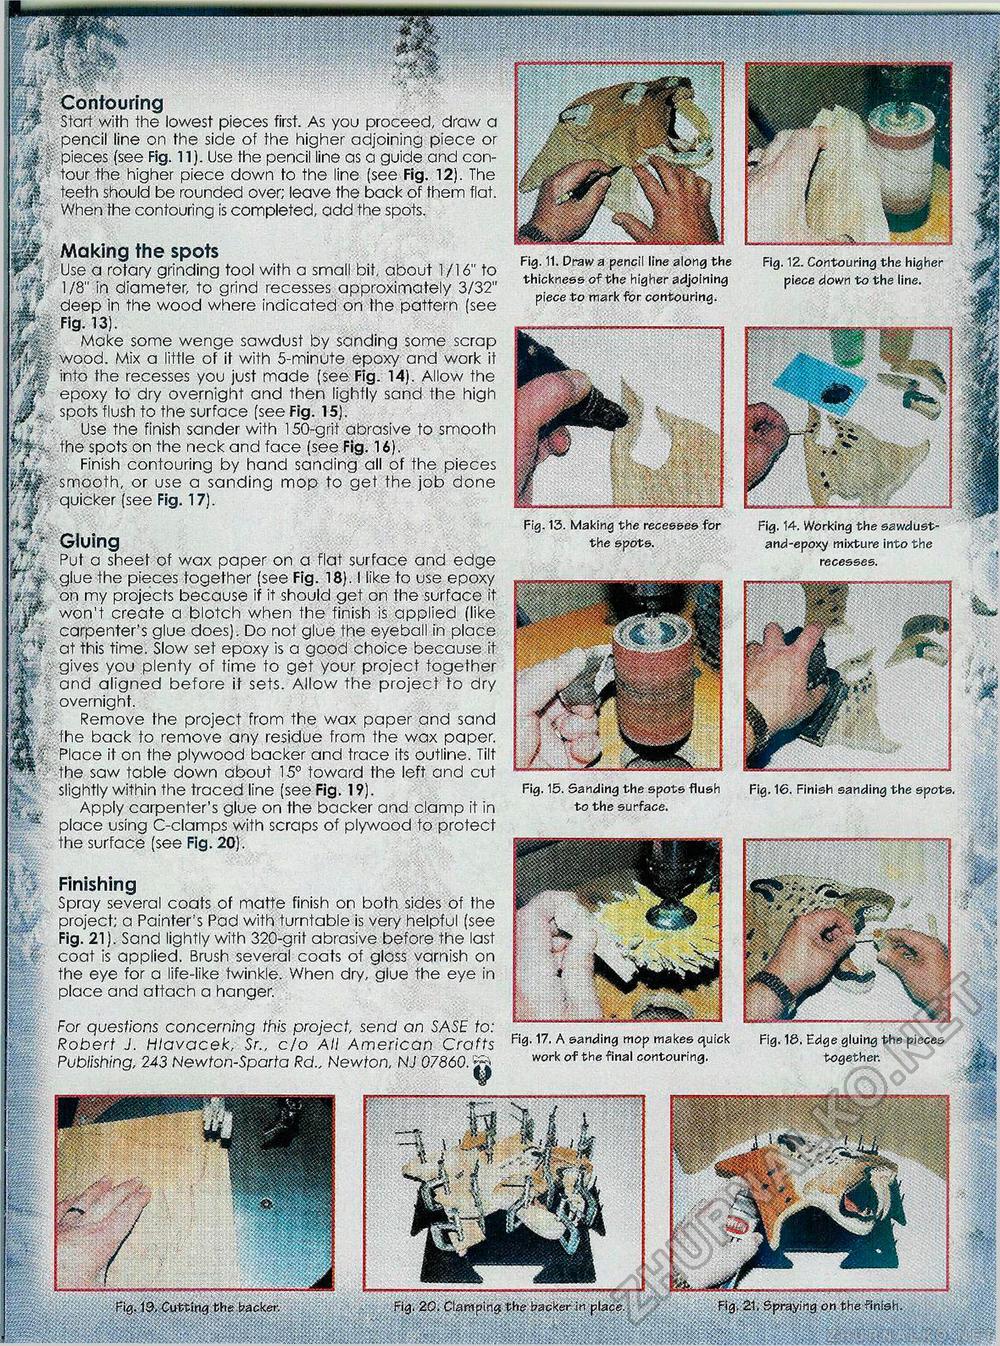
pj Contouring W^ Start with the lowest pieces first. As you proceed, draw a : pencil line on the side of the higher adjoining piece or j J§: I pieces (see Fig. 11). Use the pencil line as a guide and con-tour the higher piece down to the line (see Fig. 12). The r * |f teeth should be rounded over; leave the back of them flat. When the contouring is completed, add the spots. 0!' Making the spots Use a rotary grinding tool with a small bit, about 1/16" to '■^S' 1/8" in diameter, to grind recesses approximately 3/32" j deep in the wood where indicatea on the pattern (see rjr-;: Fig. 13). Make some wenge sawdust by sanding some scrap W0.|| wood. Mix a little of it with 5-minute epoxy and work it into the recesses you just made (see Fig. 14). Allow the t epoxy to dry overnight and then lightly sand the high Jr., spots flush to the surface (see Fig. 15). r ■' Use the finish sander with 150-grit abrasive to smooth fefthe spots on the neck and face (see Fig. 16). . £ Finish contouring by hand sanding all of the pieces ppjfesmooth, or use a sanding mop to get the job done / ' f;' quicker (see Fig. 17). Fig. 11. Draw a pencil line along the thickness of the higher adjoining piece to mark for contouring. Fig. 12. Contouring the higher piece down to the line. Fig. 13. Making the recesses for the spots. Fig. 14. Working the sawdust-and-epoxy mixture into the recesses. Gluing f.. Put a sheet of wax paper on a flat surface and edge ■f- glue the pieces together (see Fig. 18). I like to use epoxy A on my projects because if it should get on the surface it W'y won't create a blotch when the finish is applied (like carpenter's glue does). Do not glue the eyeball in place at this time. Slow set epoxy is a good choice because it | ■ gives you plenty of time to get your project together 5 . and aligned before it sets. Allow the project to dry | v overnight. i ; Remove the project from the wax paper and sand | the back to remove any residue from the wax paper. |C Place it on the plywood backer and trace its outline. Tilt * the saw table down about 15° toward the left and cut slightly within the traced line (see Fig. 19). L Apply carpenter's glue on the backer and clamp it in place using C-clamps with scraps of plywood to protect the surface (see Fig. 20). ^gmm Fig. 15. Sanding the spots flush to the surface. Fig. 16. Finish sanding the spots. Finishing Spray several coats of matte finish on both sides of the project; a Painter's Pad with turntable is very helpful (see Fig. 21). Sand lightly with 320-grit abrasive before the last coat is applied. Brush several coats of gloss varnish on the eye for a life-like twinkle. When dry, glue the eye in place and attach a hanger. For questions concerning this project, send an SASE to: Robert J. Hiavacek, Sr., c/o All American Crafts Publishing, 243 Newton-Sparta Rd„ Newton, NJ 07860. Fig. 17. A sanding mop makes quick work of the final contouring. Fig. 18. Edge gluing the pieces together. rig. 20. Clamping the backer in place. Fig. 19. Cutting the backer. |


