Creative Woodworks & crafts 2003-11, страница 50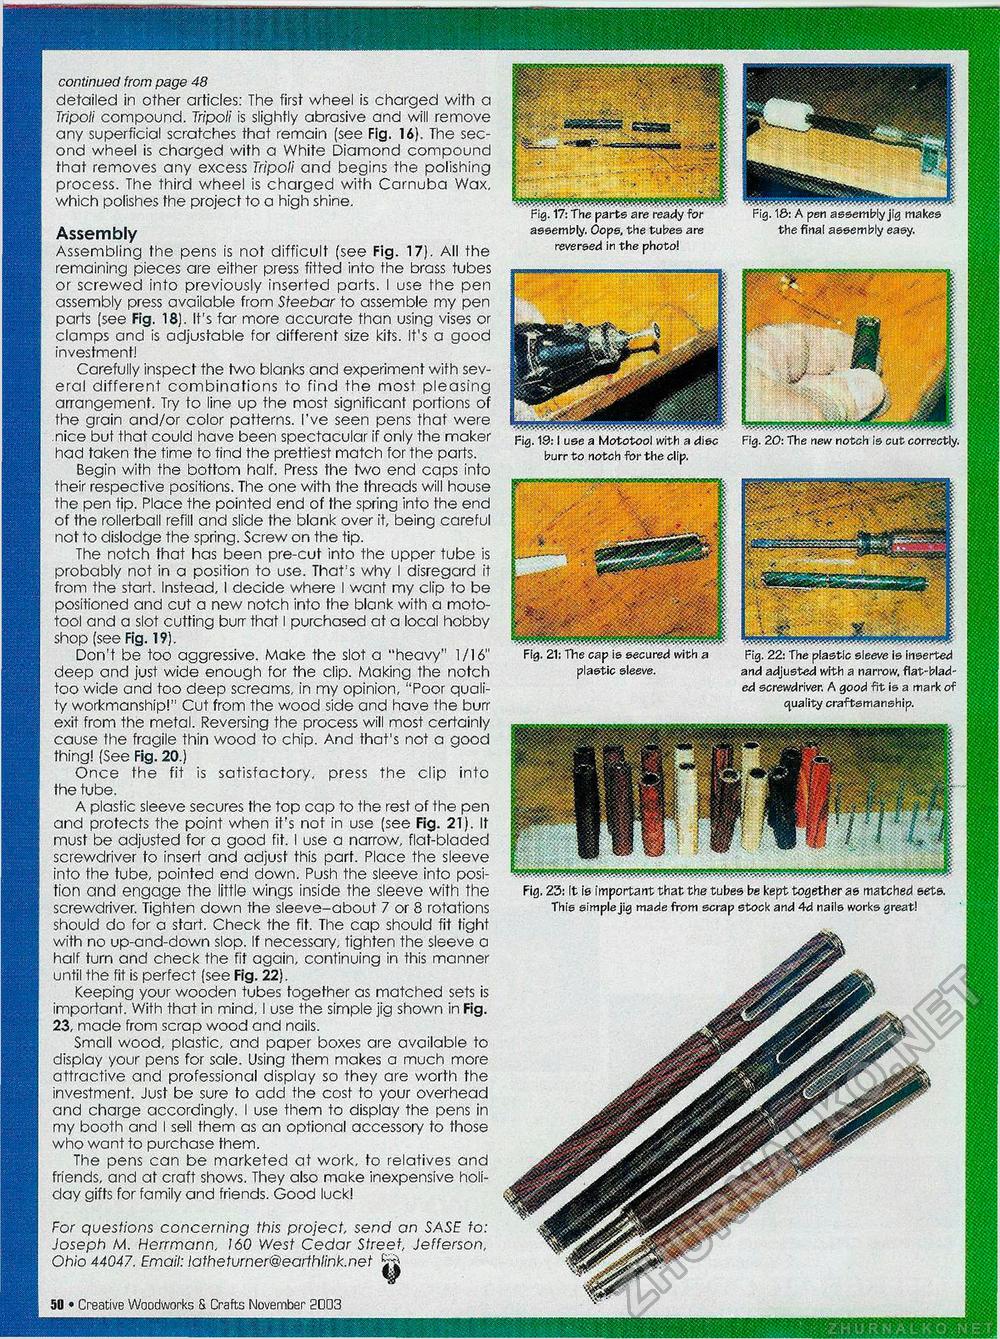
continued from page 48 detailed in other articles: The first wheel is charged with a Tripoli compound. Tripoli is slightly abrasive and will remove any superficial scratches that remain (see Fig. 16). The second wheel is charged with a White Diamond compound that removes any excess Tripoli and begins the polishing process. The third wheel is charged with Carnuba Wax. which polishes the project to a high shine. Assembly Assembling fhe pens is not difficult (see Fig. 17). All the remaining pieces are either press fitted into the brass tubes or screwed into previously inserted parts. I use the pen assembly press available from Steebar to assemble my pen parts [see Fig. 18). It's far more accurate than using vises or clamps and is adjustable for different size kits. It's a good investment! Carefully inspect the two blanks and experiment with several different combinations to find the most pleasing arrangement. Try to line up the most significant portions of the grain and/or color patterns. I've seen pens that were nice but that could have been spectacular if only the maker had taken the time to tind the prettiest match for the parts. Begin with the bottom half. Press the two end caps into their respective positions. The one with the threads will house the pen tip. Place the pointed end of the spring into the end of the rollerball refill and slide the blank over it, being careful not to dislodge the spring. Screw on the tip. The notch that has been pre-cut into the upper tube is probably not in a position to use. That's why I disregard it from the start. Instead, I decide where I want my clip to be positioned and cut a new notch into the blank with a moto-tool and a slot cutting burr that I purchased at a local hobby shop (see Fig. 19). Don't be too aggressive. Make the slot a "heavy" 1/16" deep and just wide enough for the clip. Making the notch too wide and too deep screams, in my opinion, "Poor quality workmanship!" Cut from the wood side and have the burr exit from the metal. Reversing the process will most certainly cause the fragile thin wood to chip. And that's not a good thing! (See Fig. 20.) Once the fit is satisfactory, press the clip into the tube. A plastic sleeve secures the top cap to the rest of the pen and protects the point when it's not in use (see Fig. 21). It must be adjusted for a good fit. I use a narrow, flat-bladed screwdriver to insert and adjust this part. Place the sleeve into the tube, pointed end down. Push the sleeve into position and engage the little wings inside the sleeve with the screwdriver. Tighten down the sleeve-about 7 or 8 rotations should do for a start. Check the fit. The cap should fit tight with no up-and-down slop. If necessary, tighten the sleeve a half turn and check the fit again, continuing in this manner until the fit is perfect (see Fig. 22). Keeping your wooden tubes together as matched sets is important. With that in mind, I use the simple jig shown in Fig. 23, made from scrap wood and nails. Small wood, plastic, and paper boxes are available to display your pens for sale. Using them makes a much more attractive and professional display so they are worth the investment. Just be sure to add the cost to your overhead and charge accordingly. I use them to display the pens in my booth and I sell them as an optional accessory to those who want to purchase them. The pens can be marketed at work, to relatives and friends, and at craft shows. They also make inexpensive holiday gifts for family and friends. Good luck! For questions concerning this project, send an SASE to: Joseph M. Herrmann, 160 West Cedar Street, Jefferson, Ohio 44047. Email: latheturner@earfhlink.net 56 • Creative Woodworks 8. Crafts November 2003 rig. I■ w yai i*s> <aio fcatAy mi assembly. Oops, the tubes are reversed in the photo! Fig. 18: A pen assembly jig makes the final assembly easy. Fig. 19:1 use a Mototool with a disc burr to notch for the clip. Fig. 20: The new notch is cut correctly. Fig. 22: The plastic sleeve Is inserted and adjusted with a narrow, flat-bladed screwdriver. A good fit is a mark of quality craftsmanship. Fig. 23: It ie important that the tubes be kept together as matched sets. This simple jig made from scrap stock and 4d nails works great! |


