Creative Woodworks & crafts 2004-01, страница 18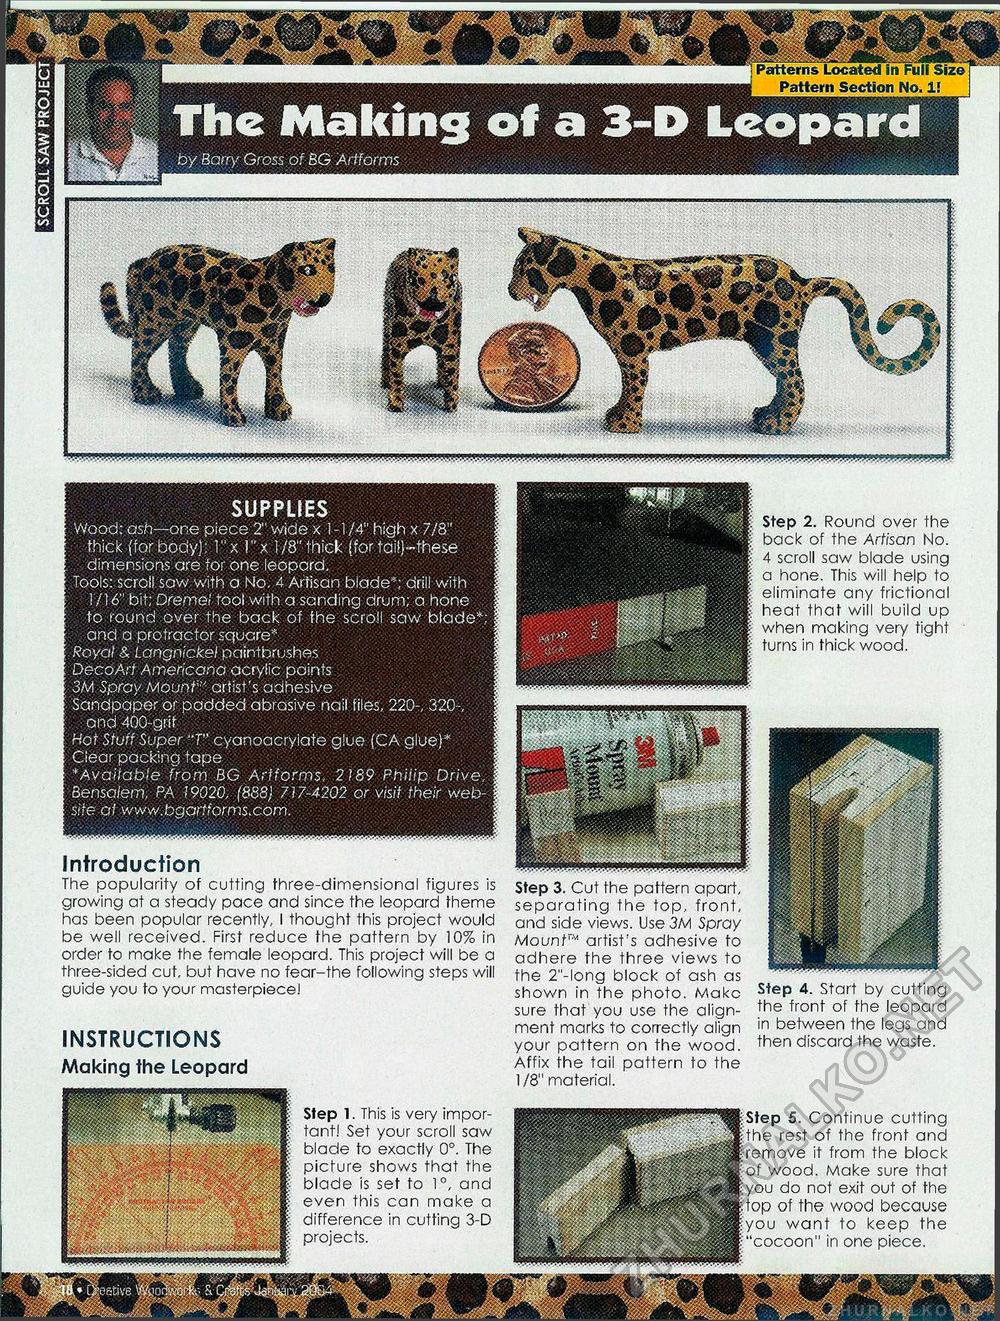
The Making of a 3-D Leopard by Barry Gross of BG Artforms Patterns Located in Full Size Pattern Section No. 1! SUPPLIES Wood: ash—one piece 2" wide x 1-1/4" high x 7/8" thick (for body); l"x i"x 1/8" thick (for tail)-these dimensions are for one leopara. Tools: scroll saw with a No. 4 Artisan blade*; drill with 1/16" bit; Dremel tool with a sanding drum; a hone to round over the back of the scroll saw blade*; and a protractor square* Royal & Langnlckel paintbrushes DecoArt Americana acrylic paints 3M Spray Mounf" artist's adhesive Sandpaper or padded abrasive nail files, 220-, 320-, and 400-grif Hot Stuff Super "T" cyanoacryiate glue (CA glue)* Ciear packing tape * Available from BG Artforms, 2189 Fhilip Drive. Bensalem, PA 19020, (888J 717-4202 or visit their website af www.bgartforms.com. Step 2. Round over the back of the Artisan No. 4 scroll saw blade using a hone. This will help to eliminate any frictional heat that will build up when making very tight turns in thick wood. Introduction The popularity of cutting three-dimensional figures is growing at a steady pace and since the leopard theme has been popular recently, I thought this project would be well received. First reduce the pattern by 10% in order to make the female leopard. This project will be a three-sided cut, but have no fear-the following steps will guide you to your masterpiece! INSTRUCTIONS Making the Leopard Step 3. Cut the pattern apart, separating the top, front, and side views. Use 3M Spray Mount™ artist's adhesive to adhere the three views to the 2"-long block of ash as shown in the photo. Make sure that you use the alignment marks to correctly align your pattern on the wood. Affix the tail pattern to the 1/8" material. Step 4. Start by cutting the front of the leopard in between the legs and then discard the waste. Step 1. This is very important! Set your scroll saw blade to exactly 0°. The picture shows that the blade is set to 1°, and even this can make a difference in cutting 3-D projects. 5. Continue cutting rest of the front and it from the block wood. Make sure that do not exit out of the of the wood because u want to keep the 'cocoon" in one piece. |


