Creative Woodworks & crafts 2004-01, страница 19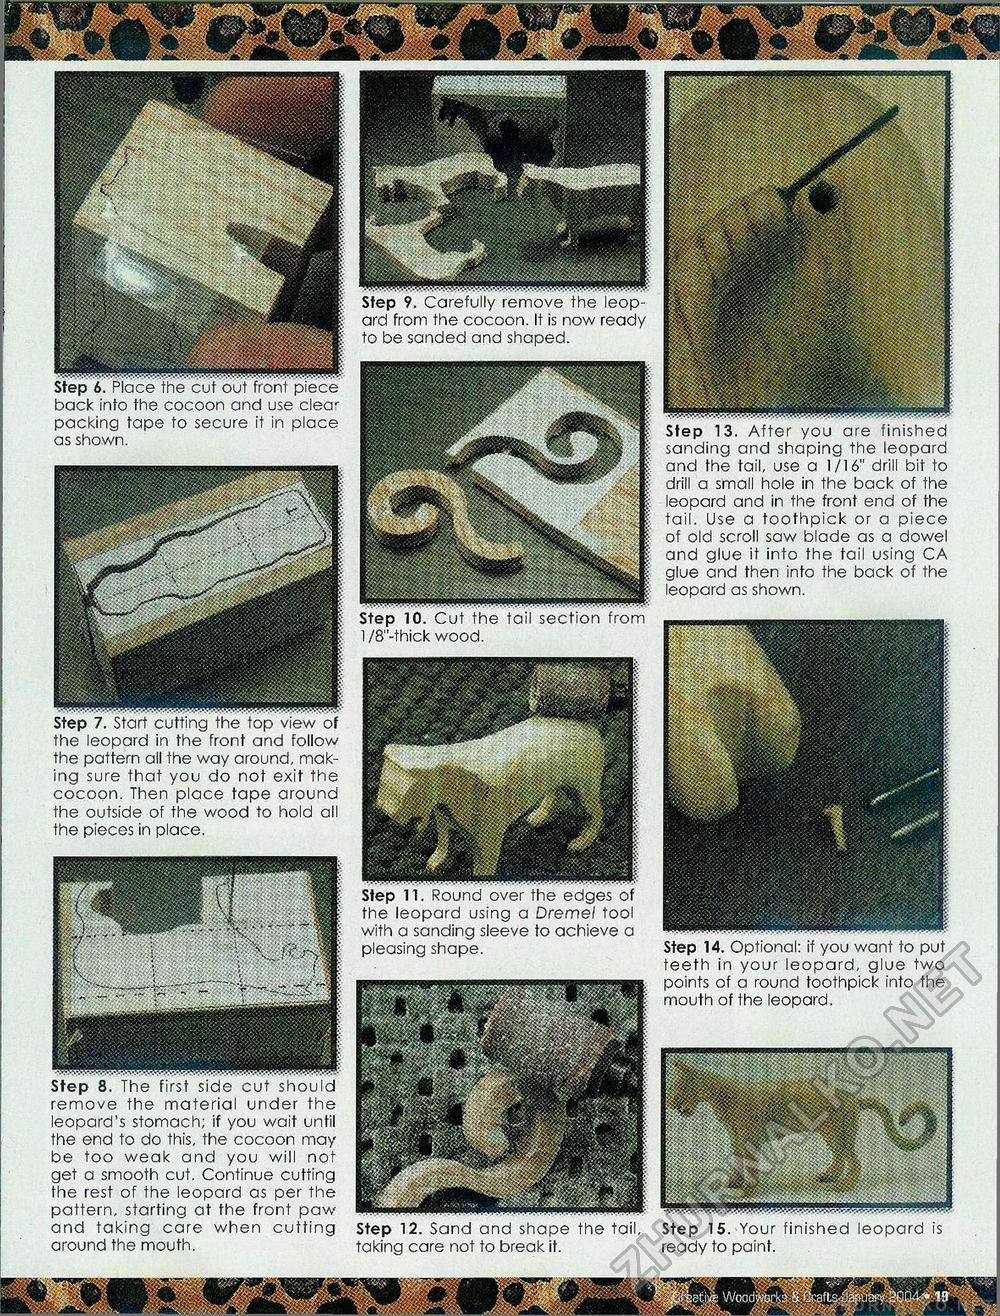
back into the cocoon and use clea' packing tape to secure it in place as shown. ard from the cocoon. It is now ready to be sanded and shaped. the leopard using a Dremel tool with a sanding sleeve to achieve a pleasing shape. Step 12. Sand and shape the tail, taking care not to break it. Step 14. Optional: if you want to put teeth in your leopard, glue two points of a round toothpick into the mouth of the leopard. Step 15. Your finished leopard is ready to paint. l/8"-thick wood. Step 8. The first side cut should remove the material under the leopard's stomach; if you wait until the end to do this, the cocoon may be too weak and you will not get a smooth cut. Continue cutting the rest of the leopard as per the pattern, starting at the front paw and taking care when cutting around the mouth. Step 13. After you are finished sanding and shaping the leopard and the tail, use a 1/16" drill bit to drill a small hole in the back of the leopard and in the front end of the tail. Use a toothpick or a piece of old scroll saw blade as a dowel and glue it into the tail using CA glue and then into the back of the leopard as shown. the leopard in the front and follow the pattern all the way around, making sure that you do not exit the cocoon. Then place tape around the outside of the wood to hold all the pieces in place. |


