Creative Woodworks & crafts 2004-01, страница 26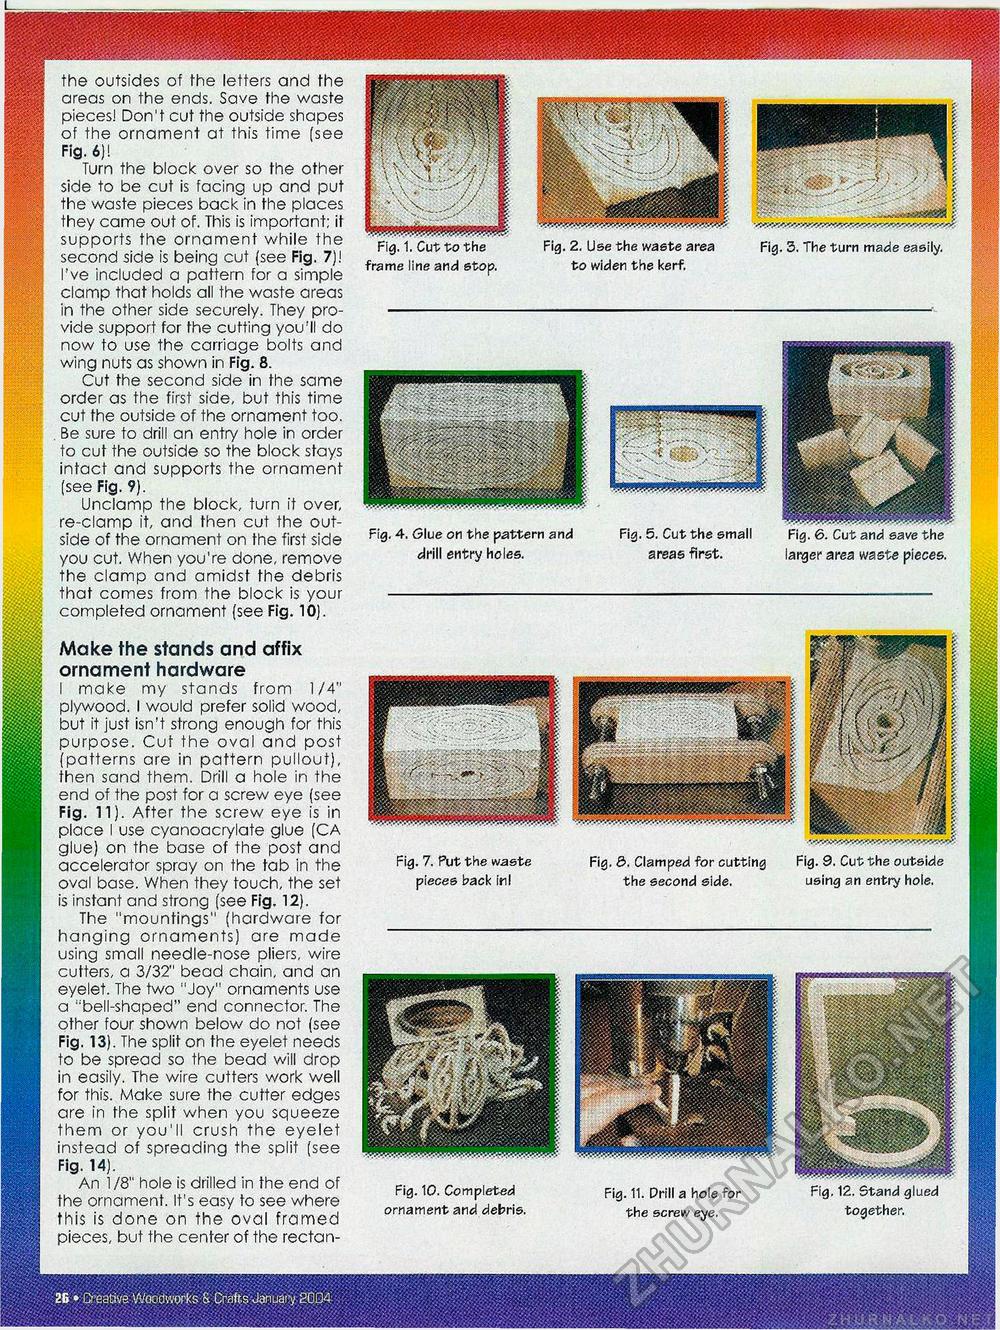
Fig, 1. Cut to the Fig. 10. Completed ornament and debris. Fig. 12. Stand glued together. Fig. 11. Drill a hole for the screw eye. Make the stands and affix ornament hardware I make my stands from 1/4" plywood. I would prefer solid wood, but it just isn't strong enough for this purpose. Cut the oval and post (patterns are in pattern pullout), then sand them. Drill a hole in the end of the post for a screw eye (see Fig. 11). After the screw eye is in place I use cyanoacrylate glue (CA glue) on the base of the post and accelerator spray on the tab in the oval base. When they touch, the set is instant and strong (see Fig. 12). The "mountings" (hardware for hanging ornaments) are made using small needle-nose pliers, wire cutters, a 3/32" bead chain, and an eyelet. The two "Joy" ornaments use a "bell-shaped" end connector. The other four shown below do not (see Fig. 13). The split on the eyelet needs to be spread so the bead will drop in easily. The wire cutters work well for this. Make sure the cutter edges are in the split when you squeeze them or you'll crush the eyelet instead of spreading the split [see Fig. 14). An 1/8" hole is drilled in the end of the ornament. It's easy to see where this is done on the oval framed pieces, but the center of the rectan- Fig. 7. Put the waste pieces back inl Fig. &. Clamped for cutting the second side. the outsides of the letters and the areas on the ends. Save the waste pieces! Don't cut the outside shapes of the ornament at this time [see Fig. 6)! Turn the block over so the other side to be cut is facing up and put the waste pieces back in the places they came out of. This is important; it supports the ornament while the second side is being cut (see Fig. 7)! I've included a pattern for a simple clamp that holds all the waste areas in the other side securely. They provide support for the cutting you'll do now to use the carriage bolts and wing nuts as shown in Fig. 8. Cut the second side in the same order as the first side, but this time cut the outside of the ornament too. . Be sure to drill an entry hole in order to cut the outside so the block stays intact and supports the ornament (see Fig. 9). Unclamp the block, turn it over, re-clamp it, and then cut the outside of the ornament on the first side you cut. When you're done, remove the clamp and amidst the debris that comes from the block is your completed ornament (see Fig. 10). Fig. 5. Cut the small areas first. Fig. 9. Cut the outside using an entry hole. Fig. 3. The turn made easily. Fig. 4. Glue on the pattern and drill entry holes. larger area waste pieces. |


