Creative Woodworks & crafts 2004-01, страница 27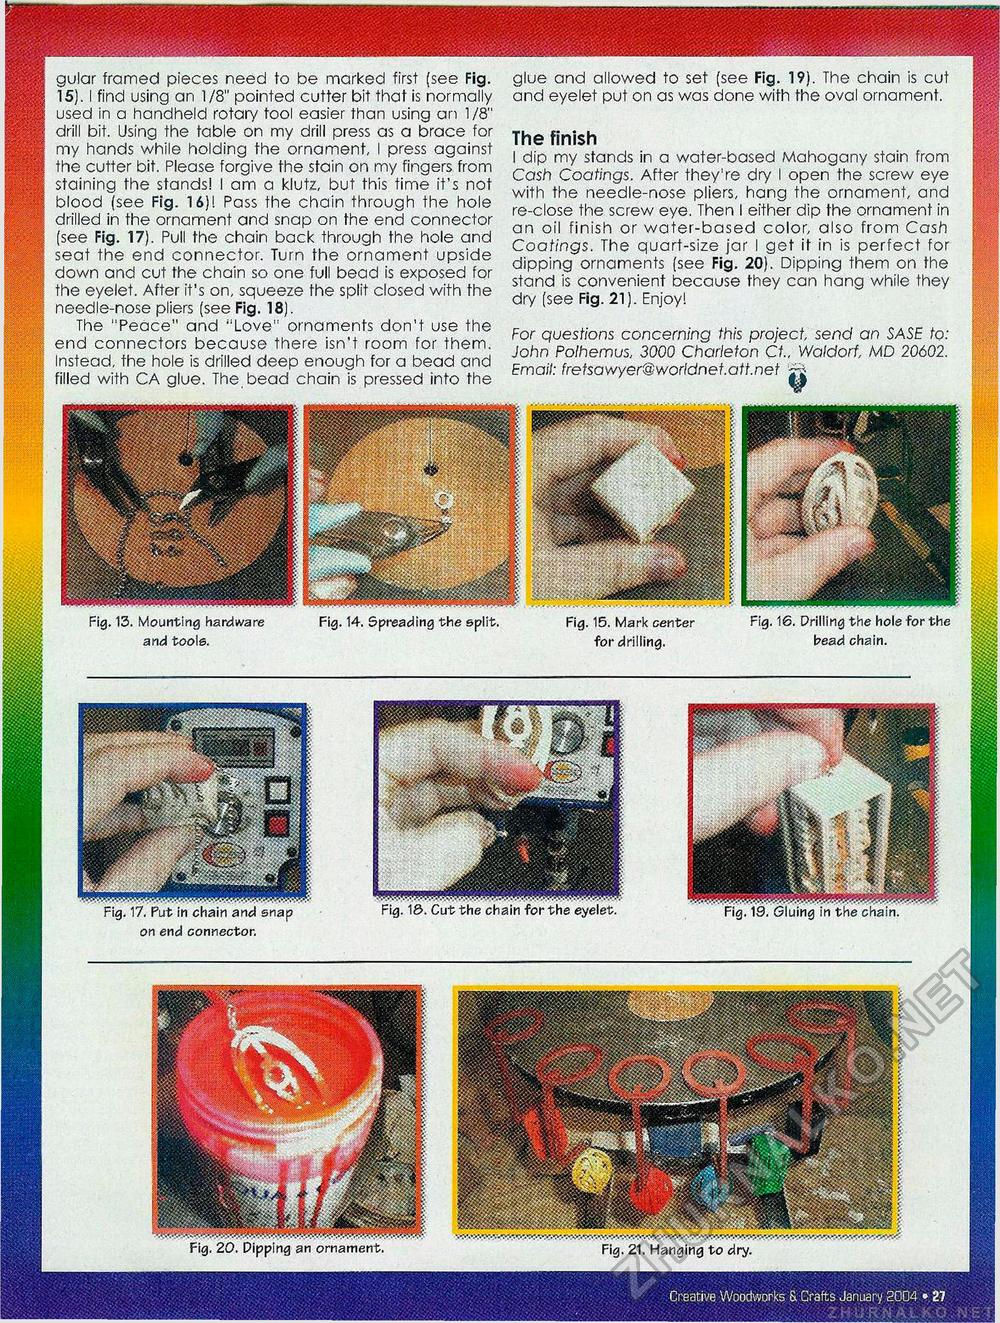
Fig. 18. Cut the chain for the eyelet. Fig. 20. Pipping an ornament. Fig. 21. Hanging to dry. glue and allowed to set (see Fig. 19). The chain is cut and eyelet put on as was done with the oval ornament. gular framed pieces need to be marked first (see Fig. 15). I find using an 1/8" pointed cutter bit that is normally used in a handheld rotary tool easier than using an 1/8" drill bit. Using the table on my drill press as a brace for my hands while holding the ornament, I press against the cutter bit. Please forgive the stain on my fingers from staining the stands! I am a klutz, but this time it's not blood (see Fig. 16)! Pass the chain through the hole drilled in the ornament and snap on the end connector (see Fig. 17). Pull the chain back through the hole and seat the end connector. Turn the ornament upside down and cut the chain so one full bead is exposed for the eyelet. After it's on, squeeze the split closed with the needle-nose pliers (see Fig. 18). The "Peace" and ''Love" ornaments don't use the end connectors because there isn't room for them. Instead, the hole is drilled deep enough for a bead and filled with CA glue. The, bead chain is pressed into the Fig. 13. Mounting hardware Fig. 14. Spreading the split, and tools. The finish I dip my stands in a water-based Mahogany stain from Cash Coatings. After they're dry I open the screw eye with the needle-nose pliers, hang the ornament, and re-close the screw eye. Then I either dip the ornament in an oil finish or water-based color, also from Cash Coatings. The quart-size jar I get it in is perfect for dipping ornaments (see Fig. 20). Dipping them on the stand is convenient because they can hang while they dry (see Fig. 21). Enjoy! For questions concerning this project send an SASE to: John Polhemus, 3000 Charleton Ct„ Waldorf, MD 20602. Email: fretsawyer@woridnef.att.net rj Fig. 15. Mark center for drilling. Fig. 16. Prilling the hole for the bead chain. 8S5g Fig. 17. Put in chain and snap on end connector. |


