Creative Woodworks & crafts 2004-01, страница 58
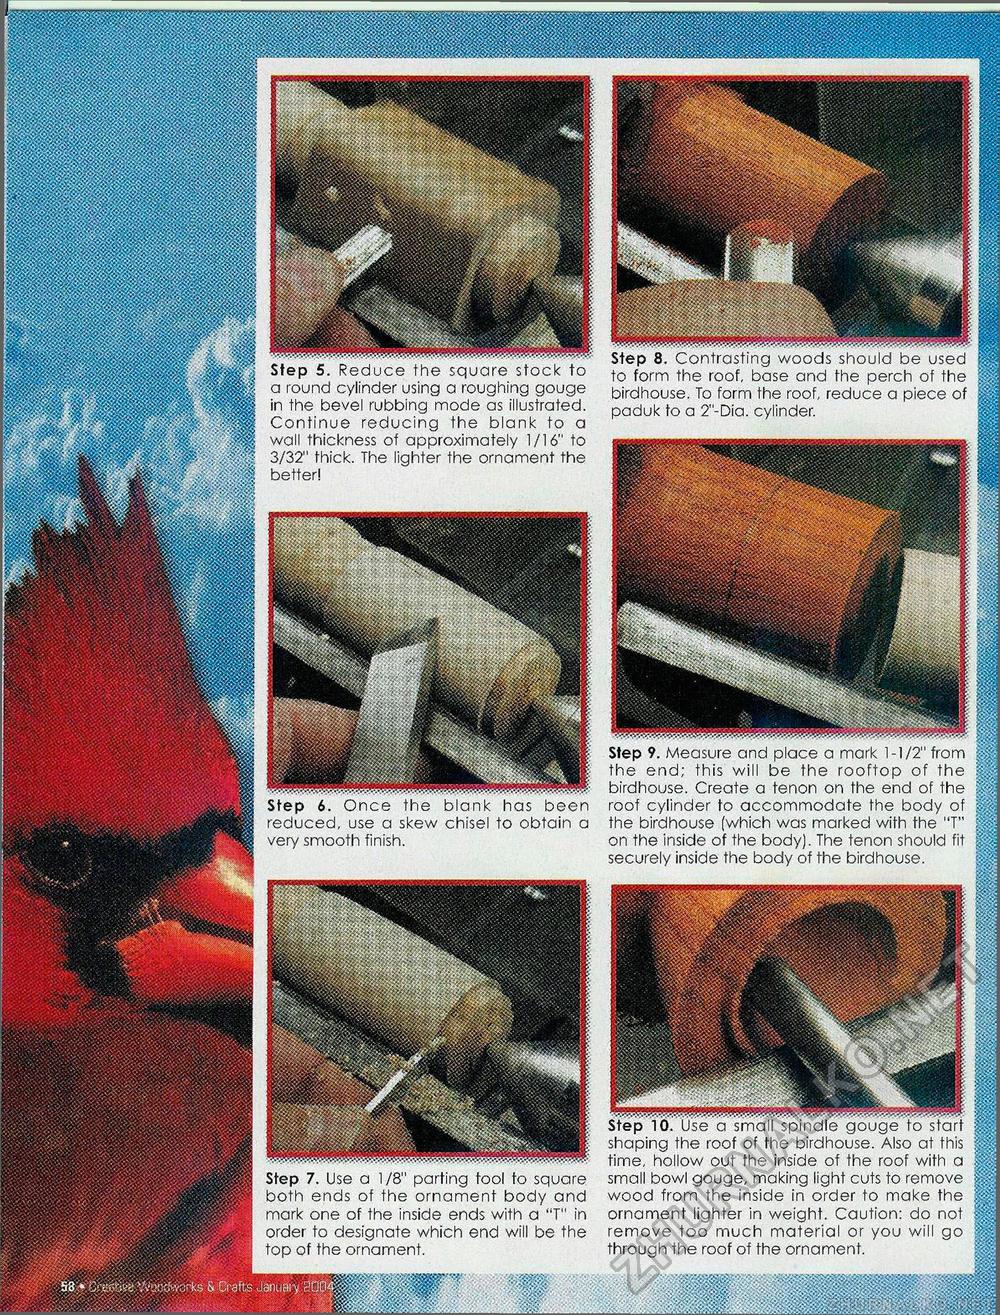
Step 8. Contrasting woods should be used to form the roof, base and the perch of the birdhouse. To form the roof, reduce a piece of paduk to a 2"-Dia. cylinder. Step 5. Reduce the square stock to a round cylinder using a roughing gouge in the bevel rubbing mode as illustrated. Continue reducing the blank to a wall thickness of approximately 1/16" to 3/32" thick. The lighter the ornament the better! Step 9. Measure and place a mark 1-1/2" from the end; this will be the rooftop of the birdhouse. Create a tenon on the end of the roof cylinder to accommodate the body of the birdhouse (which was marked with the "T" on the inside of the body). The tenon should fit securely inside the body of the birdhouse. Step 6. Once the blank has been reduced, use a skew chisel to obtain a very smooth finish. Step 10. Use a small spindle gouge to start shaping the roof of the birdhouse. Also at this time, hollow out the inside of the roof with a small bowl gouge, making light cuts to remove wood from the inside in order to make the ornament lighter in weight. Caution: do not remove too much material or you will go through the roof of the ornament. !!|!SSI!1PP Step 7. Use a 1/8" parting fool fo square both ends of the ornament body and mark one of the inside ends with a "T" in order to designate which end will be the top of the ornament. |


