Creative Woodworks & crafts 2004-03, страница 49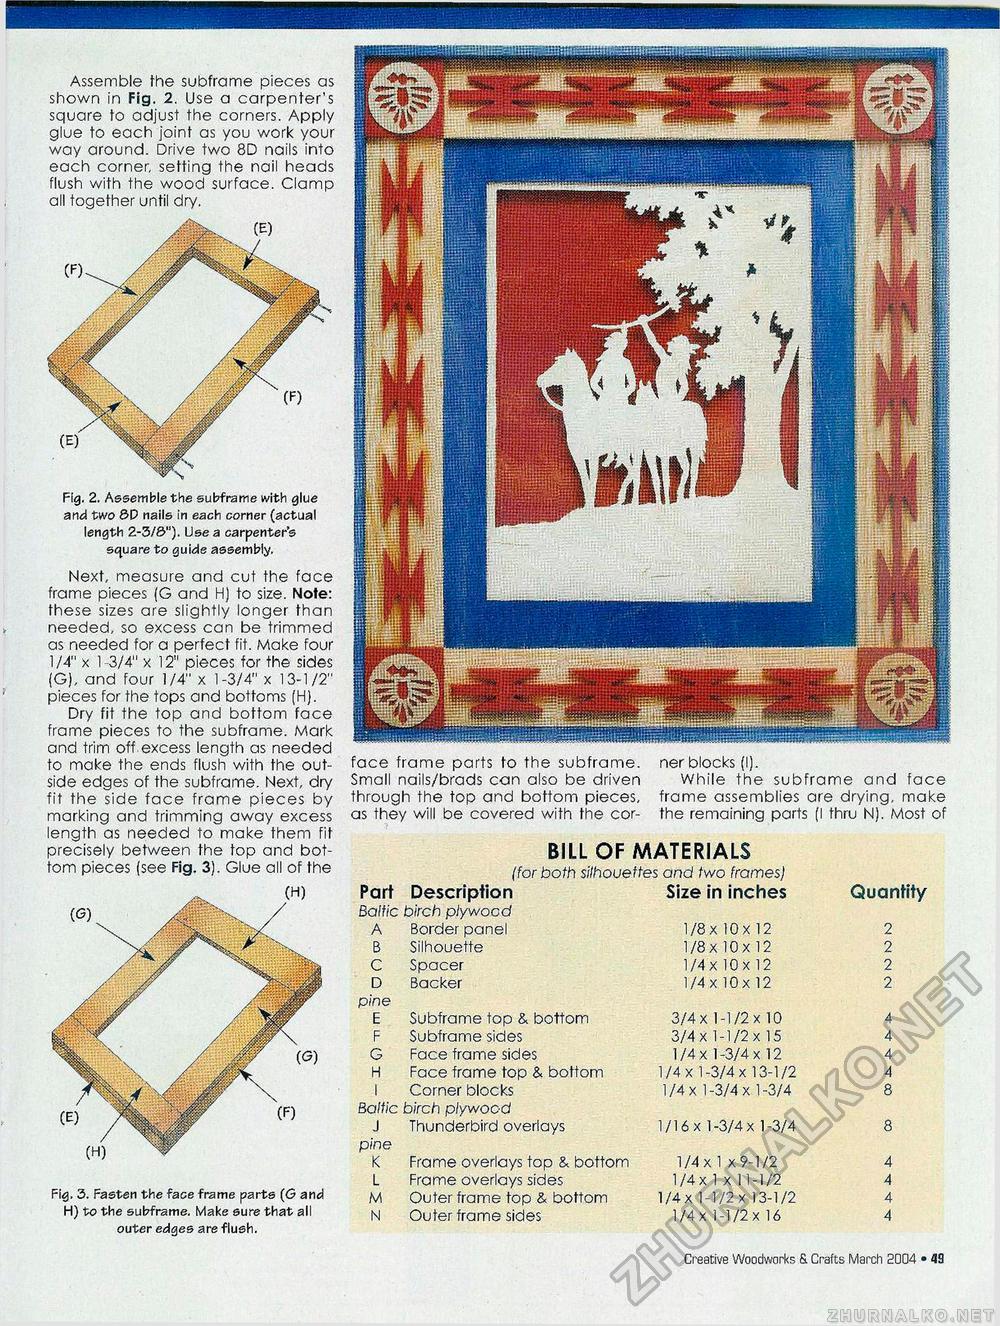
BILL OF MATERIALS (for both silhouettes and two frames) BILL OF MATERIALS (for both silhouettes and two frames)
Fig, 3. Fasten the face frame parts (G and H) to the subframe. Make sure that all outer edges are flush. face frame parts to the subframe. Small nails/brads can also be driven through the top and bottom pieces, as they will be covered with the cor ner blocks (I). While the subframe and face frame assemblies are drying, make the remaining parts (I thru N). Most of Fig. 2. Assemble the subframe with glue and two 8P nails in each corner (actual length 2-3/8"). Use a carpenter's square to guide assembly. Next, measure and cut the face frame pieces (G and H) to size. Note: these sizes are slightly longer than needed, so excess can be trimmed as needed for a perfect fit. Make four 1/4" x 13/4" x 12" pieces for the sides (G), and four 1/4" x 1-3/4" x 13-1/2" pieces for the tops and bottoms (H). Dry fit the top and bottom face frame pieces to the subframe. Mark and trim off excess length as needed to make the ends flush with the outside edges of the subframe. Next, dry fit the side face frame pieces by marking and trimming away excess length as needed to make them fit precisely between the top and bottom pieces (see Fig. 3). Glue all of the Assemble the subframe pieces as shown in Fig. 2. Use a carpenter's square to adjust the corners. Apply glue to each joint as you work your way around. Drive two 8D nails into each corner, setting the nail heads flush with the wood surface. Clamp all together until dry. 14 • Creative Woodworks S. Crafts March 2004 |
||||||||||||||||||||||||||||||||||||||||||||||||||||||||||||||||||||||||||||


