Creative Woodworks & crafts 2004-03, страница 48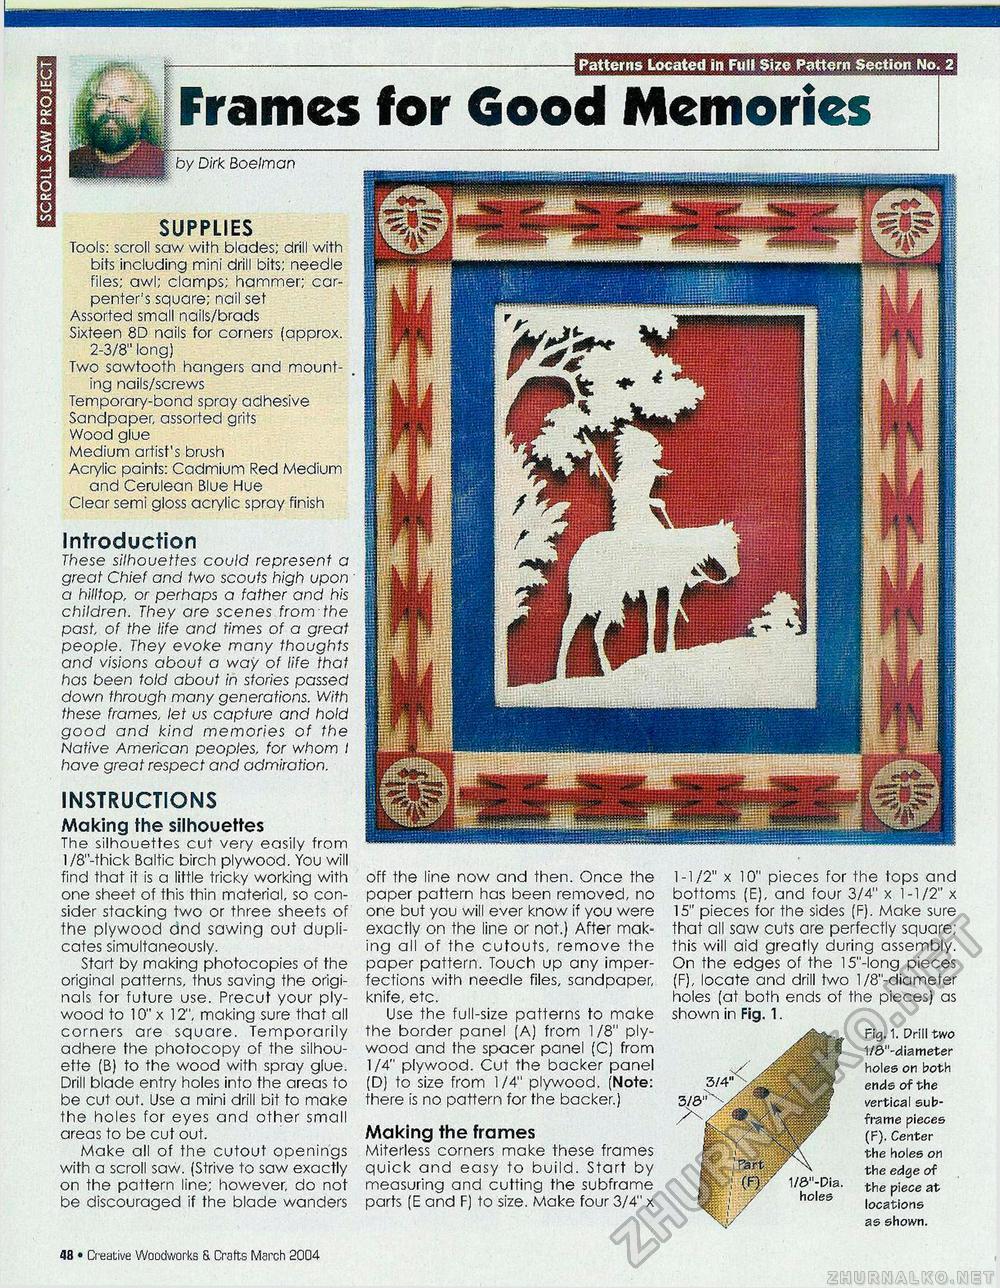
Patterns Located in Fh» Size Pattern Section No. 2 Frames for Good Memories by Dirk Boelman SUPPLIES Tools: scroll saw with blades; drill with bits including mini drill bits; needle files; awl; clamps; hammer; carpenter's square; nail set Assorted small nails/brads Sixteen 8D nails for corners fapprox. 2-3/8" long) Two sawtooth hangers and mounting nails/screws Temporary-bond spray adhesive Sandpaper, assorted grits Wood glue Medium artist's brush Acrylic paints: Cadmium Red Medium and Cerulean Blue Hue Clear semi gloss acrylic spray finish Introduction These silhouettes could represent a great Chief and two scouts high upon a hilltop, or perhaps a father and his children. They are scenes from the past, of the life and times of a great people. They evoke many thoughts and visions about a way of life that has been told about in stories passed down through many generations. With these frames, let us capture and hold good and kind memories of the Native American peoples, for whom I have great respect and admiration. INSTRUCTIONS Making the silhouettes The silhouettes cut very easily from l/8"-thick Baltic birch plywood. You will find that it is a little tricky working with one sheet of this thin material, so consider stacking two or three sheets of the plywood dnd sawing out duplicates simultaneously. Start by making photocopies of the original patterns, thus saving the originals for future use. Precut your plywood to 10" x 12", making sure that all corners are square. Temporarily adhere the photocopy of the silhouette (B) to the wood with spray glue. Drill blade entry holes into the areas to be cut out. Use a mini drill bit to make the holes for eyes and other small areas to be cut out. Make all of the cutout openings with a scroll saw. (Strive to saw exactly on the pattern line; however, do not be discouraged if the blade wanders off the line now and then. Once the paper pattern has been removed, no one but you will ever know if you were exactly on the line or not.) After making all of the cutouts, remove the paper pattern. Touch up any imperfections with needle files, sandpaper, knife, etc. Use the full-size patterns to make the border panel (A) from 1/8" plywood and the spacer panel (C) from 1/4" plywood. Cut the backer panel (D) to size from 1/4" plywood. (Note: there is no pattern for the backer.) Making the frames Miterless corners make these frames quick and easy to build. Start by measuring and cutting the subframe parts (E and F) to size. Make four 3/4" x 1-1/2" x 10" pieces for the tops and bottoms (E), and four 3/4" x 1-1/2" x 15" pieces for the sides (F). Make sure that all saw cuts are perfectly square; this will aid greatly during assembly. On the edges of the l5"-long pieces (F), locate and drill two 1 /8"-diamefer holes (at both ends of the pieces) as shown in Fig. 1. Fig. 1. Drill two 1/0"-diameter holes on both ends of the vertical sub-frame pieces (F). Center the holes on the edge of the piece at locations as shown. 1/0"-Dia. holes 14 • Creative Woodworks S. Crafts March 2004 |


