Creative Woodworks & crafts 2004-03, страница 56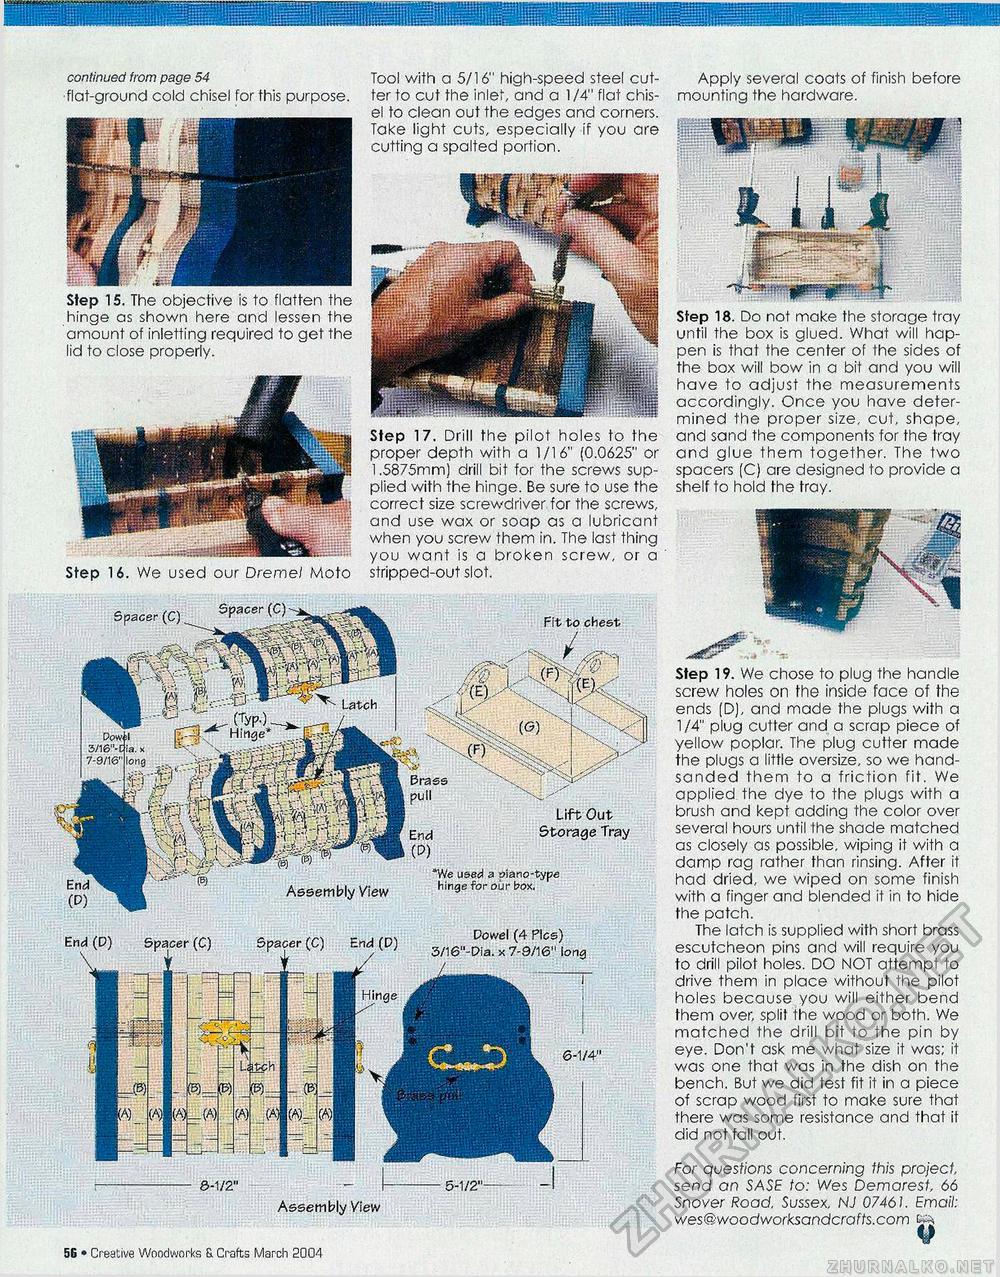
Fit to chest Latch "We used a £>iano-type hinge for our box, Assembly View Dowel (4 Pics) 3/16"-Dia.x 7-9/16" long End (D) Spacer (C) Assembly View continued from page 54 ■flat-ground cold chisel for this purpose. Tool with a 5/16" high-speed steel cutter to cut the inlet, and a 1/4" flat chisel to clean out the edges and corners. Take light cuts, especially if you are cutting a spalted portion. Apply several coats of finish before mounting the hardware. Step 19. We chose to plug the handle screw holes on the inside face of the ends (D), and made the plugs with a 1 /4" plug cutter and a scrap piece of yellow poplar. The plug cutter made the plugs a little oversize, so we hand-sanded them to a friction fit. We applied the dye to the plugs with a brush and kept adding the color over several hours until the shade matched as closely as possible, wiping it with a damp rag rather than rinsing. After it had dried, we wiped on some finish with a finger and blended it in to hide the patch. The latch is supplied with short brass escutcheon pins and will require you to drill pilot holes. DO NOT attempt to drive them in place without the pilot holes because you will either bend them over, split the wood or both. We matched the drill bit to the pin by eye. Don't ask me what size it was; it was one that was in the dish on the bench. But we did test fit it in a piece of scrap wood first to make sure that there was some resistance and that it did not fall out. For questions concerning this project, send an SASE to: Wes Demarest, 66 Snover Road, Sussex, NJ 07461. Email: wes@woodworksandcrafts.com ka ¥ Step 17. Drill the pilot holes to the proper depth with a 1/16" (0.0625" or 1.5875mm) drill bit for the screws supplied with the hinge. Be sure to use the correct size screwdriver for the screws, and use wax or soap as a lubricant when you screw them in. The last thing you want is a broken screw, or a stripped-out slot. Step 18. Do not make the storage tray until the box is glued. What will happen is that the center of the sides of the box will bow in a bit and you will have to adjust the measurements accordingly. Once you have determined the proper size, cut, shape, and sand the components for the tray and glue them together. The two spacers (C) are designed to provide a shelf to hold the tray. 14 • Creative Woodworks S. Crafts March 2004 Step 15. The objective is to flatten the hinge as shown here and lessen the amount of inletting required to get the lid to close properly. Step 16. We used our Dremel Moto |


