Creative Woodworks & crafts 2004-03, страница 62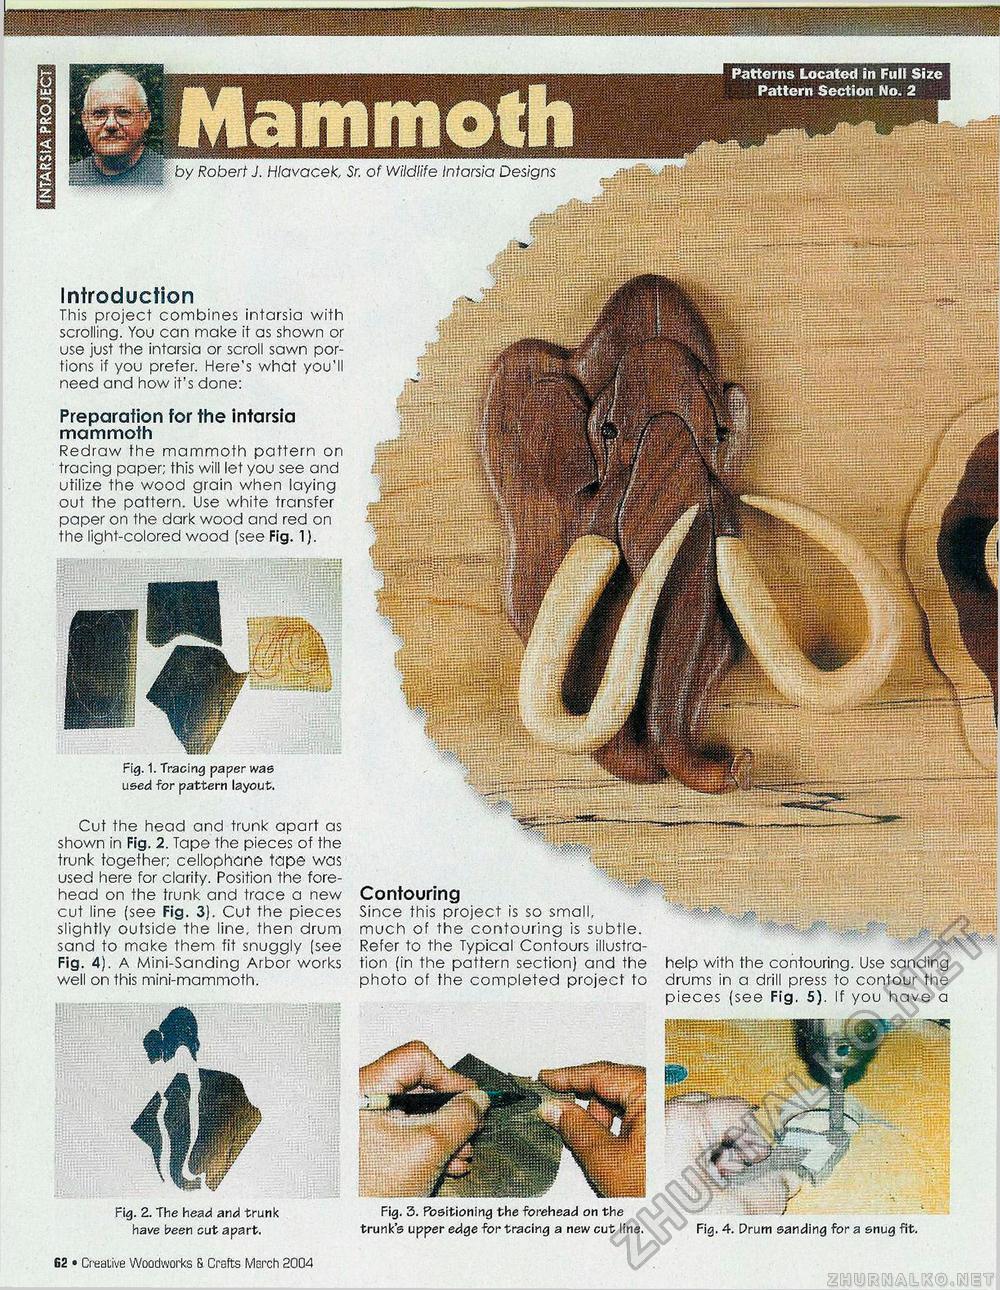
Patterns Located in Full Size Pattern Section No. 2 Mammothby Robert J. Hlavacek, Sr. of Wildlife Intarsia Designs wmmmm Introduction This project combines intarsia with scrolling. You can make it as shown or use just the intarsia or scroll sawn portions if you prefer. Here's what you'll need and how it's done: Preparation for the intarsia mammoth Redraw the mammoth pattern on tracing paper; this will let you see and utilize the wood grain when laying out the pattern. Use white transfer paper on the dark wood and red on the light-colored wood (see Fig. 1). Fig. 1. Tracing paper was used for pattern layout. Cut the head and trunk apart as shown in Fig. 2. Tape the pieces of the trunk together; cellophane tape was used here for clarity. Position the forehead on the trunk and trace a new cut line (see Fig. 3). Cut the pieces slightly outside the line, then drum sand to make them fit snuggly (see Fig. 4). A Mini-Sanding Arbor works well on this mini-mammoth. Contouring Since this project is so small, much of the contouring is subtle. Refer to the Typical Contours illustration (in the pattern section) and the photo of the completed project to help with the contouring. Use sanding drums in a drill press to contour the pieces (see Fig. 5). If you have a Fig. 2. The head and trunk Fig. 3. Positioning the forehead on the have been cut apart. trunk's upper edge for tracing a new cut line. Fig. 4. Drum sanding for a snug fit. 14 • Creative Woodworks S. Crafts March 2004 |


