Creative Woodworks & crafts 2004-03, страница 64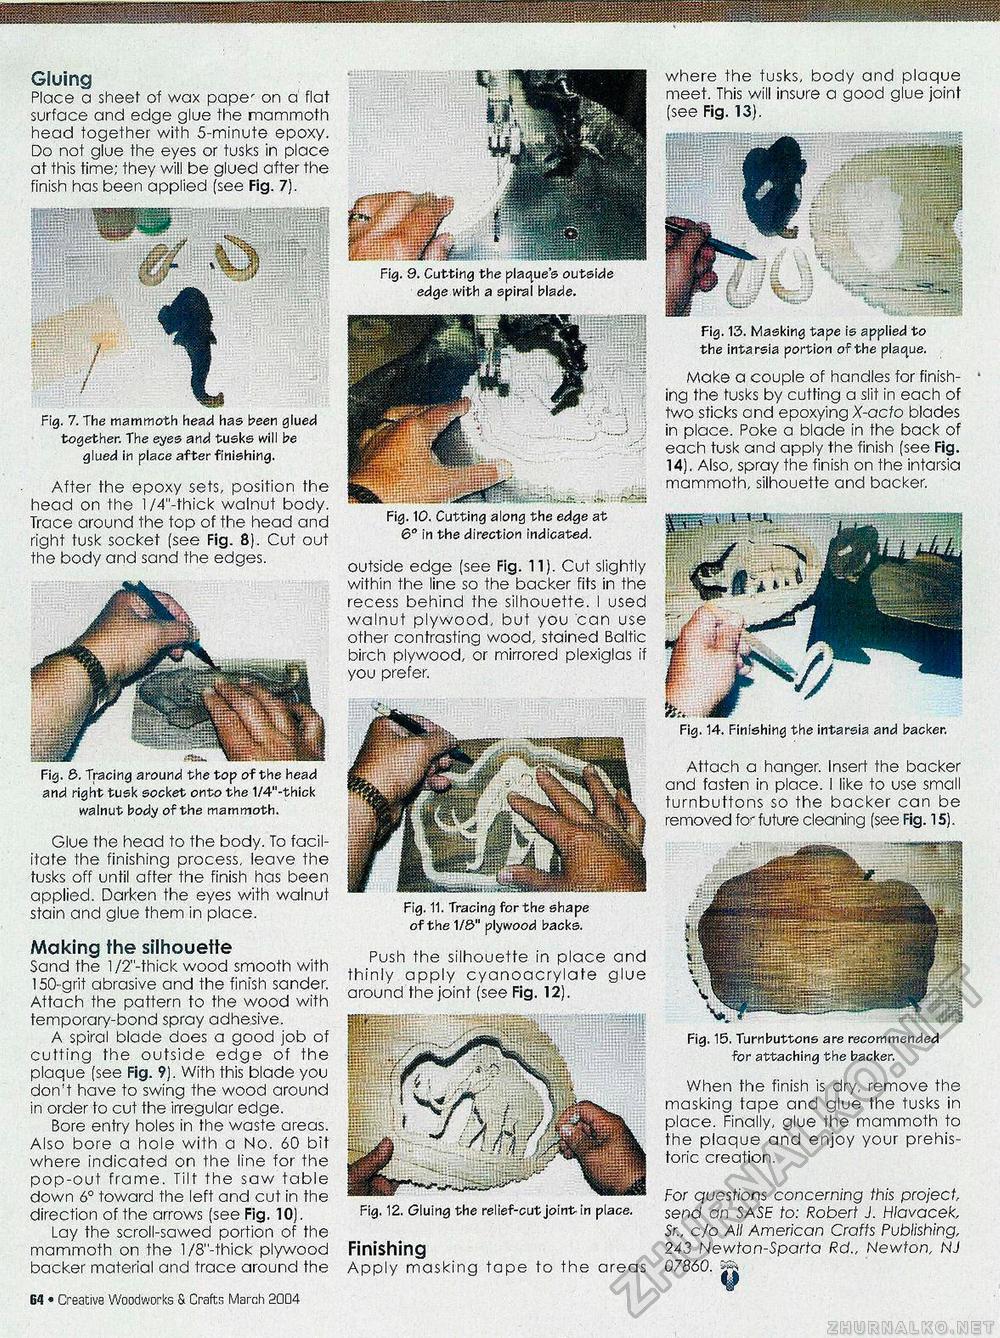
Gluing Place a sheet of wax pape' on a flat surface and edge glue the mammoth head together with 5-minute epoxy. Do not glue the eyes or tusks in place at this time; they will be glued after the finish has been applied (see Fig. 7). Fig. 7. The mammoth head has been glued together. The eyes and tusks will be glued in place after finishing. After the epoxy sets, position the head on the l/4"-thick walnut body. Trace around the top of the head and right tusk socket (see Fig. 8). Cut out the body and sand the edges. Fig. 8. Tracing around the top of the head and right tusk socket onto the 1/4"-thick walnut body of the mammoth. Glue the head to the body. To facilitate the finishing process, leave the tusks off until after the finish has been applied. Darken the eyes with walnut stain and glue them in place. Making the silhouette Sand the 1 /2"-thick wood smooth with 150-grit abrasive and the finish sander. Attach the pattern to the wood with temporary-bond spray adhesive. A spiral blade does a good job of cutting the outside edge of the plaque (see Fig. 9). With this blade you don't have to swing the wood around in order to cut the irregular edge. Bore entry holes in the waste areas. Also bore a hole with a No. 60 bit where indicated on the line for the pop-out frame. Tilf the saw table down 6° toward the left and cut in the direction of the arrows (see Fig. 10). Lay the scroll-sawed portion of the mammoth on the l/8"-thick plywood backer material and trace around the 64 • Creative Woodworks & Craftn March 2004 Fig. 9. Cutting the plaque's outside edge with a spiral blade. Fig. 10. Cutting along the edge at 6° in the direction indicated. outside edge (see Fig. 11). Cut slightly within the line so the backer fits in the recess behind the silhouette. I used walnut plywood, but you can use other contrasting wood, stained Baltic birch plywood, or mirrored plexiglas if you prefer. Fig. 11. Tracing for the shape of the 1/8" plywood backs. Push the silhouette in place and thinly apply cyanoacrylate glue around the joint (see Fig. 12). Fig. 12. Gluing the relief-cut joint in place. Finishing Apply masking tape to the areas where the tusks, body and plaque meet. This will insure a good glue joint (see Fig. 13). Fig. 13. Masking tape is applied to the intarsia portion of the plaque. Make a couple of handles for finishing the tusks by cutting a slit in each of two sticks and epoxying X-acto blades in place. Poke a blade in the back of each tusk and apply the finish (see Fig. 14). Also, spray the finish on the intarsia mammoth, silhouette and backer. Fig. 14. Finishing the intarsia and backer. Attach a hanger. Insert the backer and fasten in place. I like to use small turnbuttons so the backer can be removed fo' future cleaning (see Fig. 15). Fig. 15. Turnbuttons are recommended for attaching the backer. When the finish is dry, remove the masking tape and glue the tusks in place. Finally, glue the mammoth to the plaque and enjoy your prehistoric creation. For questions concerning this project, send an SASE to: Robert J. Hlavacek, Sr., c/o All American Crafts Publishing, 243 Newton-Sparta Rd„ Newton, NJ 07860. % |


