Creative Woodworks & crafts 2004-03, страница 68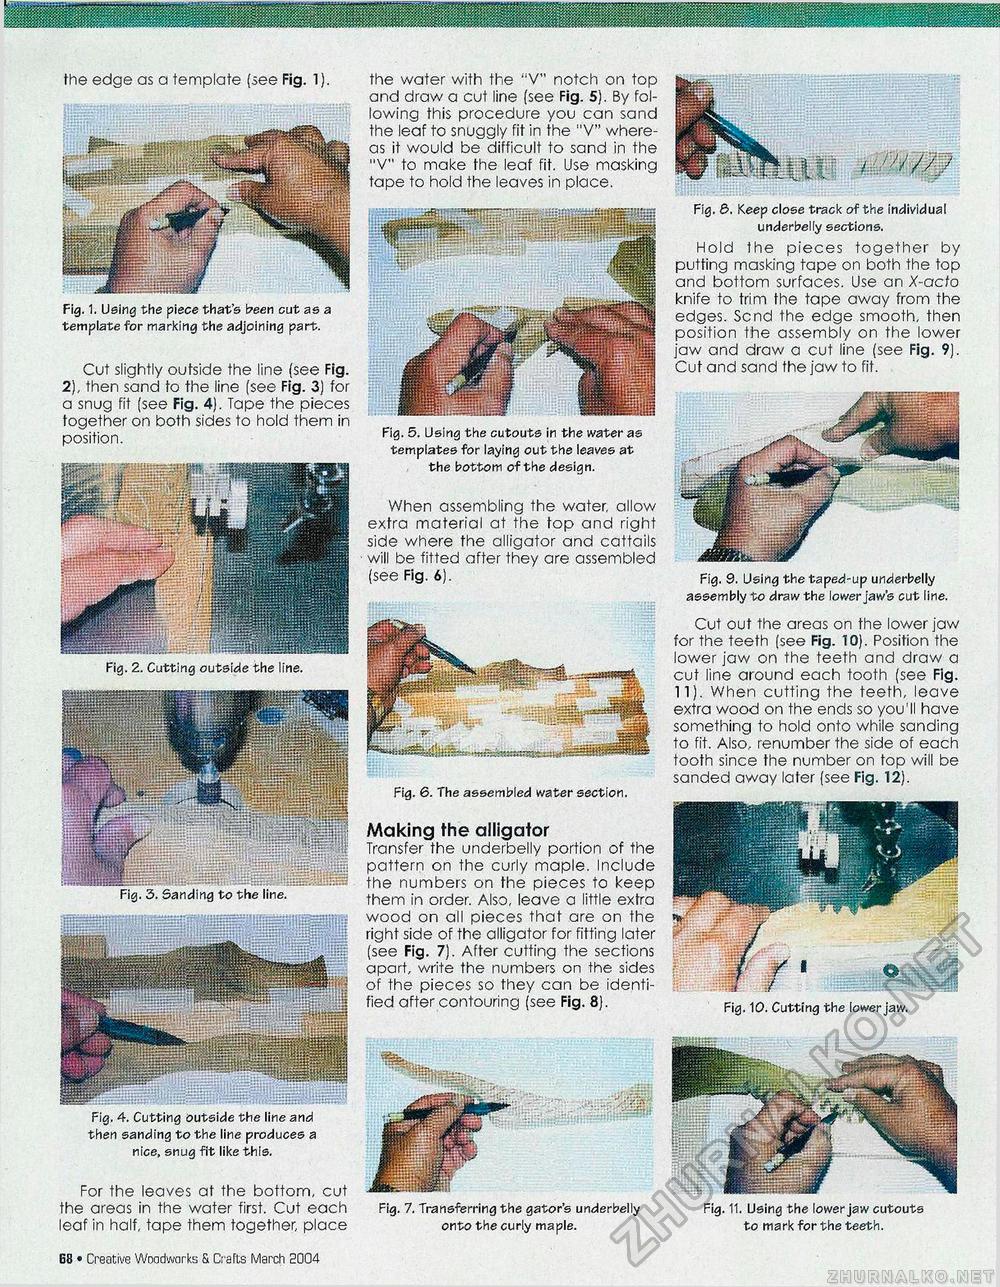
the edge as a template (see Fig. 1). the water with the "V" notch on top and draw a cut line (see Fig. 5). By following this procedure you can sand the leaf to snuggly fit in the "V" whereas it would be difficult to sand in the "V" to make the leaf fit. Use masking tape to hold the leaves in place. Fig. 4. Cutting outside the line and then sanding to the line produces a nice, snug fit like this. Fig. 1. Using the piece that's been cut as a template for marking the adjoining part. Cut slightly outside the line (see Fig. 2), then sand to the line (see Fig. 3) for a snug fit (see Fig. 4). Tape the pieces together on both sides to hold them in position. Fig. 5. Using the cutouts in the water as templates for laying out the leaves at the bottom of the design. Fig. 0. Keep close track of the individual underbelly sections. Hold the pieces together by putting masking tape on both the top and bottom surfaces. Use an X-acto knife to trim the tape away from the edges. Send the edge smooth, then position the assembly on the lower jaw and draw a cut line (see Fig. 9). Cut and sand the jaw to fit. When assembling the water, allow extra material at the top and right side where the alligator and cattails will be fitted after they are assembled (see Fig. 6). Fig. 9. Using the taped-up underbelly assembly to draw the lower jaw's cut line. Fig. 2. Cutting outside the line. Fig. 6. The assembled water section. Cut out the areas on the lower jaw for the teeth (see Fig. 10). Position the lower jaw on the teeth and draw a cut line around each tooth (see Fig. 11). When cutting the teeth, leave extra wood on the ends so you'll have something to hold onto while sanding to fit. Also, renumber the side of each tooth since the number on top will be sanded away later (see Fig. 12). Making the alligator Transfer the underbelly portion of the pattern on the curly maple. Include the numbers on the pieces to keep them in order. Also, leave a little extra wood on all pieces that are on the right side of the alligator for fitting later (see Fig. 7). After cutting the sections apart, write the numbers on the sides of the pieces so they can be identified after contouring (see Fig. 8). Fig. 10. Cutting the lower jaw. For the leaves at the bottom, cut the areas in the water first. Cut each leaf in half, tape them together, place Fig. 7. Transferring the gator's underbelly onto the curly maple. Fig. 11. Using the lower jaw cutouts to mark for the teeth. 14 • Creative Woodworks S. Crafts March 2004 |


