Creative Woodworks & crafts 2004-03, страница 69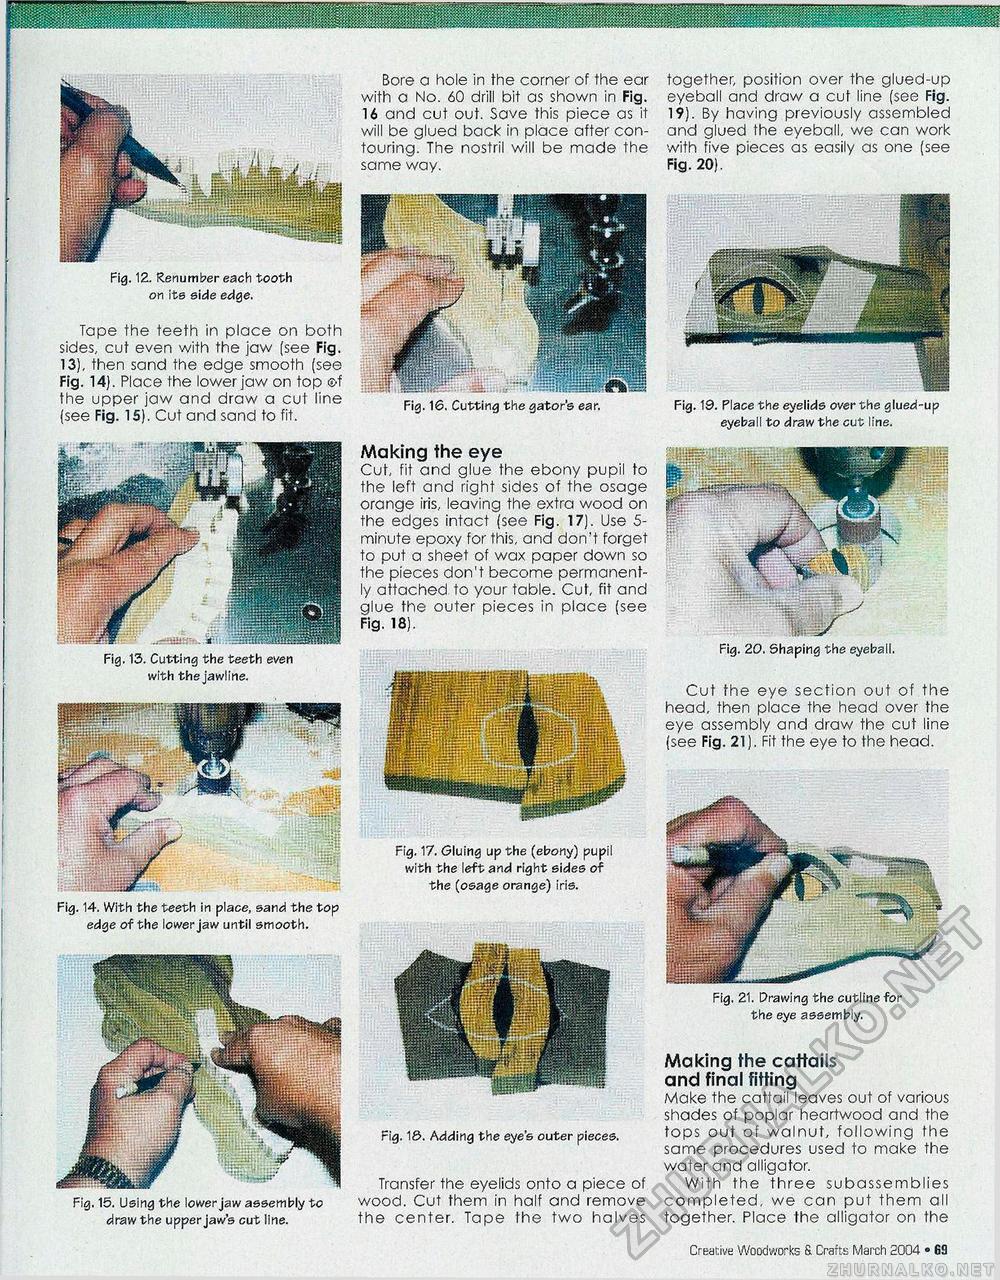
Fig. 12. Renumber each tooth on its side edge. Tape the teeth in place on both sides, cut even with the jaw (see Fig. 13), then sand the edge smooth (see Fig. 14). Place the lower jaw on top ®f the upper jaw and draw a cut line (see Fig. 15). Cut and sand to fit. Fig. 13. Cutting the teeth even with the jawline. Fig. 14. With the teeth in place, sand the top edge of the lower jaw until smooth. Fig. 15. Using the lower jaw assembly to draw the upper jaw's cut line. Bore a hole in the corner of the ear with a No. 60 drill bit as shown in Fig. 16 and cut out. Save this piece as it will be glued back in place after contouring. The nostril will be made the same way. Fig. 16. Cutting the gator's ear. Making the eye Cut, fit and glue the ebony pupil to the left and right sides of the osage orange iris, leaving the extra wood on the edges intact (see Fig. 17). Use 5-minute epoxy for this, and don't forget to put a sheet of wax paper down so the pieces don't become permanently attached to your table. Cut, fit and glue the outer pieces in place (see Fig. 18). Fig. 17. Gluing up the (ebony) pupil with the left and right sides of the (osage orange) iris. Fig. 18. Adding the eye's outer pieces. Transfer the eyelids onto a piece of wood. Cut them in half and remove the center. Tape the two halves together, position over the glued-up eyeball and draw a cut line (see Fig. 19). By having previously assembled and glued the eyeball, we can work with five pieces as easily as one (see Fig. 20). Fig. 19. Place the eyelids over the glued-up eyeball to draw the cut line. Fig, 21. Drawing the outline for the eye assembly. Making the cattails and final fitting Make the cattail leaves out of various shades of poplar heartwood and the tops out of walnut, following the same procedures used to make the water and alligator. With the three subassemblies completed, we can put them all together. Place the alligator on the Fig. 20, Shaping the eyeball. Cut the eye section out of the head, then place the head over the eye assembly and draw the cut line (see Fig. 21). Fit the eye to the head. 14 • Creative Woodworks S. Crafts March 2004 |


