Creative Woodworks & crafts 2004-06, страница 28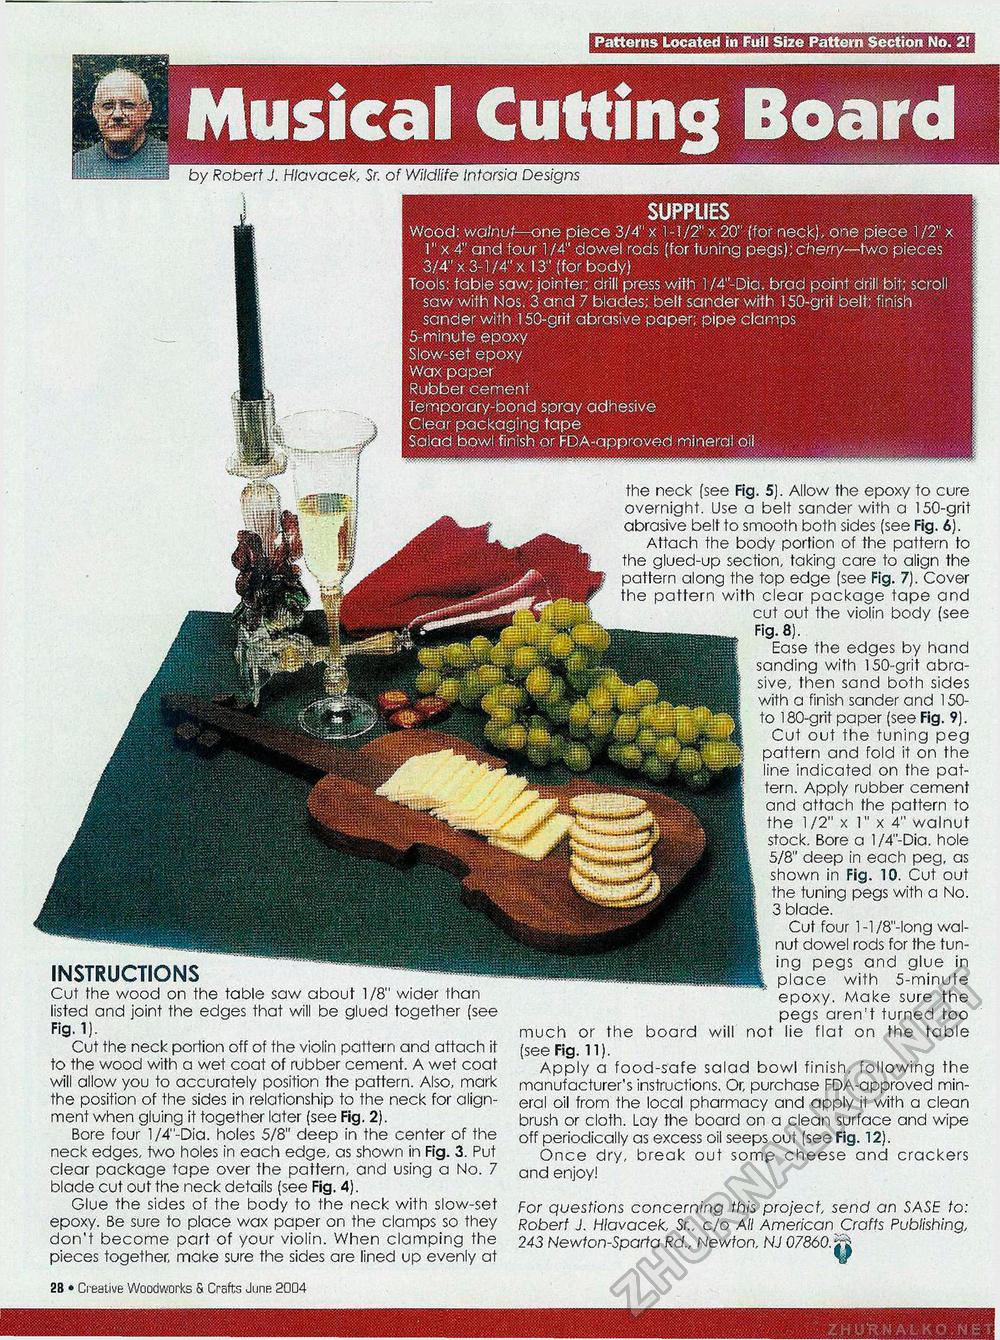
SUPPLIES Wood; walnut—one piece 3/4" x 1.-1/2" x 20" {for neck), one piece 1 /2" x 1" x 4" and four 114" dowel rods (for tuning pegs); cherry—two pieces 3/4" x 3-1/4"x 13" (for body) Tools: table saw; jointer; drill press with l /4"-Dia. brad point drill bit; scroll saw with Nos. 3 and 7 blades; belt sander with ISO-grit belt; finish sander with 150-grit abrasive paper; pipe clamps 5-minute epoxy Slow-set epoxy Wax paper Rubber cement Temporary-bond spray adhesive Clear packaging tape Salad bowl finish or FDA-approved mineral oil . INSTRUCTIONS Cut the wood on the table saw about 1/8" wider than listed and joint the edges that will be glued together (see Fig.l). Cut the neck portion off of the violin pattern and attach it to the wood with a wet coat of rubber cement. A wet coat will allow you to accurately position the pattern. Also, mark the position of the sides in relationship to the neck for alignment when gluing it together later (see Fig. 2). Bore four l/4"-Dia. holes 5/8" deep in the center of the neck edges, two holes in each edge, as shown in Fig. 3. Put clear package tape over the pattern, and using a No. 7 blade cut out the neck details (see Fig. 4). Glue the sides of the body to the neck with slow-set epoxy. Be sure to place wax paper on the clamps so they don't become part of your violin. When clamping the pieces together, make sure the sides are lined up evenly at the neck (see Fig. 5). Allow the epoxy to cure overnight. Use a belt sander with a 150-grit abrasive belt to smooth both sides (see Fig. 6). Attach the body portion of the pattern to the glued-up section, taking care to align the pattern along the top edge (see Fig. 7). Cover the pattern with clear package tape and cut out the violin body (see Fig. 8). Ease the edges by hand sanding with 150-grit abrasive, then sand both sides with a finish sander and 150-to 1 SO-grit paper (see Fig. 9). Cut out the tuning peg pattern and fold it on the line indicated on the pattern. Apply rubber cement and attach the pattern to the 1/2" x 1" x 4" walnut stock. Bore a l/4"-Dia. hole 5/8" deep in each peg, as shown in Fig. 10. Cut out the tuning pegs with a No. 3 blade. Cut four l-1/8"-long walnut dowel rods for the tuning pegs and glue in place with 5-minute epoxy. Make sure the pegs aren't turned too much or the board will not lie flat on the table (see Fig. 11). Apply a food-safe salad bowl finish, following the manufacturer's instructions. Or, purchase FDA-approved mineral oil from the local pharmacy and apply it with a clean brush or cloth. Lay the board on a clean surface and wipe off periodically as excess oil seeps out (see Fig. 12). Once dry, break out somp cheese and crackers and enjoy! For questions concerning this project, send an SASE to: Robert J. Hlavacek, Sr., c/o All American Crafts Publishing, 243 Newton-Sparta Rd„ Newton, NJ 07860.fi 4fi • Creative Woodworks S. Crafts June 2004 |
||||||||||||


