Creative Woodworks & crafts 2004-06, страница 29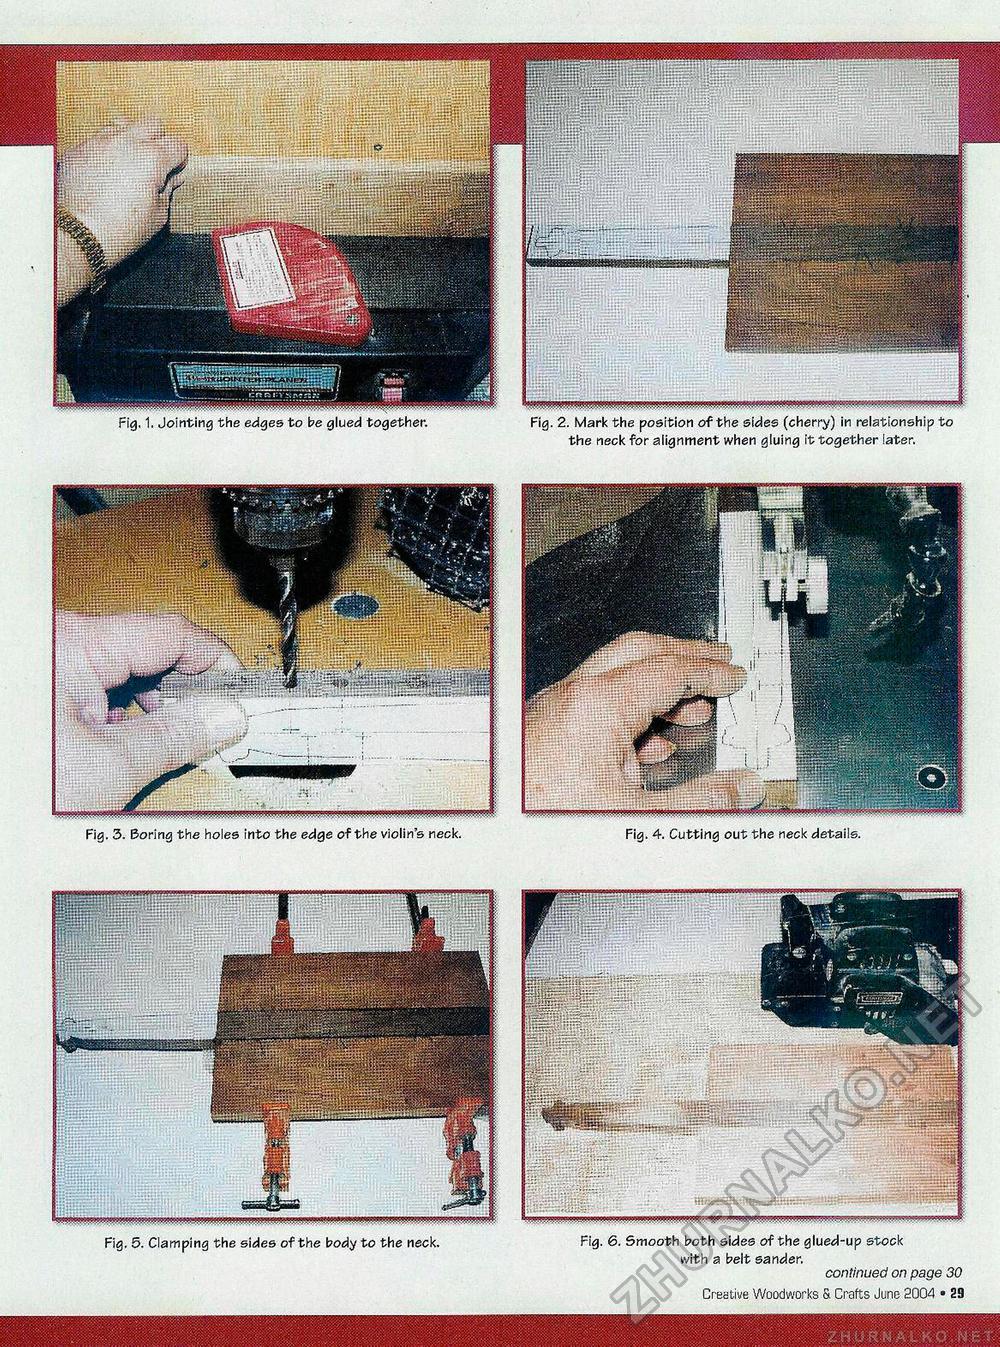
Fig. 2. Mark the position of the sides (cherry) in relationship to the neck for alignment when gluing it together later. Fig. 3. Boring the holes into the edge of the violin's neck. Fig. 4. Cutting out the neck details. Fig. 5. Clamping the sides of the body to the neck. Fig. 6. Smooth both sides of the glued-up stock with a belt sander. continued on page 30 Creative Woodworks & Crafts June 2004 • 29 |


