Creative Woodworks & crafts 2004-06, страница 64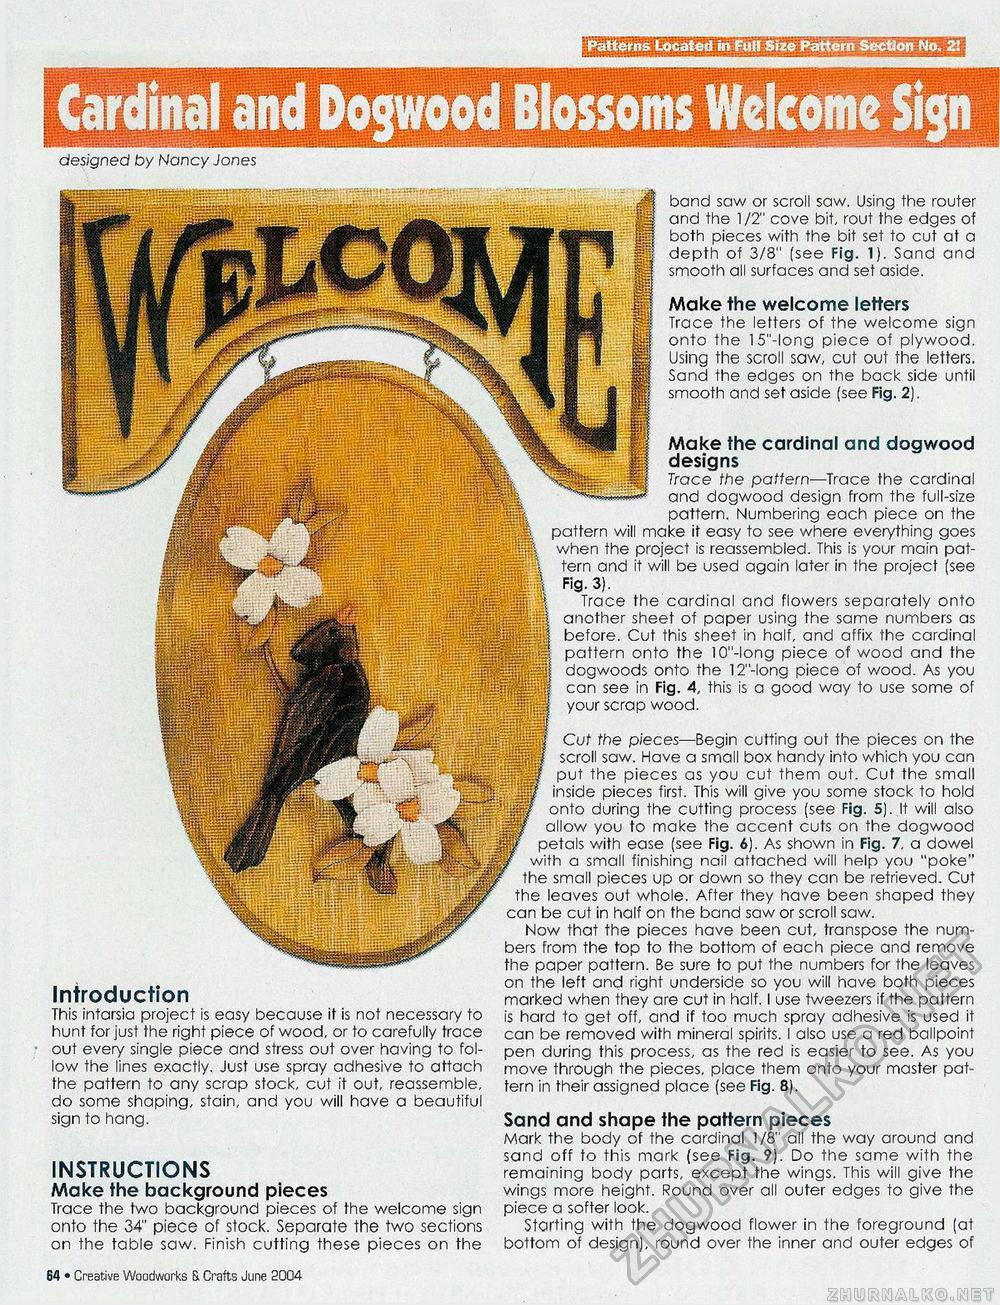
designed by Nancy Jones band saw or scroll saw. Using the router and the 1/2" cove bit, rout the edges of both pieces with the bit set to cut at a depth of 3/8" (see Fig. 1). Sand and smooth all surfaces and set aside. Make the welcome letters Trace the letters of the welcome sign onto the 15"-long piece of plywood. Using the scroll saw, cut out the letters. Sand the edges on the back side until smooth and set aside (see Fig. 2). Make the cardinal and dogwood designs Trace the pattern—Trace the cardinal and dogwood design from the full-size pattern. Numbering each piece on the pattern will make it easy to see where everything goes when the project is reassembled. This is your main pattern and it will be used again later in the project (see Fig. 3). Trace the cardinal and flowers separately onto another sheet of paper using the same numbers as before. Cut this sheet in half, and affix the cardinal pattern onto the 10"-long piece of wood and the dogwoods onto the 12"-long piece of wood. As you can see in Fig. 4, this is a good way to use some of your scrap wood. Introduction This intarsia project is easy because it is not necessary to hunt for just the right piece of wood, or to carefully trace out every single piece and stress out over having to follow the lines exactly. Just use spray adhesive to attach the pattern to any scrap stock, cut it out, reassemble, do some shaping, stain, and you will have a beautiful sign to hang. INSTRUCTIONS Make the background pieces Trace the two background pieces of the welcome sign onto the 34" piece of stock. Separate the two sections on the table saw. Finish cutting these pieces on the Cut the pieces—Begin cutting out the pieces on the scroll saw. Have a small box handy into which you can put the pieces as you cut them out. Cut the small inside pieces first. This will give you some stock to hold onto during the cutting process (see Fig. 5). It will also allow you to make the accent cuts on the dogwood petals with ease (see Fig. 6). As shown in Fig. 7, a dowel with a small finishing nail attached will help you "poke" the small pieces up or down so they can be retrieved. Cut the leaves out whole. After they have been shaped they can be cut in half on the band saw or scroll saw. Now that the pieces have been cut, transpose the numbers from the top to the bottom of each piece and remove the paper pattern. Be sure to put the numbers for the leaves on the left and right underside so you will have both pieces marked when they are cut in half. I use tweezers if the pattern is hard to get off, and if too much spray adhesive is used it can be removed with mineral spirits. I also use a red ballpoint pen during this process, as the red is easier to see. As you move through the pieces, place them onto your master pattern in their assigned place (see Fig. 8). Sand and shape the pattern pieces Mark the body of the cardinal 1/8" all the way around and sand off to this mark (see Fig. 9). Do the same with the remaining body parts, except the wings. This will give the wings more height. Round over all outer edges to give the piece a softer look. Starting with the dogwood flower in the foreground (at bottom of design), round over the inner and outer edges of 64 • Creative Woodworks S Crafts June 3004 |


