Creative Woodworks & crafts 2004-06, страница 66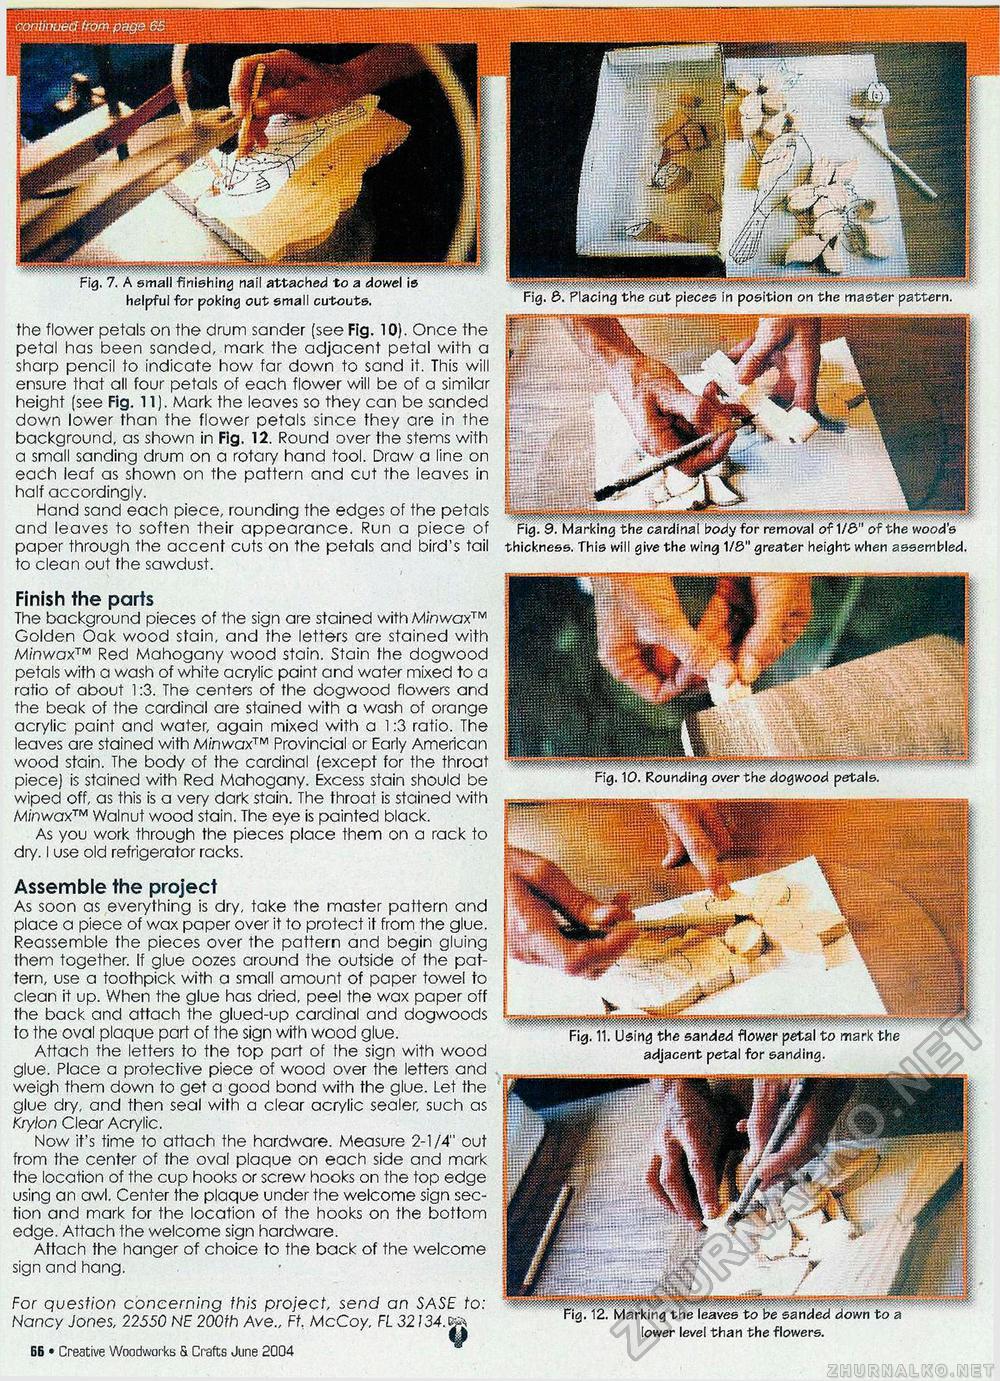
/ft" Fig. 7. A small finishing nail attached to a dowel is helpful for poking out small cutouts. ■ - - ....... Fig. 6. Placing the cut pieces in position on the master pattern. the flower petals on the drum sander [see Fig. 10). Once the petal has been sanded, mark the adjacent petal with a sharp pencil to indicate how far down to sand it. This will ensure that all four petals of each flower will be of a similar height (see Fig. 11). Mark the leaves so they can be sanded down lower than the flower petals since they are in the background, as shown in Fig. 12. Round over the stems with a small sanding drum on a rotary hand tool. Draw a line on each leaf as shown on the pattern and cut the leaves in half accordingly. Hand sand each piece, rounding the edges of the petals and leaves to soften their appearance. Run a piece of paper through the accent cuts on the petals and bird's tail to clean out the sawdust. thickness. This will give the wing 1/0" greater height when assembled. Finish the parts The background pieces of the sign are stained with M/nvvax™ Golden Oak wood stain, and the letters are stained with Minwax™ Red Mahogany wood stain. Stain the dogwood petals with a wash of white acrylic paint and water mixed to a ratio of about 1:3. The centers of the dogwood flowers and the beak of the cardinal are stained with a wash of orange acrylic paint and water, again mixed with a 1:3 ratio. The leaves are stained with Minwax™ Provincial or Early American wood stain. The body of the cardinal (except for the throat piece) is stained with Red Mahogany. Excess stain should be wiped off, as this is a very dark stain. The throat is stained with Minwax™ Walnut wood stain. The eye is painted black. As you work through the pieces place them on a rack to dry. I use old refrigerator racks. Assemble the project As soon as everything is dry, take the master pattern and place a piece of wax paper over it to protect it from the glue. Reassemble the pieces over the pattern and begin gluing them together. If glue oozes around the outside of the pattern, use a toothpick with a small amount of paper towel to clean it up. When the glue has dried, peel the wax paper off the back and attach the glued-up cardinal and dogwoods to the oval plaque part of the sign with wood glue. Attach the letters to the top part of the sign with wood glue. Place a protective piece of wood over the letters and weigh them down to get a good bond with the glue. Let the glue dry, and then seal with a clear acrylic sealer, such as Krylon Clear Acrylic. Now it's time to attach the hardware. Measure 2-1/4" out from the center of the oval plaque on each side and mark the location of the cup hooks or screw hooks on the top edge using an awl. Center the plaque under the welcome sign section and mark for the location of the hooks on the bottom edge. Attach the welcome sign hardware. Attach the hanger of choice to the back of the welcome sign and hang. adjacent petal for sanding. For question concerning this project, send an SASE to: Nancy Jones, 22550 NE 200th Ave., Ft. McCoy. FL 32'34. || BB • Creative Woodworks a Crafts June 2004 lower level than the flowers. |


