Creative Woodworks & crafts 2004-06, страница 68
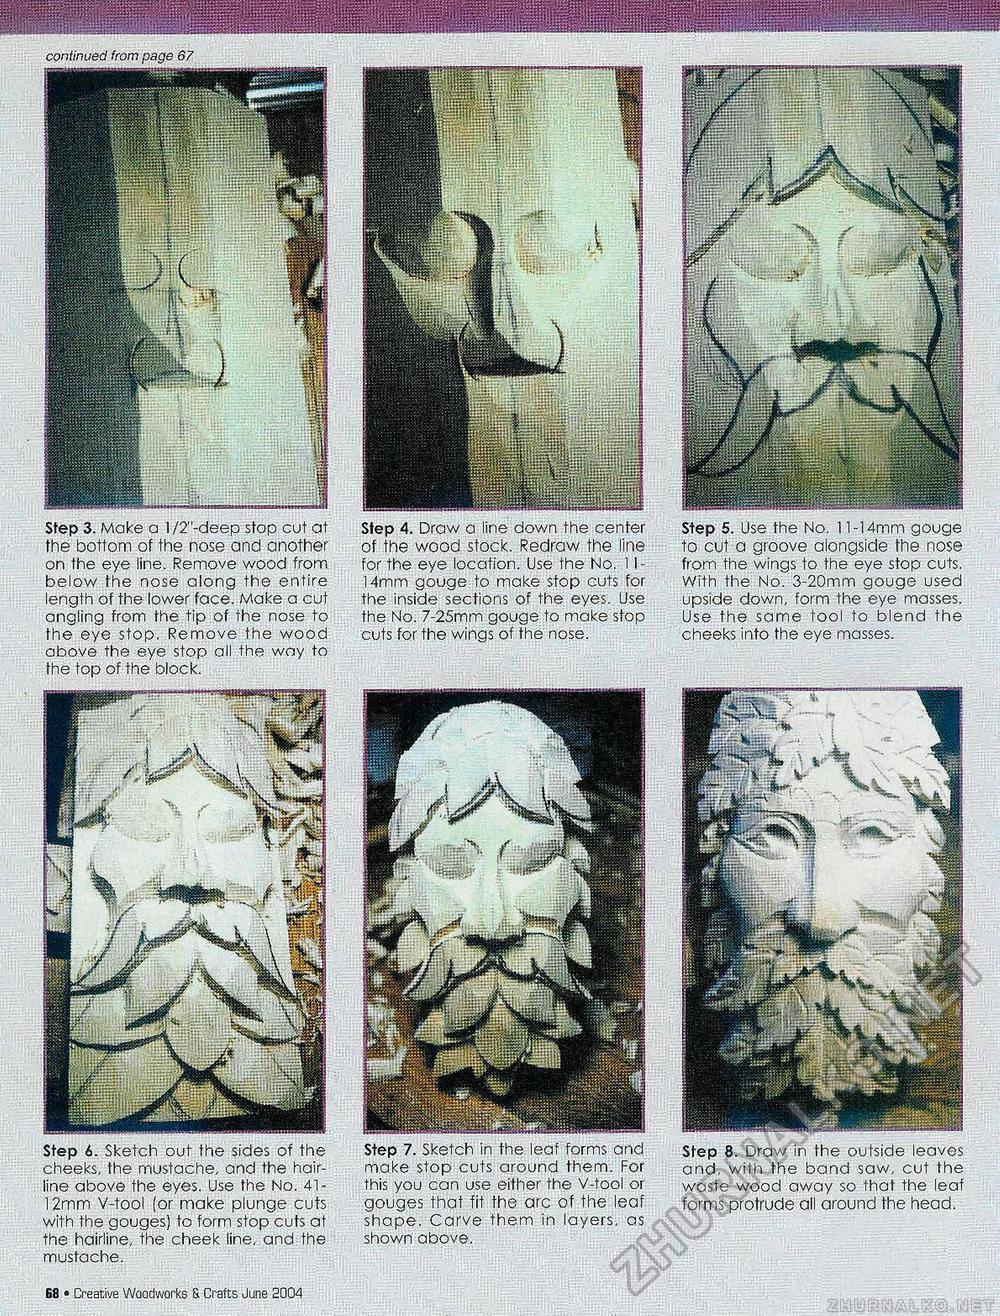
continued from page 67 Step 3. Make a l/2"-deep stop cut at the bottom of the nose and another on the eye line. Remove wood from below the nose along the entire length of the lower face. Make a cut angling from the tip of the nose to the eye stop. Remove the wood above the eye stop all the way to the top of the block. Step 4. Draw a line down the center of the wood stock. Redraw the line for the eye location. Use the No. 1I-14mm gouge to make stop cuts for the inside sections of the eyes. Use the No. 7-25mm gouge to make stop cuts for the wings of the nose. Step 5. Use the No. 11-14mm gouge to cut a groove alongside the nose from the wings to the eye stop cuts. With the No. 3-20mm gouge used upside down, form the eye masses. Use the same tool to blend the cheeks into the eye masses. Step 7. Sketch in the leaf forms and make stop cuts around them. For this you can use either the V-tool or gouges that fit the arc of the leaf shape. Carve them in layers, as shown above. Step 6. Sketch out the sides of the cheeks, the mustache, and the hairline above the eyes. Use the No. 41-12mm V-tool (or make plunge cuts with the gouges) to form stop cuts at the hairline, the cheek line, and the mustache. Step 8. Draw in the outside leaves and, with the band saw, cut the waste wood away so that the leaf forms protrude all around the head. |


