Creative Woodworks & crafts 2004-06, страница 75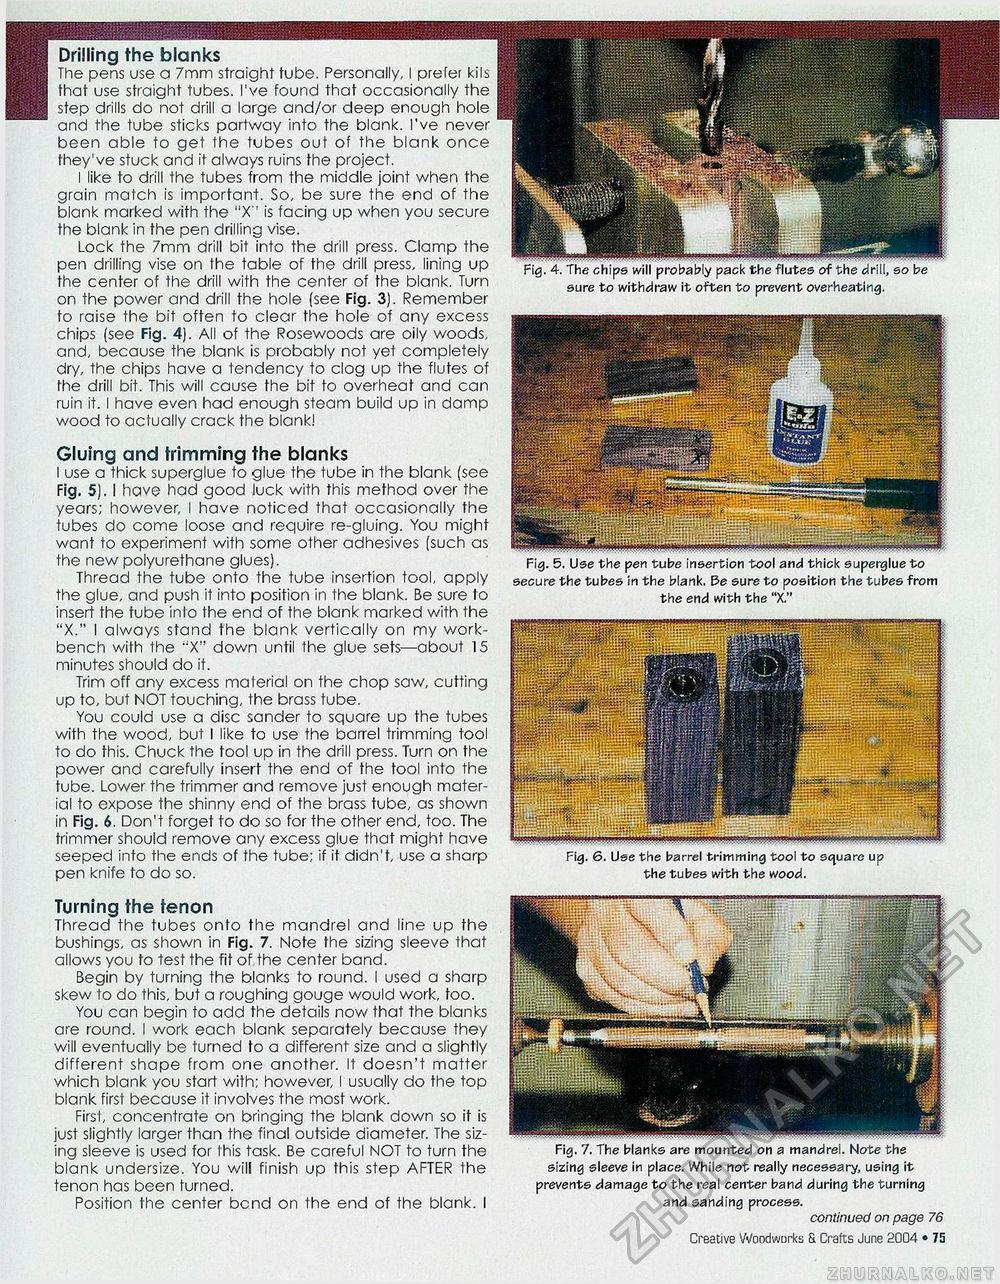
Drilling the blanks The pens use a 7mm straight tube. Personally, I prefer kils that use straight tubes. I've found that occasionally the step drills do not drill a large and/or deep enough hole and the tube sticks partway into the blank. I've never been able to get the tubes out of the blank once they've stuck and it always ruins the project. i like to drill the tubes from the middle joint when the grain match is important. So, be sure the end of the blank marked with the "XM is facing up when you secure the blank in the pen drilling vise. Lock the 7mm drill bit into the drill press. Clamp the pen drilling vise on the table of the drill press, lining up the center of the drill with the center of the blank. Turn on the power and drill the hole (see Fig. 3). Remember to raise the bit often to clear the hole of any excess chips (see Fig. 4). All of the Rosewoods are oily woods, and, because the blank is probably not yet completely dry, the chips have a tendency to clog up the flutes of the drill bit. This will cause the bit to overheat and can ruin it. I have even had enough steam build up in damp wood to actually crack the blank! Gluing and trimming the blanks I use a thick superglue to glue the tube in the blank (see Fig. 5). I have had good luck with this method over the years; however, I have noticed that occasionally the tubes do come loose and require re-gluing. You might want to experiment with some other adhesives (such as the new polyurethane glues). Thread the tube onto the tube insertion tool, apply the glue, and push it into position in the blank. Be sure to insert the tube info the end of the blank marked with the "X." I always stand the blank vertically on my workbench with the "X" down until the glue sets—about 15 minutes should do it. Trim off any excess material on the chop saw, cutting up to, but NOT touching, the brass tube. You could use a disc sander to square up the tubes with the wood, but I like to use the barrel trimming tool to do this. Chuck the tool up in the drill press. Turn on the power and carefully insert the end of the tool into the tube. Lower the trimmer and remove just enough material to expose the shinny end of the brass tube, as shown in Fig. 6. Don't forget to do so for the other end, too. The trimmer should remove any excess glue that might have seeped into the ends of the tube; if it didn't, use a sharp pen knife to do so. secure the tubes in the blank. Be sure to position the tubes from the end with the "X." Fig. 6. Use the barrel trimming tool to scjuare up the tubes with the wood. sure to withdraw it often to prevent overheating. Turning the tenon Thread the tubes onto the mandrel and line up the bushings, as shown in Fig. 7. Note the sizing sleeve that allows you to test the fit of the center band. Begin by turning the blanks to round. I used a sharp skew to do this, but a roughing gouge would work, too. You can begin to add the details now that the blanks are round. I work each blank separately because they will eventually be turned to a different size and a slightly different shape from one another. It doesn't matter which blank you start with; however, I usually do the top blank first because it involves the most work. First, concentrate on bringing the blank down so it is just slightly larger than the final outside diameter. The sizing sleeve is used for this task. Be careful NOT to turn the blank undersize. You will finish up this step AFTER the tenon has been turned. Position the center bend on the end of the blank. I Fig. 7. The blanks are mounted on a mandrel. Note the sizing sleeve in place. While not really necessary, using it prevents damage to the real center band during the turning and sanding process. continued on page 76 Creative Woodworks & Crafts June 2004 • 75 |


