Creative Woodworks & crafts 2004-06, страница 77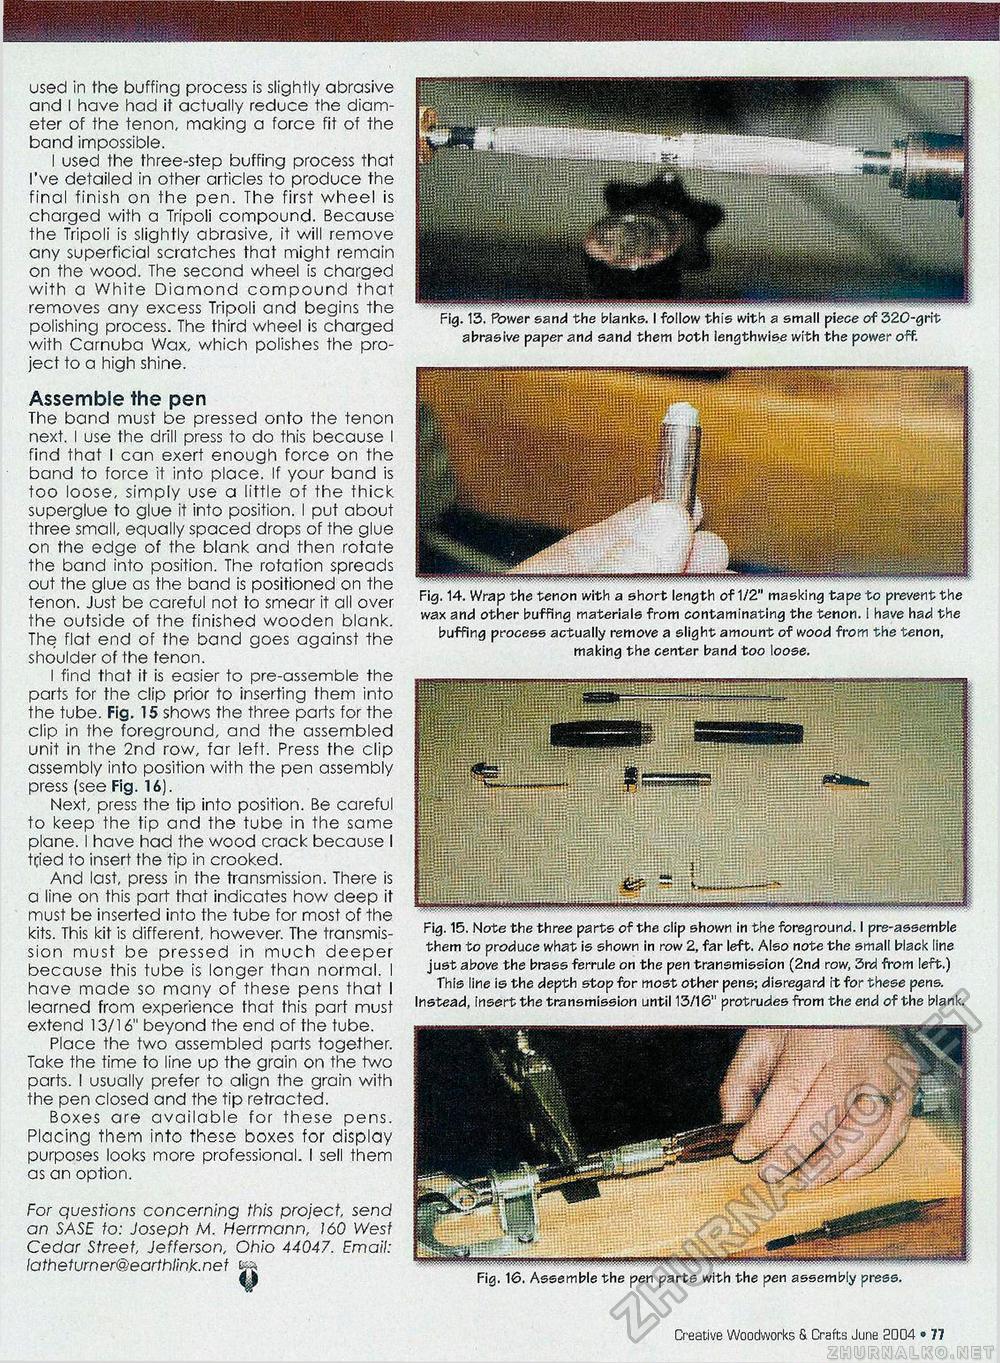
used in the buffing process is slightly abrasive and I have had it actually reduce the diameter of the tenon, making a force fit of the band impossible. I used the three-step buffing process that I've detailed in other articles to produce the final finish on the pen. The first wheel is charged with a Tripoli compound. Because the Tripoli is slightly abrasive, it will remove any superficial scratches that might remain on the wood. The second wheel is charged with a White Diamond compound that removes any excess Tripoli and begins the polishing process. The third wheel is charged with Carnuba Wax, which polishes the project to a high shine. Assemble the pen The band must be pressed onto the tenon next. I use the drill press to do this because I find that I can exert enough force on the band to force it into place. If your band is too loose, simply use a little of the thick superglue to glue it into position. I put about three small, equally spaced drops of the glue on the edge of the blank and then rotate the band into position. The rotation spreads out the glue as the band is positioned on the tenon. Just be careful not to smear it all over the outside of the finished wooden blank. The flat end of the band goes against the shoulder of the tenon. I find that it is easier to pre-assemble the parts for the clip prior to inserting them into the tube. Fig. 15 shows the three parts for the clip in the foreground, and the assembled unit in the 2nd row, far left. Press the clip assembly into position with the pen assembly press (see Fig. 16). Next, press the tip into position. Be careful to keep the tip and the tube in the same plane. I have had the wood crack because I tfied to insert the tip in crooked. And last, press in the transmission. There is a line on this part that indicates how deep it must be inserted into the tube for most of the kits. This kit is different, however. The transmission must be pressed in much deeper because this tube is longer than normal. I have made so many of these pens that I learned from experience that this part must extend 13/16" beyond the end of the tube. Place the two assembled parts together. Take the time to line up the grain on the two parts. I usually prefer to align the grain with the pen closed and the tip retracted. Boxes are available for these pens. Placing them into these boxes for display purposes looks more professional. I sell them as an option. For questions concerning this project, send an SASE to: Joseph M. Herrmann, 160 West Cedar Street, Jefferson, Ohio 44047. Email: latheturner@earthlink.net Fig. 14. Wrap the tenon with a short length of 1/2" masking tape to prevent the wax and other buffing materials from contaminating the ten on. I have had the buffing process actually remove a slight amount of wood from the tenon, making the center band too loose. Fig. 15. Note the three parts of the clip shown in the foreground. I pre-assemble them to produce what is shown in row 2, far left. Also note the small black line just above the brass ferrule on the pen transmission (2nd row, 3rd from left.) This line is the depth stop for most other pens; disregard it for these pens. Instead, insert the transmission until 13/16" protrudes from the end of the blank. Fig. 13. Power sand the blanks. I follow this with a small piece of 320-grit abrasive paper and sand them both lengthwise with the power off. Fig. 16. Assemble the pen parts with the pen assembly press. 4fi • Creative Woodworks S. Crafts June 2004 |


