Creative Woodworks & crafts 2004-06, страница 76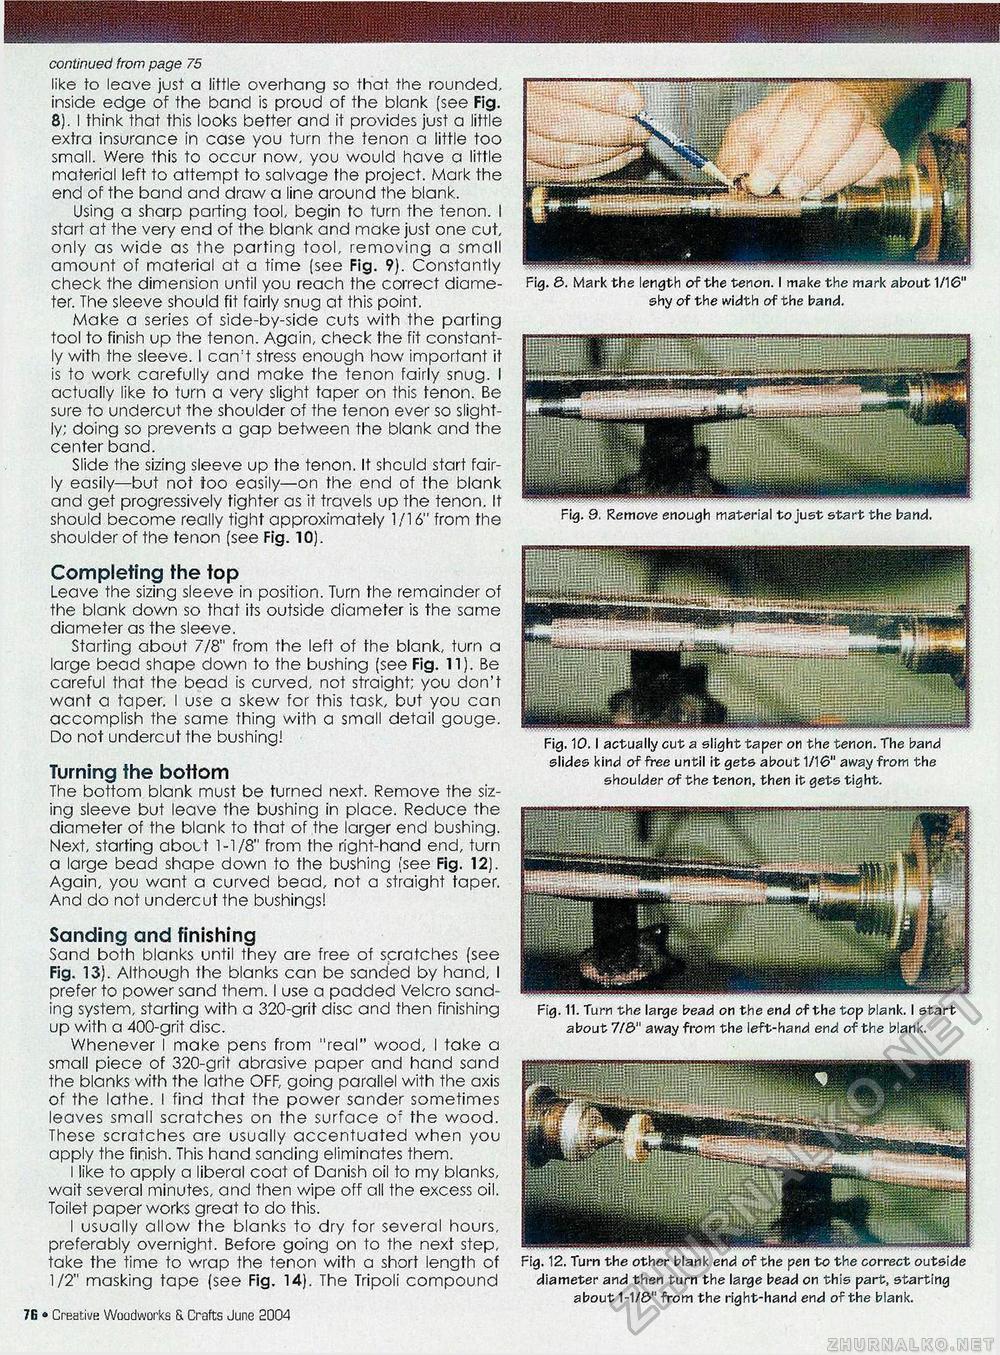
continued from page 75 like to leave just a little overhang so that the rounded, inside edge of the band is proud of the blank (see Fig. 8). I think that this looks better and it provides just a little extra insurance in case you turn the tenon a little too small. Were this to occur now, you would have a little material left to attempt to salvage the project. Mark the end of the band and draw a line around the blank. Using a sharp parting tool, begin to turn the tenon. I start at the very end of the blank and make just one cut, only as wide as the parting tool, removing a small amount of material at a time (see Fig. 9). Constantly check the dimension until you reach the correct diameter. The sleeve should fit fairly snug at this point. Make a series of side-by-side cuts with the parting tool to finish up the tenon. Again, check the fit constantly with the sleeve. I can't stress enough how important it is to work carefully and make the tenon fairly snug. I actually like to turn a very slight taper on this tenon. Be sure to undercut the shoulder of the tenon ever so slightly; doing so prevents a gap between the blank and the center band. Slide the sizing sleeve up the tenon. It should start fairly easily—but not too easily—on the end of the blank and get progressively tighter as it travels up the tenon. It should become really tight approximately 1/16" from the shoulder of the tenon (see Fig. 10). Completing the top Leave the sizing sleeve in position. Turn the remainder of the blank down so that its outside diameter is the same diameter as the sleeve. Starting about 7/8" from the left of the blank, turn a large bead shape down to the bushing (see Fig. 11). Be careful that the bead is cuwed, not straight; you don't want a taper. I use a skew for this task, but you can accomplish the same thing with a small detail gouge. Do not undercut the bushing! Turning the bottom The bottom blank must be turned next. Remove the sizing sleeve but leave the bushing in place. Reduce the diameter of the blank to that of the larger end bushing. Next, starting about 1-1/8" from the right-hand end, turn a large bead shape down to the bushing (see Fig. 12). Again, you want a curved bead, not a straight taper. And do not undercut the bushings! Sanding and finishing Sand both blanks until they are free of scratches (see Fig. 13). Although the blanks can be sanded by hand, I prefer to power sand them. I use a padded Velcro sanding system, starting with a 320-grit disc and then finishing up with a 400-grit disc. Whenever I make pens from "real" wood, I take a small piece of 320-grit abrasive paper and hand sand the blanks with the lathe OFF, going parallel with the axis of the lathe. I find that the power sander sometimes leaves small scratches on the surface of the wood. These scratches are usually accentuated when you apply the finish. This hand sanding eliminates them. I like to apply a liberal coat of Danish oil to my blanks, wait several minutes, and then wipe off all the excess oil. Toilet paper works great to do this. I usually allow the blanks to dry for several hours, preferably overnight. Before going on to the next step, take the time to wrap the tenon with a short length of 1/2" masking tape (see Fig. 14). The Tripoli compound 4fi • Creative Woodworks S. Crafts June 2004 Fig. 6. Mark the length of the tenon. I make the mark about 1/16" shy of the width of the band. Fig. 9, Remove enough material to just start the band. Fig. 10. I actually cut a slight taper on the tenon. The band slides kind of free until it gets about 1/16" away from the shoulder of the tenon, then it gets tight. Fig. 11. Turn the large bead on the end of the top blank. I start about 7/6" away from the left-hand end of the blank. Fig. 12. Turn the other blank end of the pen to the correct outside diameter and then turn the large bead on this part, starting about 1-1/6" from the right-hand end of the blank. |


