Creative Woodworks & crafts 2004-08, страница 14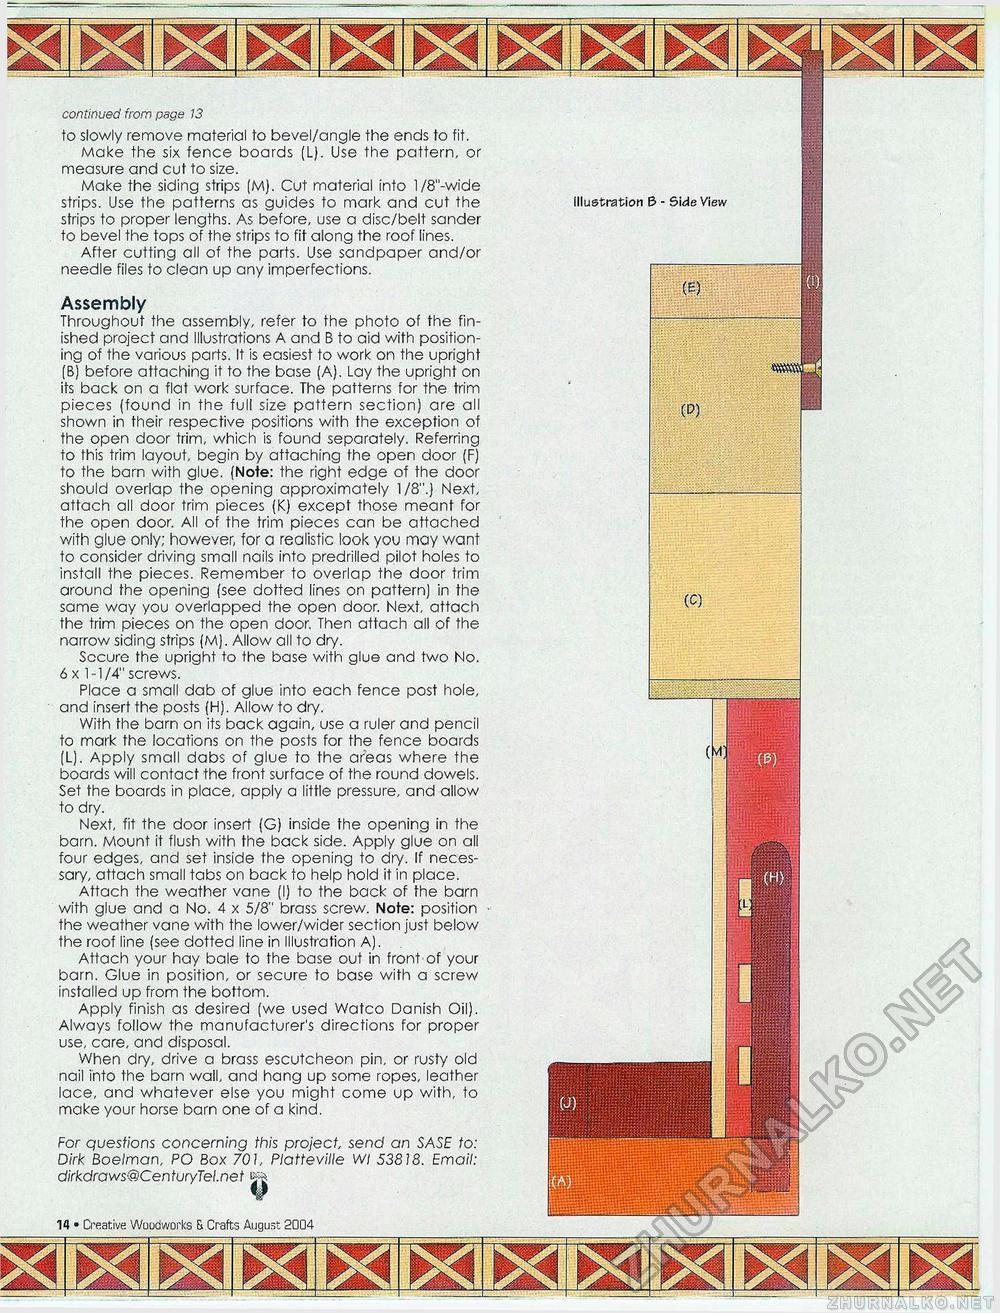
continued from page 13 to slowly remove material to bevel/angle the ends to fit. Make the six fence boards (L). Use the pattern, or measure and cut to size. Make the siding strips (M). Cut material into l/8"-wide strips. Use the patterns as guides to mark and cut the strips to proper lengths. As before, use a disc/belt sander to bevel the tops of the strips to fit along the roof lines. After cutting all of the parts. Use sandpaper and/or needle files to clean up any imperfections. Assembly Throughout the assembly, refer to the photo of the finished project and Illustrations A and B to aid with positioning of the various parts. It is easiest to work on the upright (B) before attaching it to the base (A). Lay the upright on its back on a flat work surface. The patterns for the trim pieces (found in the full size pattern section) are all shown in their respective positions with the exception of the open door trim, which is found separately. Referring to this trim layout, begin by attaching the open door (F) to the barn with glue. (Note: the right edge of the door should overlap the opening approximately 1/8".) Next, attach all door trim pieces (K) except those meant for the open door. All of the trim pieces can be attached with glue only; however, for a realistic look you may want to consider driving small nails into predrilled pilot holes to install the pieces. Remember to overlap the door trim around the opening (see dotted lines on pattern) in the same way you overlapped the open door. Next, attach the trim pieces on the open door. Then attach all of the narrow siding strips (M). Allow all to dry. Sccure the upright to the base with glue and two No. 6 x 1-1/4" screws. Place a small dab of glue into each fence post hole, and insert the posts (H). Allow to dry. With the barn on its back again, use a ruler and pencil to mark the locations on the posts for the fence boards (L). Apply small dabs of glue to the areas where the boards will contact the front surface of the round dowels. Set the boards in place, apply a little pressure, and allow to dry. Next, fit the door insert (G) inside the opening in the barn. Mount it flush with the back side. Apply glue on all four edges, and set inside the opening to dry. If necessary, attach small tabs on back to help hold it in place. Attach the weather vane (I) to the back of the barn with glue and a No. 4 x 5/8" brass screw. Note: position the weather vane with the lower/wiaer section just below the roof line (see dotted line in Illustration A). Attach your hay bale to the base out in front of your barn. Glue in position, or secure to base with a screw installed up from the bottom. Apply finish as desired (we used Watco Danish Oil). Always follow the manufacturer's directions for proper use, care, and disposal. When dry, drive a brass escutcheon pin, or rusty old nail into the barn wall, and hang up some ropes, leather lace, and whatever else you might come up with, to make your horse barn one of a kind. For questions concerning this project, send an SASE to: Dirk Boeiman, PO Box 701, Platteville Wl 53818. Email: dirkdraws@CenturyTei.net Creative Woodworks 3. Crafts August 2004 • 18 Illustration E> - Side View (M
|


