Creative Woodworks & crafts 2004-08, страница 18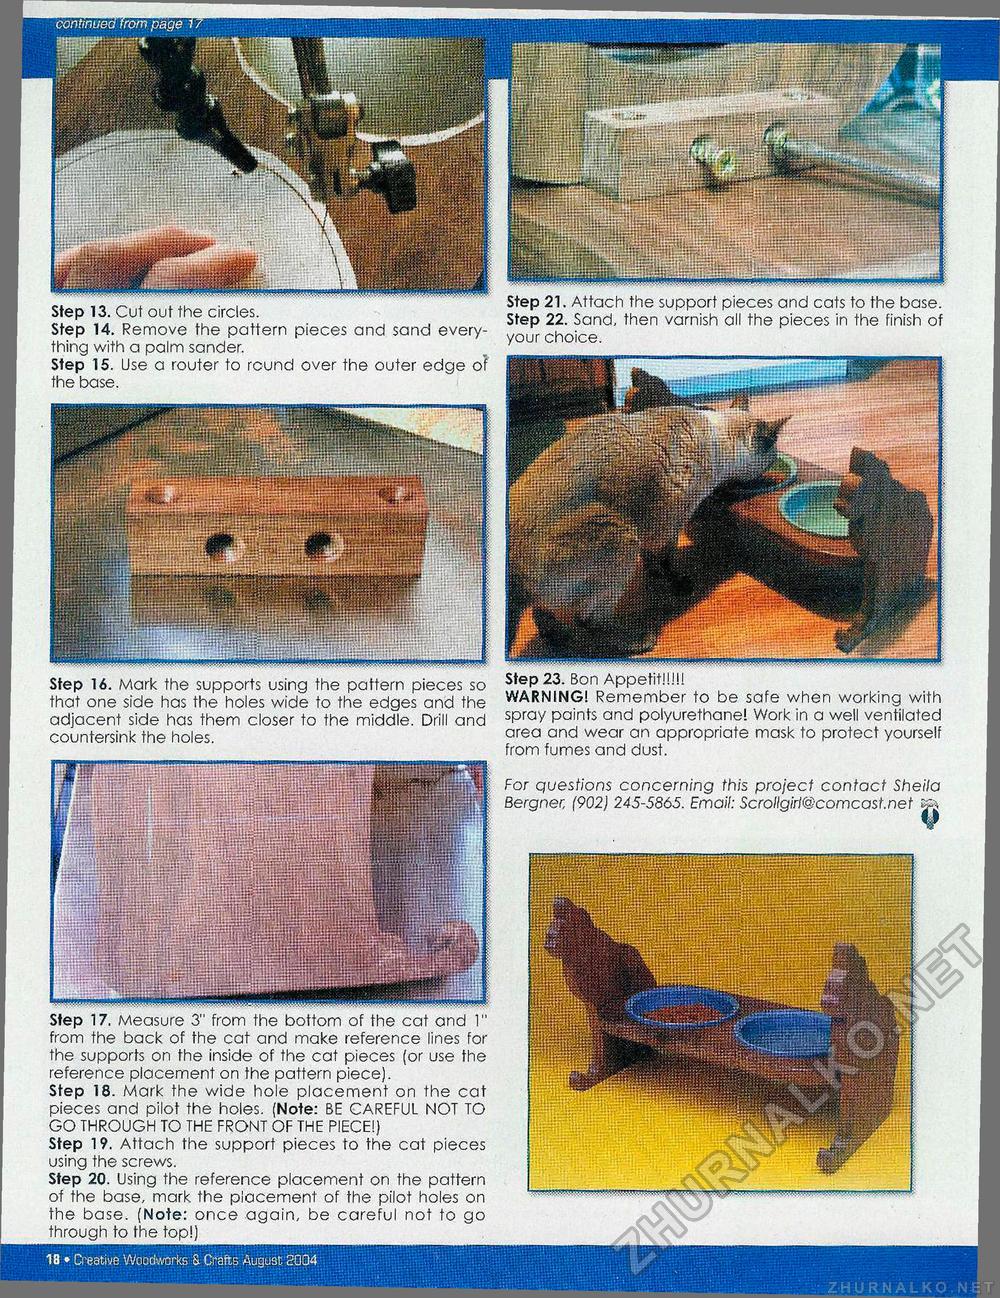
18 • Creative Woodworks & Crafts August 2004 Step 16. Mark the supports using the pattern pieces so that one side has the holes wide to the edges and the adjacent side has them closer to the middle. Drill and countersink the holes. Step 17. Measure 3" from the bottom of the cat and 1" from the back of the cat and make reference lines for the supports on the inside of the cat pieces (or use the reference placement on the pattern piece). Step 18. Mark the wide hole placement on the cat pieces and pilot the holes. (Note: BE CAREFUL NOT TO GO THROUGH TO THE FRONT OF THE PIECE!) Step 19. Attach the support pieces to the cat pieces using the screws. Step 20. Using the reference placement on the pattern of the base, mark the placement of the pilot holes on the base. (Note: once again, be careful not to go through to the top!) Step 13. Cut out the circles. Step 14. Remove the pattern pieces ana sand everything with a palm sander. Step 15. Use a router to round over the outer edge of the base. Step 21. Attach the support pieces and cats to the base. Step 22. Sand, then varnish all the pieces in the finish of your choice. Step 23. Bon Appetit!!!!! WARNING! Remember to be safe when working with spray paints and polyurethane! Work in a well ventilated area and wear an appropriate mask to protect yourself from fumes and dust. For questions concerning this project contact Sheila Bergner, (902) 245-5865. Email: Scrollgirl@comcast.net ^ |


