Creative Woodworks & crafts 2004-08, страница 41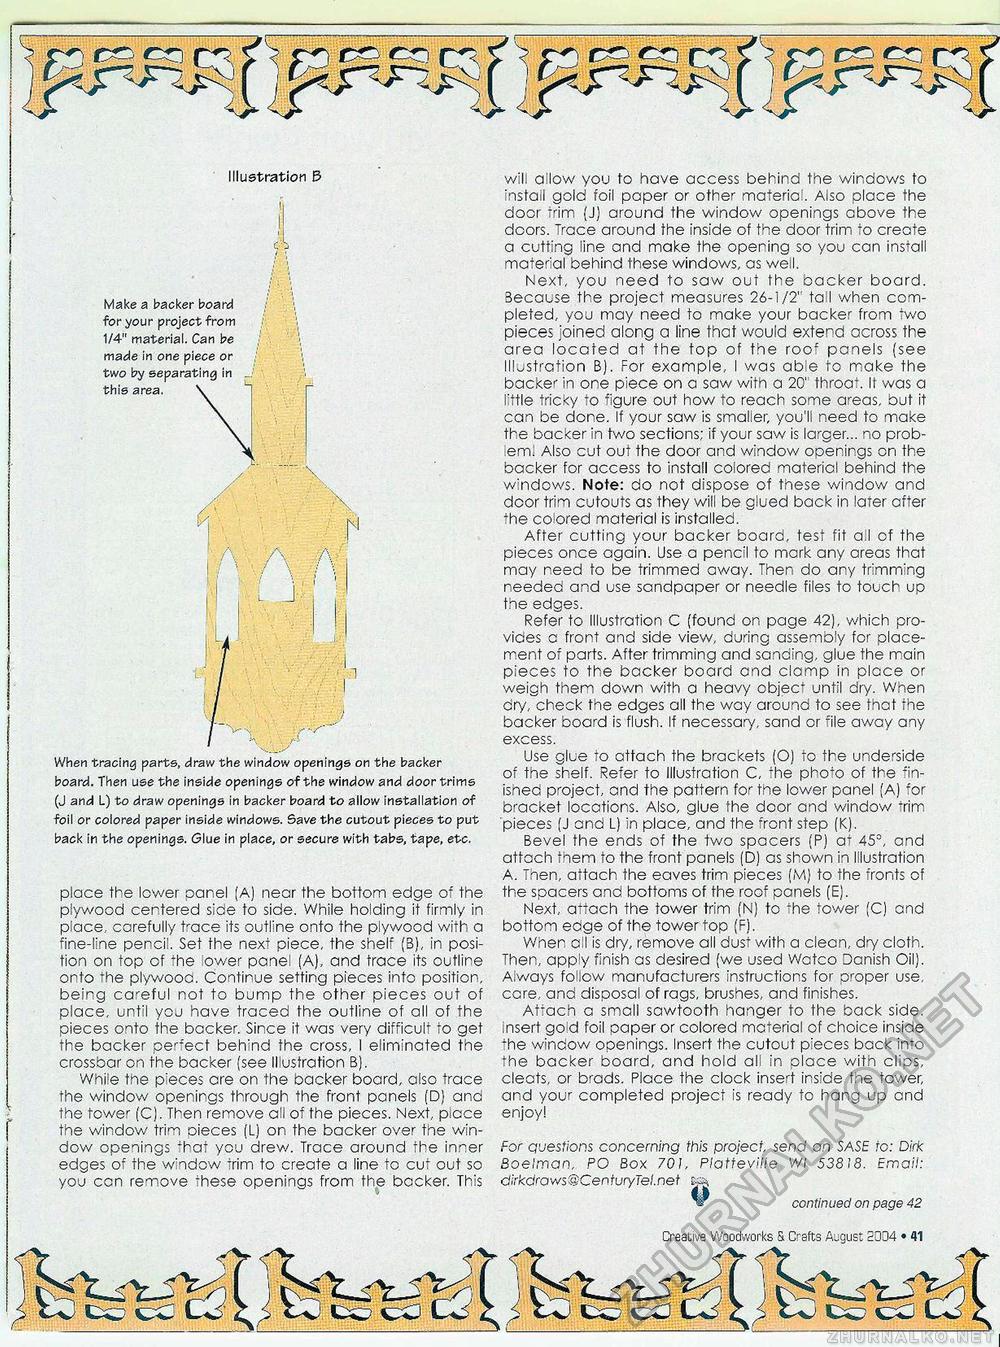
bp^rFI gplSlg Illustration 5 Make a backer board for your project from 1/4" material. Can be made in one piece or two by separating in this area. When tracing parts, draw the window openings on the backer board. Then use the inside openings of the window and door trims (J and L) to draw openings in backer board to allow installation of foil or colored paper inside windows. Save the cutout pieces to put back in the openings. Glue in place, or secure with tabs, tape, etc. place the lower panel (A) near the bottom edge of the plywood centered side to side. While holding it firmly in place, carefully trace its outline onto the plywood with a fine-line pencil. Set the next piece, the shelf (5), in position on top of the ower panel (A), and trace its outline onto the plywood. Continue setting pieces into position, being ca'eful not to bump the other pieces out of place, until you have traced the outline of all of the pieces onto the bccker. Since it was very difficult to get the backer perfect beh'nd the cross, I eliminated the crossbar on the backer (see Illustration B). While the p'eces ere on the backer board, also trace the window openings through the front panels (D) and the tower (C). Then remove all of the pieces. Next, picce the window trim oieces (L) on the backer over the window openings that you drew. Trace around the inner edges of the window trim to create a line to cut out so you con remove these openings from the bccker. This will allow you to have access behind the windows to install gold foil paper or other materic . Also place the doer trim (J) around the window openings above the doors. Trace around the inside of the door trim to create a cutting line and make the opening so you can install material behind these windows, as well. Next, you need to saw out the backer board. 3ecause the project measures 26-1/2' ta I when completed, you may need to make your backer from two pieces joined along a line that wouid exterd across the area located at the top of the roor panels (see Illustration B). For example, I was ab e to make the backer in one piece on a saw with a 20" throa+. It was a little tricky to figure out how to reach some areas, but it can be done. If your saw is smaller, you'll need to make the bac<er in two sections; if your saw is larger... no prob-eml Also cut out the door and window ooenings en the backer for access to install colored materiel behind the windows. Note: do not dispose of these window and door trim cutouts as they will be glued back in later after the cotored material is installed. After cutting your backer board, test fit at of the pieces once again. Use a pencil to mark any areas that may need to be trimmed away. Then do any trimming needed and use sandpaper or needle files to touch up the edges. Refer to Illustration C (found on page 42), which pro-vices a front and side view, during assemoly for placement of parts. After trimming and sanding, glue the main pieces to the backer board ond clamp in place or weigh them down with a heavy object until dry. When on/, check the edges all the way arcund to see that the backer board is flush. If necessary, sand or file away any excess. Use glue to attach the brackets (O) to the underside of the shelf. Refer to Illustration C, fhe phok) of the fin-isnec project, and the pattern for the lower panel (A) for bracket locations. Also, glue the door and window trim pieces (J and L) in place, and the front step (K). Bevel the ends of the two spacers (P) at 45°, and attach fnem to the front panels (D) as shown in Illustration A. men, attach the eaves trim pieces (M) to the fronts of the spacers and bottoms of the roof panels (E). Next, attach the tower trim (N) to "he tower (C) end bottom eoge of the tower top (F). When oil is dry, remove all dust with a clean, dry cloth. Then, app'y finish as desired (we used Wctco Danish Oil). Always follow manufacturers instructions for praper use, care, and disposal of rags, brushes, and finishes. Attach a small sawtooth hanger to the back side, nsert go d foil paper or colored material of choice inside ^he window openings. Insert the cutout p'eces back into fhe backer board, and hold all in place with clips, cleats, or brads. Place the clock insert insole the tower, and your completed project is ready to hang up and enjoy! For questions concerning this project, send on SASE rc: Dirk Soelman, PO Box 701, Plattevilie Wl 53815. Email: airkdraws@CenturyTel.net w continued on page 42 Creative Woodworks 5 Crafts A.gust d334 • 41 |


