Creative Woodworks & crafts 2004-08, страница 46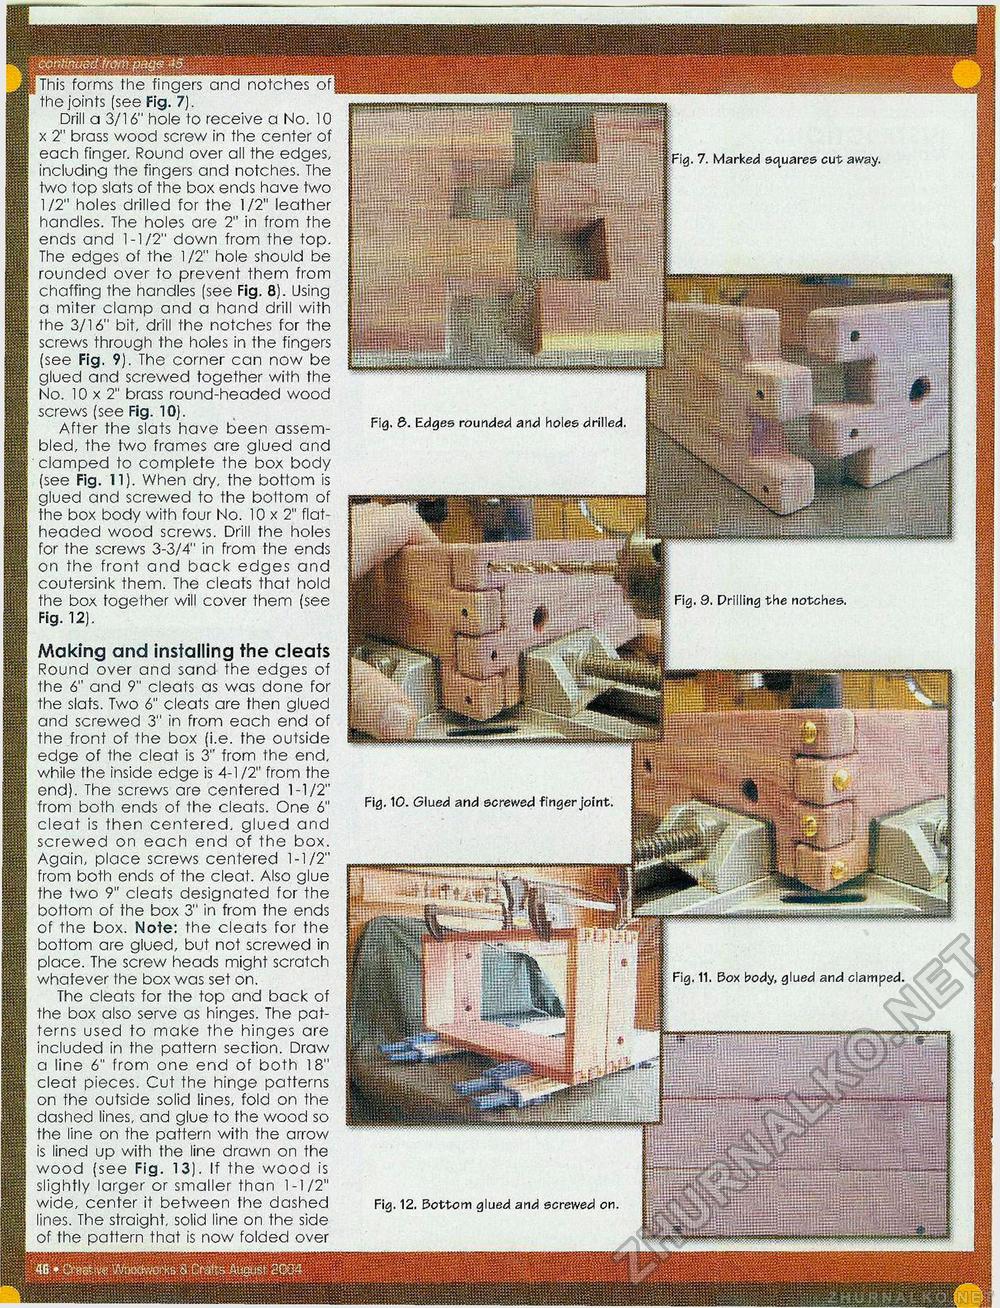
I This forms the fingers and notches of the joints (see Fig. 7). Drill a 3/16" hole to receive a No. 10 x 2" brass wood screw in the center of each finger. Round over all the edges, including the fingers and notches. The two lop slats of the box ends have two 1/2" holes drilled for the 1/2" leather handles. The holes are 2" in from the ends and 1-1/2" down from the top. The edges of the 1/2" hole should be rounded over to prevent them from chaffing the handles (see Fig. 8). Using a miter clamp and a hand drill with the 3/16" bit, drill the notches for the screws through the holes in the fingers (see Fig. 9). The corner can now be glued and screwed together with the No. 10x2" brass round-headed wood screws (see Fig. 10). After the slats have been assembled, the two frames are glued and clamped to complete the box body (see Fig. 11). When dry, the bottom is glued and screwed to the bottom of the box body with four No. 10x2" flat-headed wood screws. Drill the holes for the screws 3-3/4" in from the ends on the front and back edges and coutersink them. The cleats that hold the box together will cover them (see Fig. 12). Making and installing the cleats Round over and sand the edges of the 6" and 9" cleats as was done for the slats. Two 6" cleats are then glued and screwed 3" in from each end of the front of the box (i.e. the outside edge of the cleat is 3" from the end, while the inside edge is 4-1/2" from the end). The screws are centered 1-1/2" from both ends of the cleats. One 6" cleat is then centered, glued and screwed on each end of the box. Again, place screws centered 1-1/2" from both ends of the cleat. Also glue the two 9" cleats designated for the bottom of the box 3" in from the ends of the box. Note: the cleats for the bottom are glued, but not screwed in place. The screw heads might scratch whatever the box was set on. The cleats for the top and back of the box also serve as hinges. The patterns used to make the hinges are included in the pattern section. Draw a line 6" from one end of both 18" cleat pieces. Cut the hinge patterns on the outside solid lines, fold on the dashed lines, and glue to the wood so the line on the pattern with the arrow is lined up with the line drawn on the wood (see Fig. 13). If the wood is slightly larger or smaller than 1-1/2" wide, center it between the dashed lines. The straight, solid line on the side of the pattern that is now folded over M-Sijll&Sflp Fig. 7. Marked squares cut away. Fig. &. Edges rounded and holes drilled, aiiiwwiettssifoww Fig. 9. Drilling the notches. Fig. 10. Glued and screwed finger joint, Fig. 11. Box body, glued and clamped. Fig. 12. Bottom glued and screwed on |


