Creative Woodworks & crafts 2004-08, страница 47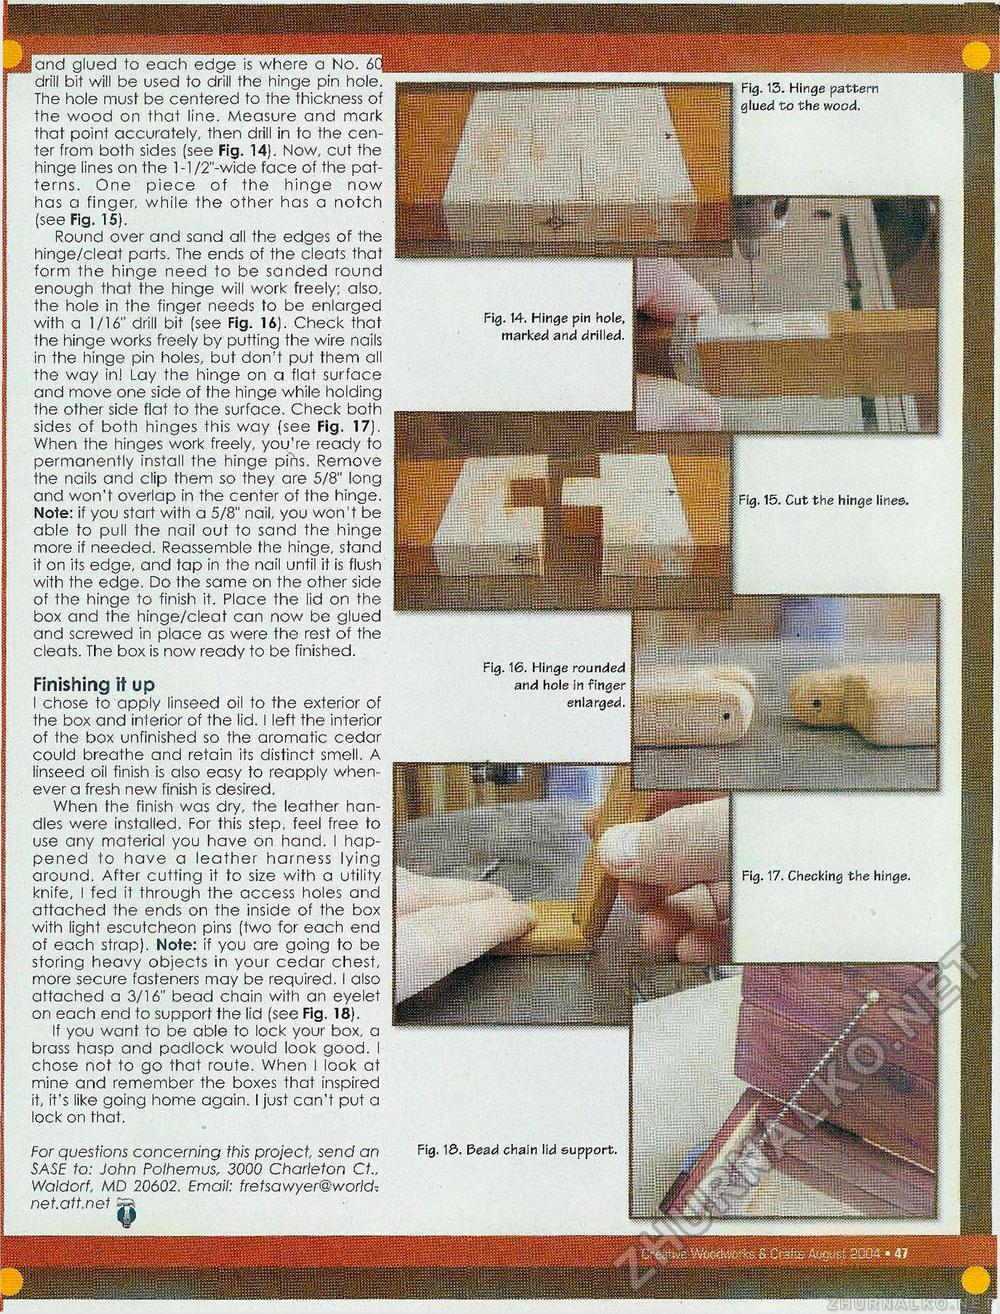
Fig. 13. Hinge pattern glued to the wood. Fig. 14. Hinge pin hole, marked and drilled. where a No drill bit will be used to drill the hinge pin hole. The hole must be centered to the thickness of the wood on that line. Measure and mark that point accurately, then drill in to the center from both sides (see Fig. 14). Now, cut the hinge lines on the l-l/2"-wide face of the patterns. One piece of the hinge now has a finger, while the other has a notch (see Fig. 15). Round over and sand all the edges of the hinge/cleat parts. The ends of the cleats that form the hinge need to be sanded round enough that the hinge will work freely; also, the hole in the finger needs to be enlarged with a 1/16" drill bit (see Fig. 16). Check that the hinge works freely by putting the wire nails in the hinge pin holes, but don't put them all the way inl Lay the hinge on a flat surface and move one side of the hinge while holding the other side flat to the surface. Check both sides of both hinges this way (see Fig. 17). When the hinges work freely, you're ready to permanently install the hinge pins. Remove the nails and clip them so they are 5/8" long and won't overlap in the center of the hinge. Note: if you start with a 5/8" nail, you won't be able to pull the nail out to sand the hinge more if needed. Reassemble fhe hinge, stand it on its edge, and tap in the nail until it is flush with the edge. Do the same on the other side of the hinge to finish it. Place the lid on the box and the hinge/cleat can now be glued and screwed in place as were the rest of the cleats. The box is now ready to be finished. Finishing it up I chose to apply linseed oil to the exterior of the box and interior of the lid. I left the interior of the box unfinished so the aromatic cedar could breathe and retain its distinct smell. A linseed oil finish is also easy to reapply whenever a fresh new finish is desired. When the finish was dry, the leather handles were installed. For this step, feel free to use any material you have on hand. 1 happened to have a leather harness lying around. After cutting it to size with a utility knife, I fed it through the access holes and attached the ends on the inside of the box with light escutcheon pins (two for each end of each strap). Note: if you are going to be storing heavy objects in your cedar chest, more secure fasteners may be required. I also attached a 3/16" bead chain with an eyelet on each end to support the lid (see Fig. 18). If you want to be able to lock your box, a brass hasp and padlock would look good. I chose not to go that route. When I look at mine and remember the boxes that inspired it, it's like going home again. I just can't put a lock on that. For questions concerning this project, send an SASE to: John Polhemus, 3000 Charleton Ct„ Waldorf, MD 20602. Email: fretsawyer@world-net.att.net Fig. 17. Checking the hinge. Fig. 18. Bead chain lid support. Fig. 16. Hinge rounded and hole in finger enlarged. fig. 15. Cut the hinge lines. |
||||||||


