Creative Woodworks & crafts 2004-08, страница 50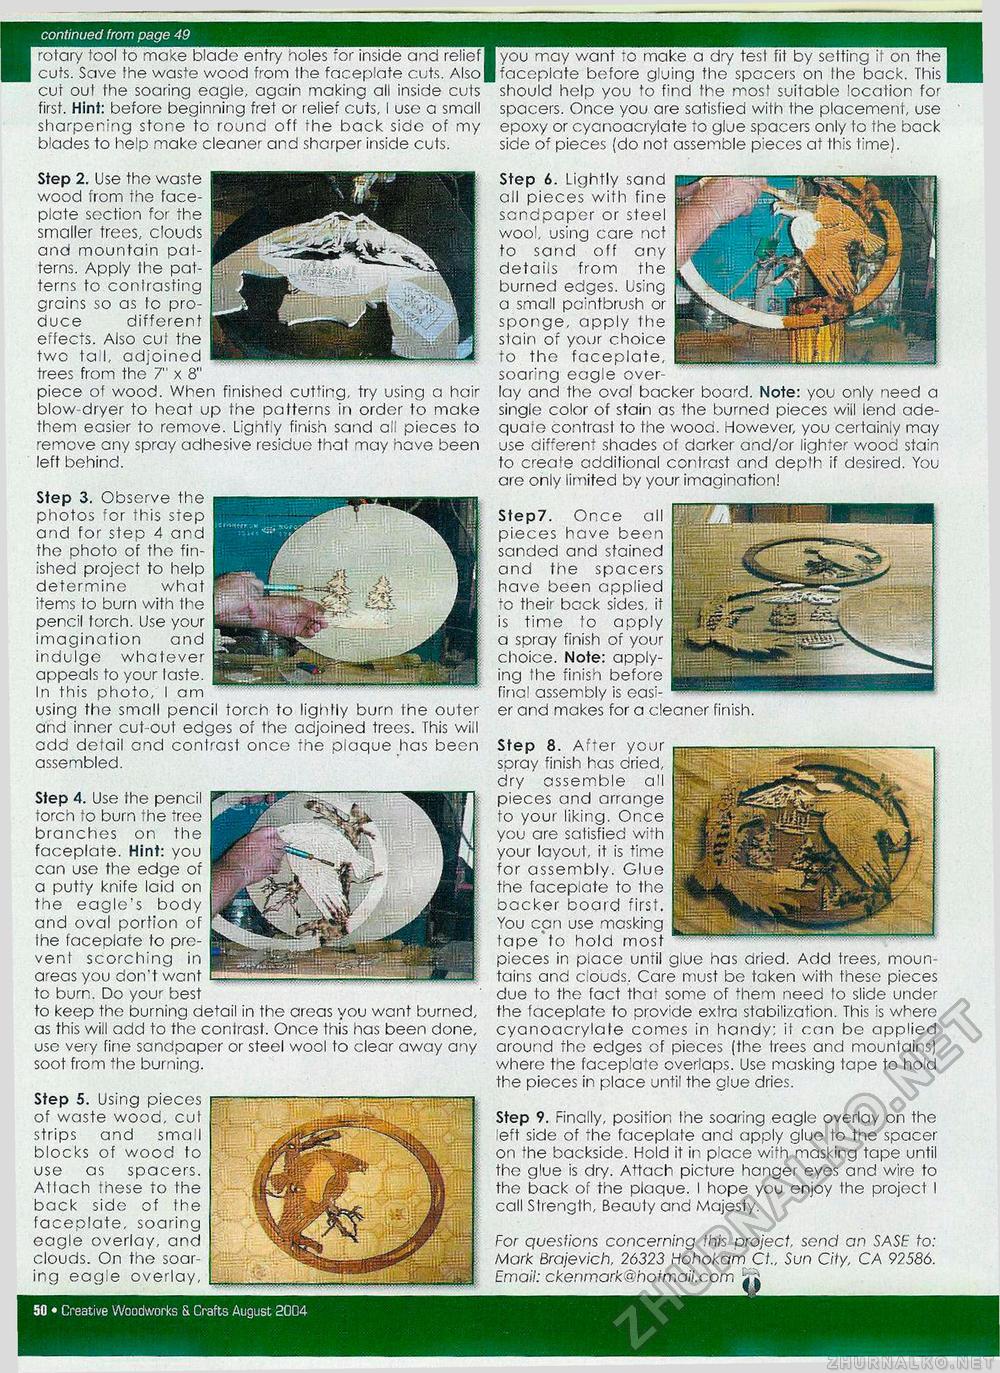
continued from page 49 ■ rotary tool to make blade entry holes for inside and relief! you may want to make a dry test fit by setting it on the ■ cuts. Save the waste wood from the faceplate cuts. Also(faceplate before gluing the spccers on Ihe back. This IH cut oul the soaring eagle, again making all inside cuts should help you to find the most suitable locatior for first. Hint: before beginning fret or relief cuts, I use a small spacers. Once you are satisfied wilh the placement, use sharpening stone to round off the back side of my epoxy or cyanoacrylate to glue spacers only to the back blades to help make cleaner and sharper inside cuts. side of pieces (do not assemble pieces at this time). Step 2. Use the waste wood from the face-plcte section for the smaller trees, clouds and mountain pal-terns. Apply Ihe patterns to contrasting grains so as to produce different effects. Also cuf the two tail, adjoined trees from the 7" x 8" piece of wood. When finished cutting, try using a hair blow dryer to heat up the patterns in order to make them easier to remove. Lightly finish sand all pieces to 'emove any spray adhesive residue that may have been left behind. Step 3. Observe the photos for this step and for step 4 and the photo of the finished project to help determine what items to burn with the pencil torch. Use your imagination and indulge whatever appeals to your laste. In this photo, I am using the small pencil torch to lightly burn the outer and inner cut-out edges of the adjoined trees. This wiil add detail end contrast once the plaque has been assembled. Step 4. Use the pencil torch to burn the tree branches on the faceplate. Hint: you can use the edge of a putty knife laid on the eagle's body and oval portion of the faceplate to pro-vent scorching in areas you don't want to burn. Do your best to keep the burning detail in the areas you want burned, as this will add to the contrast. Once this has been done, use very fine sandpaper or steel wool to clear away any soot from the burning. Step 5. Using pieces of waste wood, cut strips and small blocks of wood to use as spacers. Attach these to the back side of the faceplate, soaring eagle overlay, and clouds. On the soaring eagle overlay, Step 6. Lightly sand all pieces with fine sandpaper or steel wool, using care not to sand off any details from the burned edges. Using a small paintbrush or sponge, apply the stain of your choice to the faceplate, soaring eagle overlay and the oval backer board. Note: you only need a single color of stain as the burned pieces will lend adequate contrast to the wooa. However, you certainly may use different shades of darker and/or lighter wood stain to create additional contrast and depth if desired. You are only limited by your imagination! Step7. Once all pieces have been sanded and stained and the spacers have been applied to their back sides, it is time to apply a spray finish of your choice. Note: applying the finish before final assembly is easi-er and makes for a cleanor finish. Step 8. After your soray finish has dried, dry assemble all pieces and arrange to your liking. Once you are satisfied with your layout, it is time for assembly. Glue the faceplate to the backer board first. You can use mosking tape to hold most pieces in place until glue has dried. Add trees, mountains and clouds. Care must be taken with these pieces due to the fact that some of them need to slide under the faceplate to provide extra stabilization. This is where cyanoacrylate comos in handy; il can bo applied around fhe edges of pieces (the trees and mountains) where the facep'afe overlaps. Use masking tape to hold the pieces in place until the glue dries. Step 9. Finally, position the soaring eagle overlay on the eft side of the faceplate and apply glue to the spacer on the backside. Hold it in p'ace with masking tape until the glue is dry. Attach picture hanger eyes and wire to the back of the plaque. I hope you enjoy the project I call Strength, Beauty and Majesty. For questions concerning this project, send an SASE to: Mark Brajevich, 26323 Hohokam Ci„ Sun City, CA 92.586. Email: ckenmark@hoimail.com Si 50 • Creative Woodworks & Crafts August 2004 |


