Creative Woodworks & crafts 2004-08, страница 72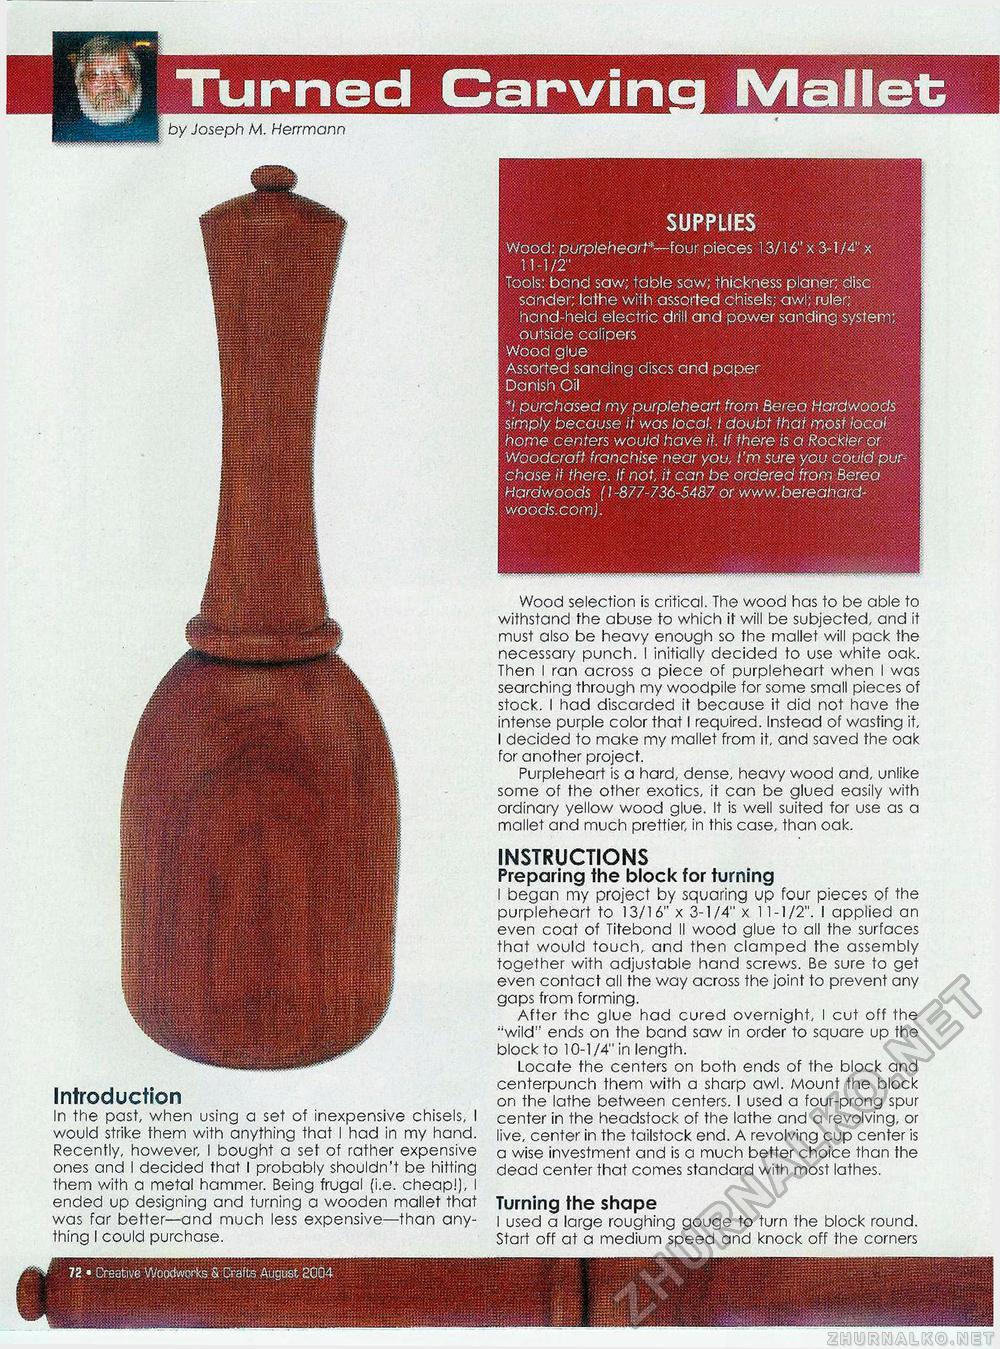
by Joseph M. Herrmann SUPPLIES Wood: purpleheart*—four pieces 13/16"x3-1/4"x 11-1/2" Tools: bond saw; table saw; thickness planer; disc sander; lathe with assorted chisels; awl; ruler; hand held electric drill and power sanding system; outside calipers Wood glue Assorted sanding discs and paper Danish Oil *I purchased my purpleheart from Berea Hardwoods simply because it was local. I doubt that most local home centers would have it. If there is a Rockier or Woodcraft franchise near you, I'm sure you could purchase if there. If not, it can be ordered from Berea Hardwoods (I-877-736-5487 or www.bereahard-w oods.coml. Wood selection is critical. The wood has to be able to withstand the abuse to which it will be subjected, and it must also be heavy enough so the mallet will pack the necessary punch. I initially decided to use white oak. Then I ran across a piece of purpleheart when I was searching through my woodpile for some small pieces of stock. I had discarded it because it did not have the intense purple color that I required. Instead of wasting it, I decided to make my mallet from it, and saved the oak for another project. Purpleheart is a hard, dense, heavy wood and, unlike some of the other exotics, it can be glued easily with ordinary yellow wood glue. It is well suited for use as a mallet and much prettier, in this case, than oak. INSTRUCTIONS Preparing the block for turning I began my project by squaring up four pieces of the purpleheart to 13/16" x 3-1/4" x 11-1/2". I applied an even coat of Titebond II wood glue to all the surfaces that would touch, and then clamped the assembly together with adjustable hand screws. Be sure to get even contact all the way across the joint to prevent any gaps from forming. After the glue had cured overnight, I cut off the "wild" ends on the band saw in order to square up the block to 10-1/4" in length. Locate the centers on both ends of the block and centerpunch them with a sharp awl. Mount the block on the lathe between centers. I used a four-prong spur center in the headstock of the lathe and a revolving, or live, center in the tailstock end. A revolving cup center is a wise investment and is a much better choice than the dead center that comes standard with most lathes. Turning the shape I used a large roughing gouge to turn the block round. Start off at a medium speed and knock off the corners Introduction In the past, when using a set of inexpensive chisels, I would strike them with anything that I had in my hand. Recently, however, I bought a set of rather expensive ones and I decided that I probably shouldn't be hitting them with a metal hammer. Being frugal (i.e. cheap!), I ended up designing and turning a wooden mallet that was far better—and much less expensive—than anything I could purchase. |


