Creative Woodworks & crafts 2004-08, страница 74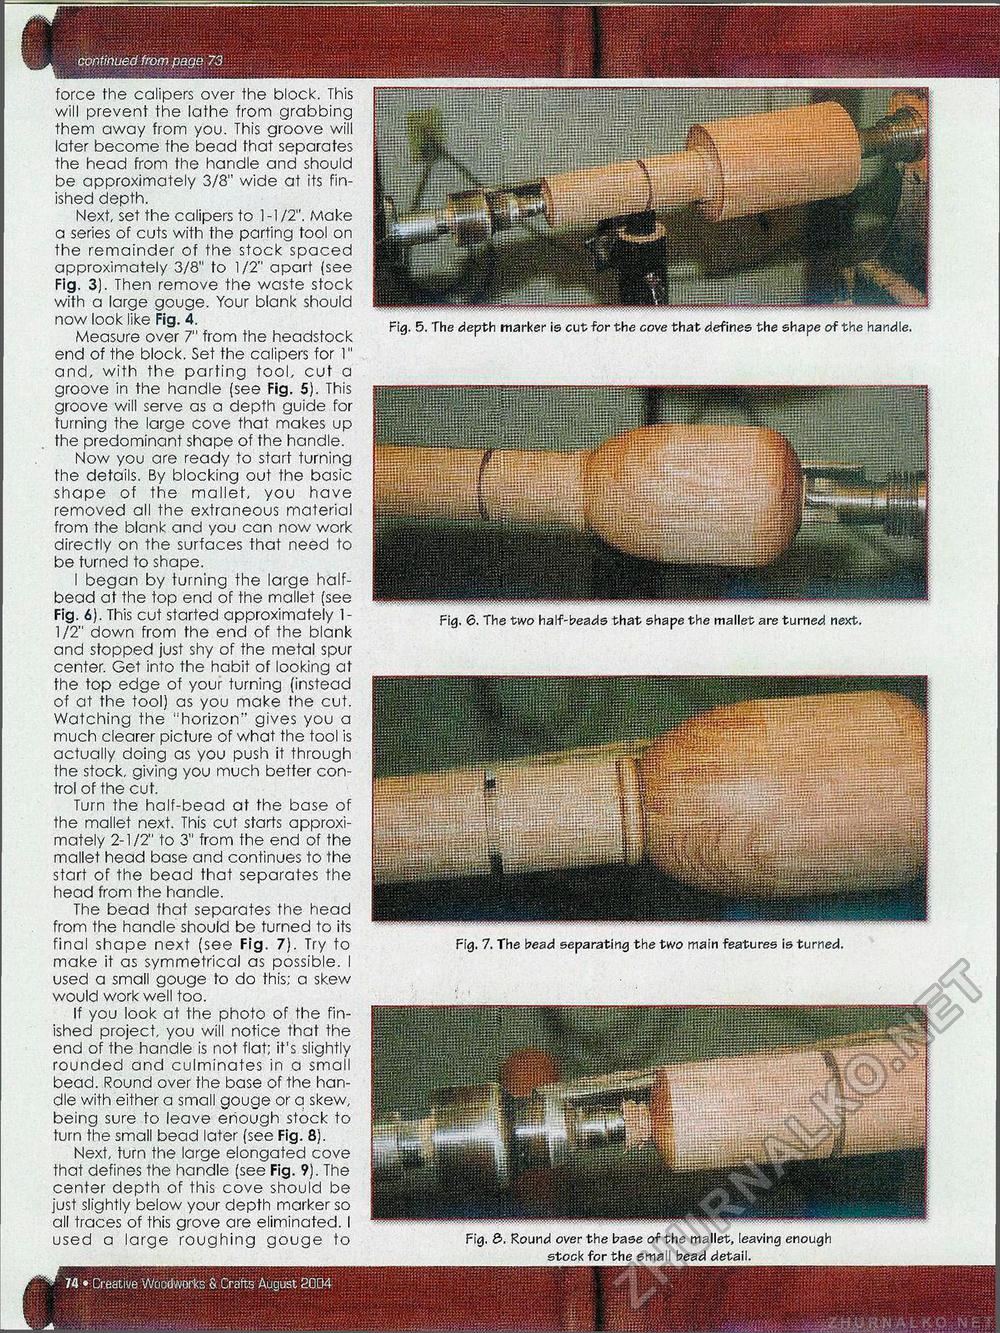
continued from page 73 force the calipers over the block. This will prevent the lathe from grabbing them away from you. This groove will later become the bead that separates the head from the handle and should be approximately 3/8" wide at its finished depth. Next, set the calipers to 1 -1 /2". Make a series of cuts with the parting tool on the remainder of the stock spaced approximately 3/8" to 1/2" apart (see Fig. 3). Then remove the waste stock with a large gouge. Your blank should now look like Fig. 4. Measure over 7" from the headstock end of the block. Set the calipers for 1" and, with the parting tool, cut a groove in the handle (see Fig. 5). This groove will serve as a depth guide for turning the large cove that makes up the predominant shape of the handle. Now you are ready to start turning the details. By blocking out the basic shape of the mallet, you have removed all the extraneous material from the blank and you can now work directly on the surfaces that need to be turned to shape. I began by turning the large half-bead at the top end of the mallet (see Fig. 6). This cut started approximately 1-1/2" down from the end of the blank and stopped just shy of the metal spur center. Get into the habit of looking at the top edge of your turning (instead of at the tool) as you make the cut. Watching the "horizon" gives you a much clearer picture of what the tool is actually doing as you push it through the stock, giving you much better control of the cut. Turn the half-bead at the base of the mallet next. This cut starts approximately 2-1/2" to 3" from the end of the mallet head base and continues to the start of the bead that separates the head from the handle. The bead that separates the head from the handle should be turned to its final shape next (see Fig. 7). Try to make it as symmetrical as possible. I used a small gouge to do this; a skew would work well too. If you look at the photo of the finished project, you will notice that the end of the handle is not flat; it's slightly rounded and culminates in a small bead. Round over the base of the handle with either a small gouge or q skew, being sure to leave enough stock to turn the small bead later (see Fig. 8). Next, turn the large elongated cove that defines the handle (see Fig. 9). The center depth of this cove should be just slightly below your depth marker so all traces of this grove are eliminated. I used a large roughing gouge to Fig. &. Round over the base of the mallet, leaving enough stock for the small bead detail. Fig. 5. The depth marker is cut for the cove that defines the shape of the handle. Fig. 6. The two half-beads that shape the mallet are turned next. Fig. 7. The bead separating the two main features is turned. |


