Creative Woodworks & crafts 2004-09, страница 47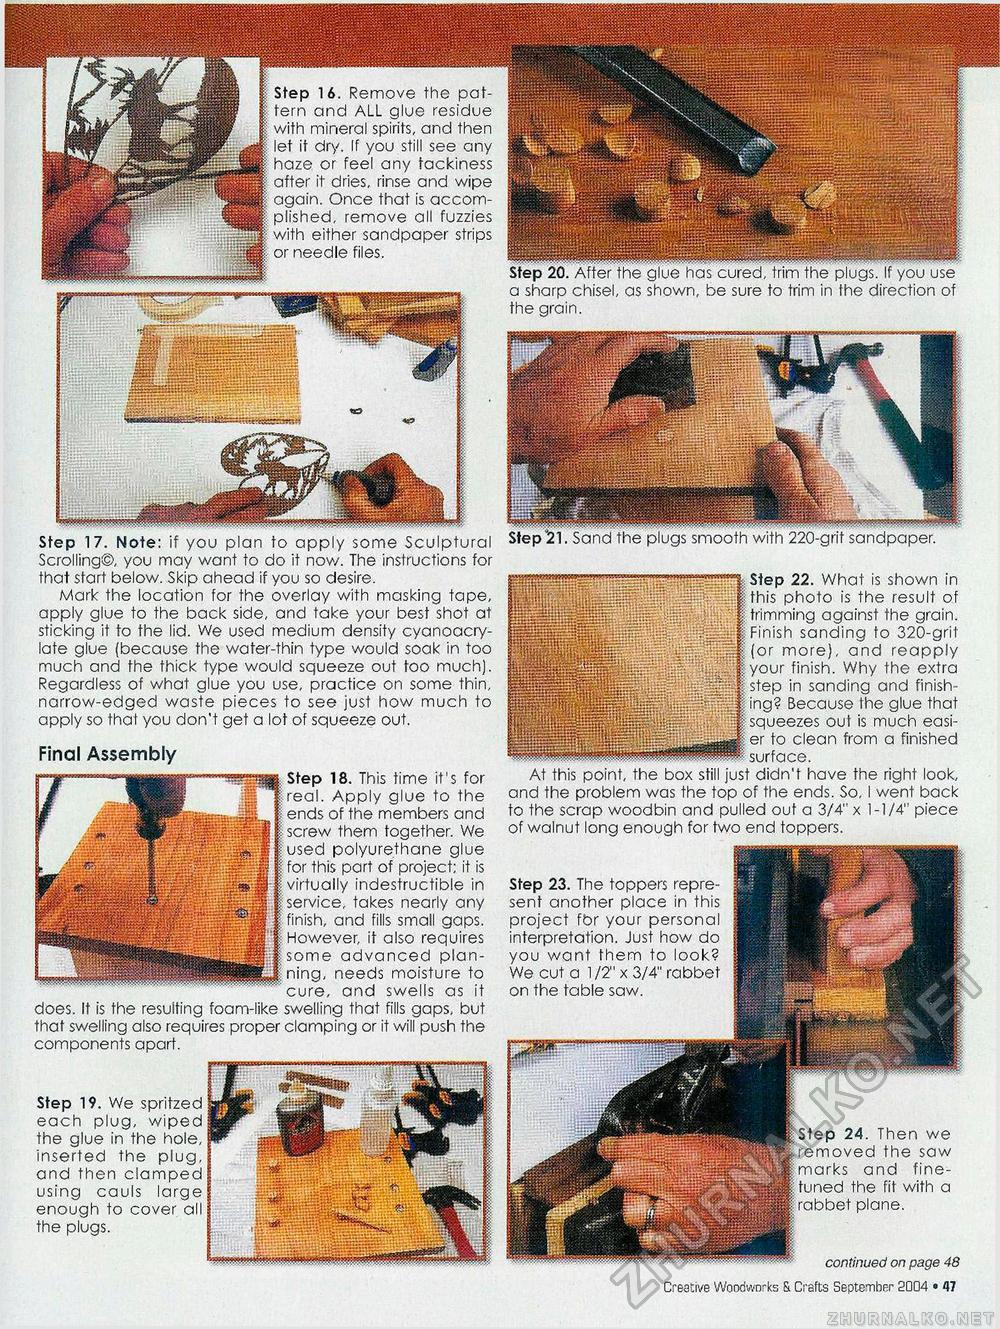
Step 16. Remove the pattern and ALL glue residue with mineral spirits, and then let it dry. If you still see any haze or feel any tackiness after it dries, rinse and wipe again. Once that is accomplished, remove all fuzzies with either sandpaper strips or needle files. Step 19. We spritzed each plug, wiped the glue in the hole, inserted the plug, and then clamped using cauls large enough to cover all the plugs. Step 20. After the glue has cured, trim the plugs. If you use a sharp chisel, as shown, be sure to trim in the direction of the grain. Step 17. Note: if you plan to apply some Sculptural Scrolling©, you may want to do it now. The instructions for that start below. Skip ahead if you so desire. Mark the location for the overlay with masking tape, apply glue to the back side, and take your best shot at sticking it to the lid. We used medium density cyanoacry-late glue (because the water-thin type would soak in too much and the thick type would squeeze out too much). Regardless of what glue you use, practice on some thin, narrow-edged waste pieces to see just how much to apply so that you don't get a lot of squeeze out. Final Assembly Step 18. This time it's for real. Apply glue to the ends of the members and screw them together. We used poiyurethane glue for this part of project; it is virtually indestructible in service, takes nearly any finish, and fills small gaps. However, it also requires some advanced planning, needs moisture to cure, and swells as it does. It is the resulting foam-like swelling that fills gaps, but that swelling also requires proper clamping or it will push the components apart. Step 22. What is shown in this photo is the result of trimming against the grain. Finish sanding to 320-grit (or more), and reapply your finish. Why the extra step in sanding and finish-Because the glue that squeezes out is much easier to clean from a finished surface. At this point, the box still just didn't have the right look, and the problem was the top of the ends. So, I went back to the scrap woodbin and pulled out a 3/4" x 1-1/4" piece of walnut long enough for two end toppers. 24. Then we removed the saw arks and fine-the fit with a plane. continued on page 48 Step 23. The toppers represent another place in this project fbr your personal interpretation. Just how do you want them to look? We cut a 1/2" x 3/4" rabbet on the table saw. fit • Creative Woodworks S. Crafts September 2004 |


