Creative Woodworks & crafts 2004-09, страница 45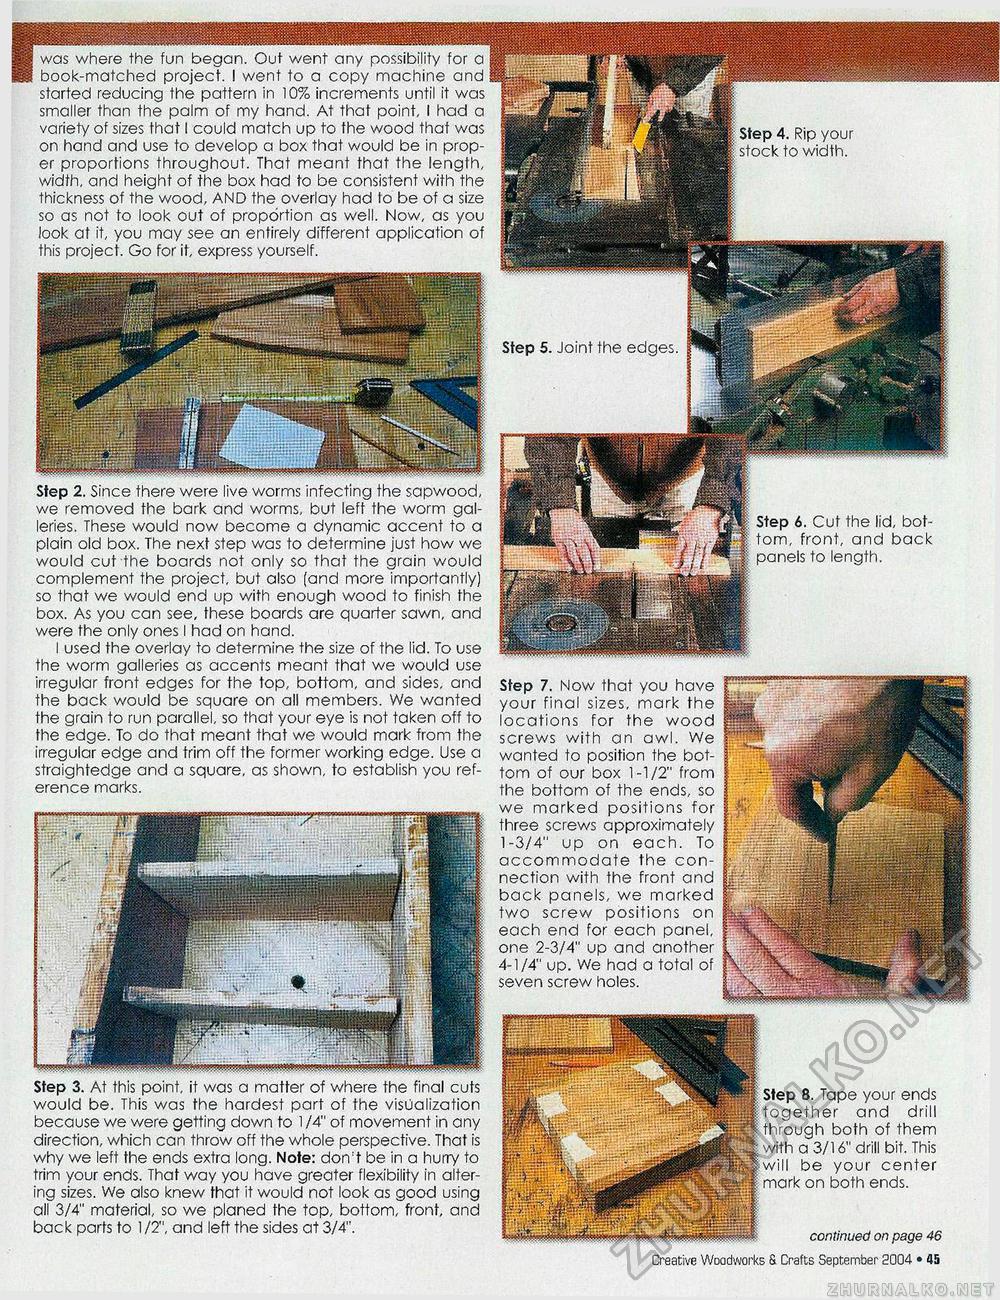
■ was where the fun began. Out went any possibility for a book-matched project. I went to a copy machine and started reducing the pattern in 10% increments until it was smaller than the palm of my hand. At that point, I had a variety of sizes that I could match up to the wood that was on hand and use to develop a box that would be in proper proportions throughout. That meant that the length, width, and height of the box had to be consistent with the thickness of the wood, AND the overlay had to be of a size so as not to look out of proportion as well. Now, as you look at it, you may see an entirely different application of this project. Go for it, express yourself. Step 2. Since there were live worms infecting the sapwood, we removed the bark and worms, but left the worm galleries. These would now become a dynamic accent to a plain old box. The next step was to determine just how we would cut the boards not only so that the grain would complement the project, but also (and more importantly) so that we would end up with enough wood to finish the box. As you can see, these boards are quarter sawn, and were the only ones I had on hand. I used the overlay to determine the size of the lid. To use the worm galleries as accents meant that we would use irregular front edges for the top, bottom, and sides, and the back would be square on all members. We wanted the grain to run parallel, so that your eye is not taken off to the edge. To do that meant that we would mark from the irregular edge and trim off the former working edge. Use a straightedge and a square, as shown, to establish you reference marks. Step 3. At this point, it was a matter of where the final cuts would be. This was the hardest part of the visualization because we were getting down to 1/4" of movement in any direction, which can throw off the whole perspective. That is why we left the ends extra long. Note: don:t be in a hurry to trim your ends. That way you have greater flexibility in altering sizes. We also knew that it would not look as good using all 3/4" material, so we planed the top, bottom, front, and back parts to 1 /2", and left the sides at 3/4". Step 6. Cut the lid, bottom, front, and back panels to length. continued on page 46 Creative Woodworks S Crafts September 2004 • 45 : Step 4. Rip your i stock to width. Step 5. Joint the edges Step 7. Now that you have your final sizes, mark the locations for the wood screws with an awl. We wanted to position the bottom of our box 1-1/2" from the bottom of the ends, so we marked positions for three screws approximately 1-3/4" up on each. To accommodate the connection with the front and back panels, we marked two screw positions on each end for each panel, one 2-3/4" up and another 4-1/4" up. We had a total of seven screw holes. 8. Tape your ends together and drill through both of them a 3/16" drill bit. This will be your center mark on both ends. |


