Creative Woodworks & crafts 2004-09, страница 43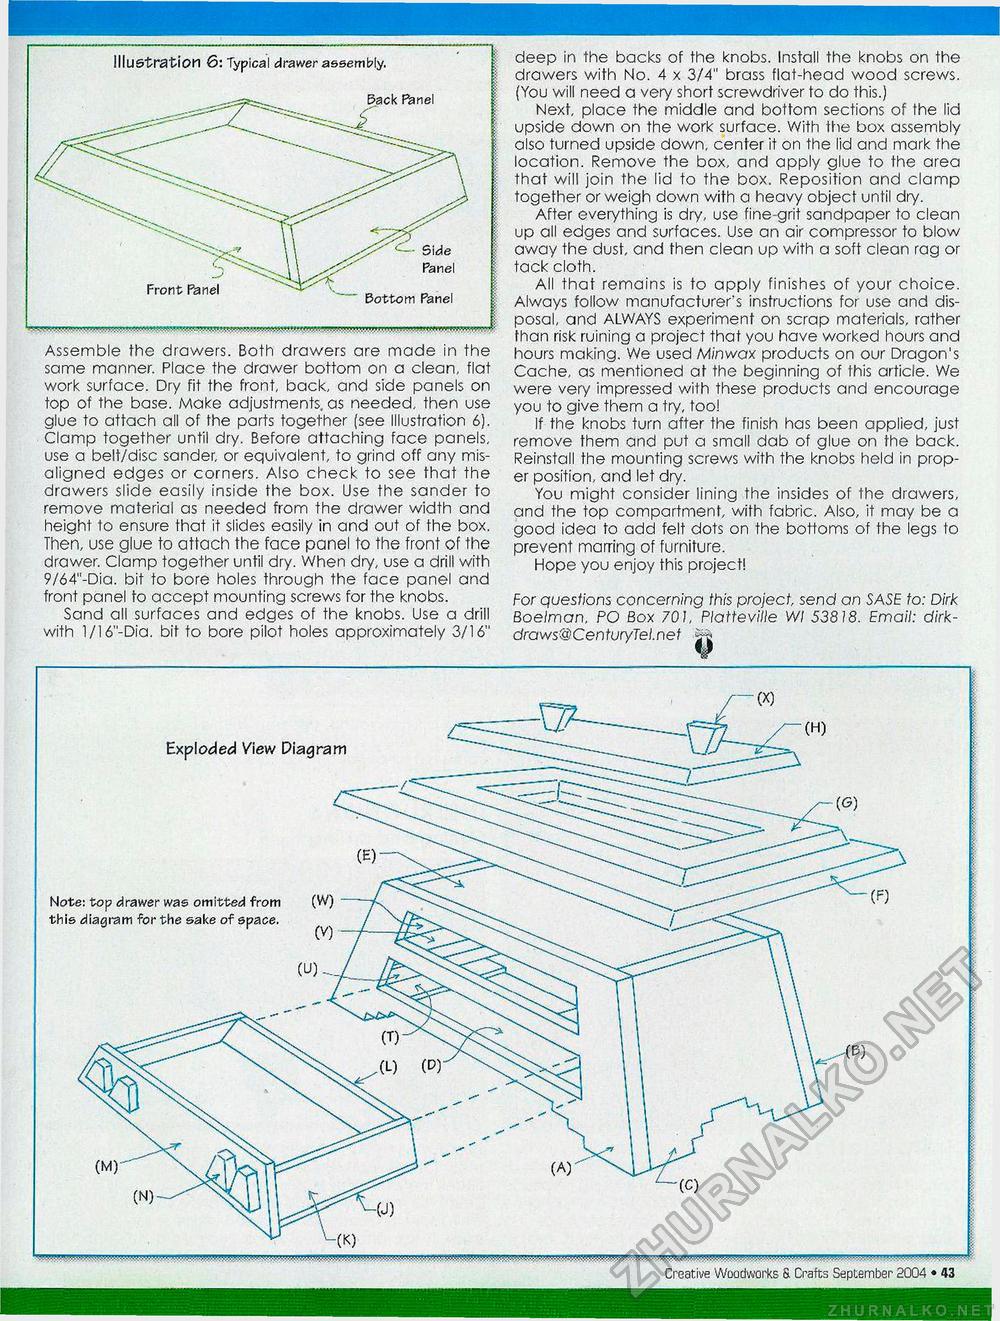
Illustration 6: Typical drawer assembly. Pack F^nel Side Panel Bottom Panel Assemble the drawers. Both drawers are made in the same manner. Place the drawer bottom on a clean, flat work surface. Dry fit the front, back, and side panels on top of the base. Make adjustments, as needed, then use glue to attach all of the parts together (see Illustration 6). Clamp together until dry. Before attaching face panels, use a belt/disc sander, or equivalent, to grind off any misaligned edges or corners. Also check to see that the drawers slide easily inside the box. Use the sander to remove material as needed from the drawer width and height to ensure that it slides easily in and out of the box. Then, use glue to attach the face panel to the front of the drawer. Clamp together until dry. When dry, use a drill with 9/64"-Dia. bit to bore holes through the face panel and front panel to accept mounting screws for the knobs. Sand all surfaces and edges of the knobs. Use a drill with 1/16"-Dia. bit to bore pilot holes approximately 3/16" deep in the backs of the knobs. Install the knobs on the drawers with No. 4 x 3/4" brass flat-head wood screws. (You will need a very short screwdriver to do this.) Next, place the middle and bottom sections of the lid upside down on the work surface. With the box assembly also turned upside down, center it on the lid and mark the location. Remove the box, and apply glue to the area that will join the lid to the box. Reposition and clamp together or weigh down with a heavy object until dry. After everything is dry, use fine-grit sandpaper to clean up all edges and surfaces. Use an air compressor to blow away the dust, and then clean up with a soft clean rag or tack cloth. All that remains is to apply finishes of your choice. Always follow manufacturer's instructions for use and disposal, and ALWAYS experiment on scrap materials, rather than risk ruining a project that you have worked hours and hours making. We used Minwax products on our Dragon's Cache, as mentioned at the beginning of this article. We were very impressed with these products and encourage you to give them a try, too! If the knobs turn after the finish has been applied, just remove them and put a small dab of glue on the back. Reinstall the mounting screws with the knobs held in proper position, and let dry. You might consider lining the insides of the drawers, and the top compartment, with fabric. Also, it may be a good idea to add felt dots on the bottoms of the legs to prevent marring of furniture. Hope you enjoy this project! For questions concerning this project, send an SASE to: Dirk Boelman. PO Box 701, Platteville Wl 53818. Email: dirk-draws@CenturyTel.net ^ Exploded View Diagram Note: top drawer was omitted from this diagram for the sake of space. -(K) fit • Creative Woodworks S. Crafts September 2004 |


