Creative Woodworks & crafts 2004-09, страница 41
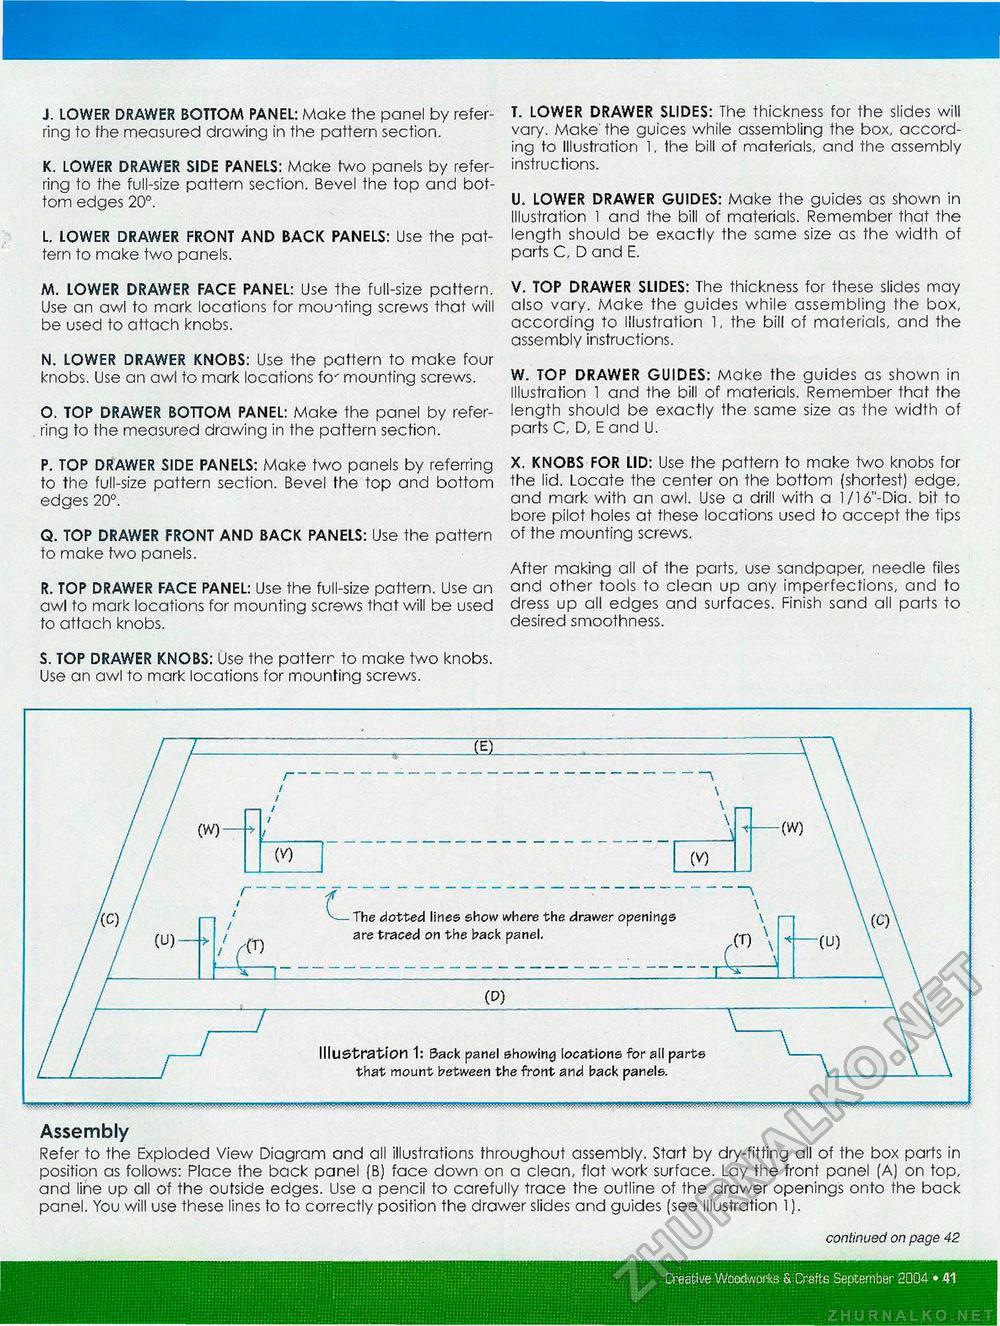
J. LOWER DRAWER BOTTOM PANEL: Make the panel by referring to the measured drawing in the pattern section. K. LOWER DRAWER SIDE PANELS: Make two panels by referring to the full-size pattern section. Bevel the top and bottom edges 20°. L. LOWER DRAWER FRONT AND BACK PANELS: Use the pattern to make two panels. M. LOWER DRAWER FACE PANEL: Use the full-size pattern. Use an awl to mark locations for mounting screws that will be used to attach knobs. N. LOWER DRAWER KNOBS: Use the pattern to make four knobs. Use an awl to mark locations fo' mounting screws. O. TOP DRAWER BOTTOM PANEL: Make the panel by referring to the measured drawing in the pattern section. P. TOP DRAWER SIDE PANELS: Make two panels by referring to the full-size pattern section. Bevel the top and bottom edges 20°. Q. TOP DRAWER FRONT AND BACK PANELS: Use the pattern to make two panels. R. TOP DRAWER FACE PANEL: Use the full-size pattern. Use an awl to mark locations for mounting screws that will be used to attach knobs. S. TOP DRAWER KNOBS: Use the pattern to make two knobs. Use an awl to mark locations for mounting screws. T. LOWER DRAWER SLIDES: The thickness for the slides will vary. Make' the guices while assembling the box, according to Illustration 1, the bill of materials, and the assembly instructions. U. LOWER DRAWER GUIDES: Make the guides as shown in Illustration 1 and the bill of materials. Remember that the length should be exactly the same size as the width of parts C, D and E. V. TOP DRAWER SLIDES: The thickness for these slides may also vary. Make the guides while assembling the box, according to Illustration 1, the bill of materials, and the assembly instructions. W. TOP DRAWER GUIDES: Make the guides as shown in Illustration 1 and the bill of materials. Remember that the length should be exactly the same size as the width of parts C, D, E and U. X. KNOBS FOR LID: Use the pattern fo make two knobs for the lid. Locate the center on the bottom (shortest) edge, and mark with an awl. Use a drill with a 1/16"-Dia. bit to bore pilot holes at these locations used to accept the tips of the mounting screws. After making all of the parts, use sandpaper, needle files and other tools to clean up any imperfections, and to dress up all edges and surfaces. Finish sand all parts to desired smoothness. Assembly Refer to the Exploded View Diagram and all illustrations throughout assembly. Start by dry-fitting all of the box parts in position as follows: Place the back panel (B) face down on a clean, flat work surface. Lay the front panel (A) on top, and line up all of the outside edges. Use a pencil to carefully trace the outline of the drawer openings onto the back panel. You will use these lines to to correctly position the drawer slides and guides (see Illustration 1). continued on page 42 1(1 • Creative Woodworks & Crafts September 3004 |


