Creative Woodworks & crafts 2004-09, страница 59
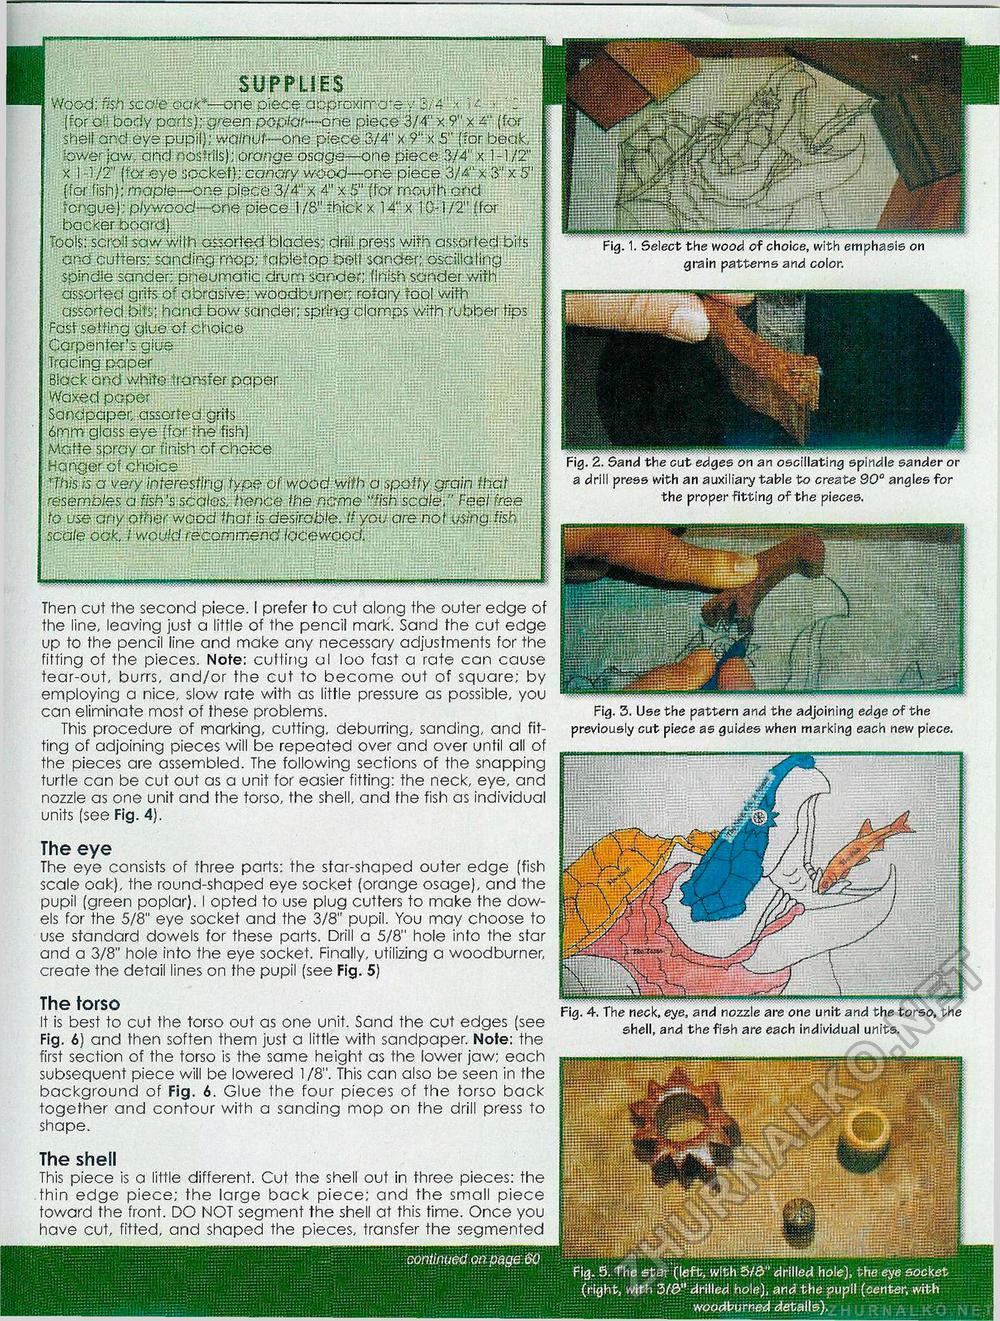
SUPPLIES Wood:' fish scale oak*—one piece approximate. y 3/4''>; ■ r [for oil body parts};:green poplar--one piece' 3/4" x 9" x 4" [for shell and eye pupil); walnut—one piece;3/4" x 9'' x 5" (for beak, lower jaw, andnostrils); orange osage—one piece 3/4" x. 1-1/2" x 1 -1/2" (for eye socket); canary wood—one piece 3/4" x 3" x 5" (for fish); maple—one piece 3/4" x 4" x 5" (for mouth ond tongue); plywood—one piece 1 /8".thick x 14" x 10-1 /2" (for backer board) Tools: scroll saw with assorted blades; drill press with assorted bits and cutters; sanding mop; tgbtetpp belt sander; oscillating . spindle sander; pneumatic drum sander; finish sander with assorted grits of abrasive: woodturner; rotary fool With assorted bits; hand bow sander; spring clamps with rubber tips Fast setting giue of choice Carpenter's giu-e Tracing paper Black and white transfer paper. Waxed paper Sandpaper, assorted grits . " 6mm glass eye (for the fish) Matte spray or finish of choice Hanger of choice This is a very interesting type of wood with a spotty grain that resembles a fish's stales, hence the ncme ''fish scale." Feel free to use any other wood that is desirable. If you are not usingj fish scale oak, I would recommend lacewood. Fig. 1. Select the wood of choice, with emphasis on continued on page. 60 Fig. S. The star (left, with 5/8" drilled hole), the eye socket (right, with 3/8" drilled hole), and the pupil (center, with woodburned details). S5SS The eye The eye consists of three parts: the star-shaped outer edge (fish scale oak), the round-shaped eye socket (orange osage), and the pupil (green poplar). I opted to use plug cutters to make the dowels for the 5/8" eye socket and the 3/8" pupil. You may choose to use standard dowels for these parts. Drill a 5/8" hole into the star and a 3/8" hole into the eye socket. Finally, utilizing a woodbumer, create the detail lines on the pupil (see Fig. 5) The torso It is best to cut the torso out as one unit. Sand the cut edges (see Fig. 6) and then soften them just a little with sandpaper. Note: the first section of the torso is the same height as the lower jaw; each subsequent piece will be lowered 1/8". This can also be seen in the background of Fig. 6. Glue the four pieces of the torso back together and contour with a sanding mop on the drill press to shape. The shell This piece is a little different. Cut the shell out in three pieces: the thin edge piece; the large back piece; and the small piece toward the front. DO NOT segment the shell at this time. Once you have cut, fitted, and shaped the pieces, transfer the segmented a drill press with an auxiliary table to create 900 angles for the proper fitting of the pieces. Then cut the second piece. I prefer to cut along the outer edge of the line, leaving just a little of the pencil mark. Sand the cut edge up to the pencil line and make any necessary adjustments for the fitting of the pieces. Note: cutting a I loo fast a rate can cause tear-out, burrs, and/or the cut to become out of square; by employing a nice, slow rate with as little pressure as possible, you can eliminate most of these problems. This procedure of marking, cutting, deburring, sanding, and fitting of adjoining pieces will be repeated over and over until all of the pieces are assembled. The following sections of the snapping turtle can be cut out as a unit for easier fitting: the neck, eye, and nozzle as one unit and the torso, the shell, and the fish as individual units (see Fig. 4). Fig. 3. Use the pattern and the adjoining edge of the previously cut piece as guides when marking each new piece. shell, and the fish are each individual units. |


