Creative Woodworks & crafts 2004-09, страница 62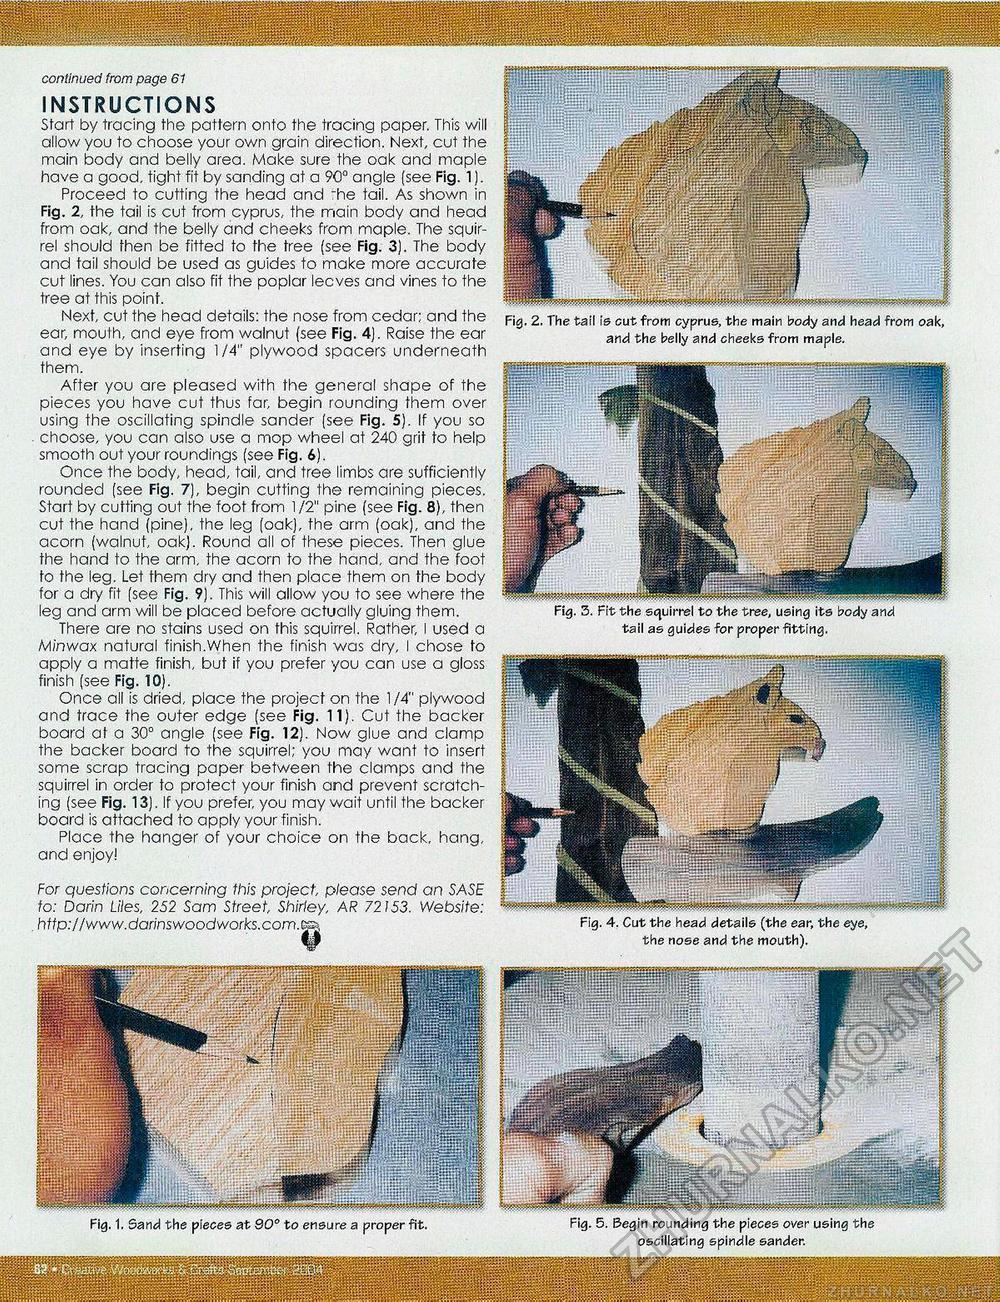
Fig. 1. Sand the pieces at 90° to ensure a proper fit. Fig. 5. Begin rounding the pieces over using the oscillating spindle sander. continued from page 61 INSTRUCTIONS Start by tracing the pattern onto the tracing paper. This will allow you to choose your own grain direction. Next, cut the main body and belly area. Make sure the oak and maple have a good, tight fit by sanding at a 90° angle (see Fig. 1). Proceed to cutting the head and "he tail. As shown in Fig. 2, the tail is cut from Cyprus, the main body and head from oak, and the belly and cheeks from maple. The squirrel should then be fitted to the tree (see Fig. 3). The body and tail should be used as guides to make more accurate cut lines. You can also fit the poplar iecves and vines to the tree at this point. Next, cut the head details: the nose from cedar; and the ear, mouth, and eye from walnut (see Fig. 4). Raise the ear and eye by inserting 1/4" plywood spacers underneath them. After you are pleased with the general shape of the pieces you have cut thus far, begin rounding them over using the oscillating spindle sander (see Fig. 5). If you so choose, you can also use a mop wheel at 240 grit to help smooth out your roundirigs (see Fig. 6). Once the body, head, tail, and tree limbs are sufficiently rounded (see Fig. 7), begin cutting the remaining pieces. Start by cutting out the foot from 1 /2" pine (see Fig. 8), then cut the hand (pine), the leg (oak), the arm (oak), and the acorn (walnut, oak). Round all of these pieces. Then glue the hand to the arm, the acorn to the hand, and the foot to the leg. Let fhem dry and then place them on the body for a dry fit (see Fig. 9). This will allow you to see where the leg and arm will be placed before actually gluing them. There are no stains used on this squirrel. Rather, I used a M/nwax natural finish.When the finish was dry, I chose to apply a matte finish, but if you prefer you can use a gloss finish (see Fig. 10). Once all is dried, place the project on the 1 /4" plywood and trace the outer edge (see Fig. 11). Cut the backer board at a 30° angle (see Fig. 12). Now glue and clamp the backer board to the squirrel; you may want to insert some scrap tracing paper between the clamps and the squirrel in order to protect your finish and prevent scratching (see Fig. 13). If you prefer, you may wait until the backer board is attached to apply your finish. Place the hanger of your choice on the back, hang, and enjoy! For questions concerning this project, please send an SASE to: Darin Liles, 252 Sam Street, Shirley, AR 72153. Website: . http://www.darinswoodworks.com.tp Fig. 2. The tail is cut from Cyprus, the main body and head from oak, and the belly and cheeks from maple. tail as guides for proper fitting. |


